Nissan Pathfinder: Mirrors - Removal and Installation
- Inside Mirror
- Door Mirror
- Door Mirror Glass
- Door Mirror Rear Finisher
- Door Mirror Actuator
- Door Mirror Remote Control Switch
- Passenger Door Mirror Control Module
Inside Mirror Nissan Pathfinder 2022
Exploded View
MANUAL ANTI-DAZZLING
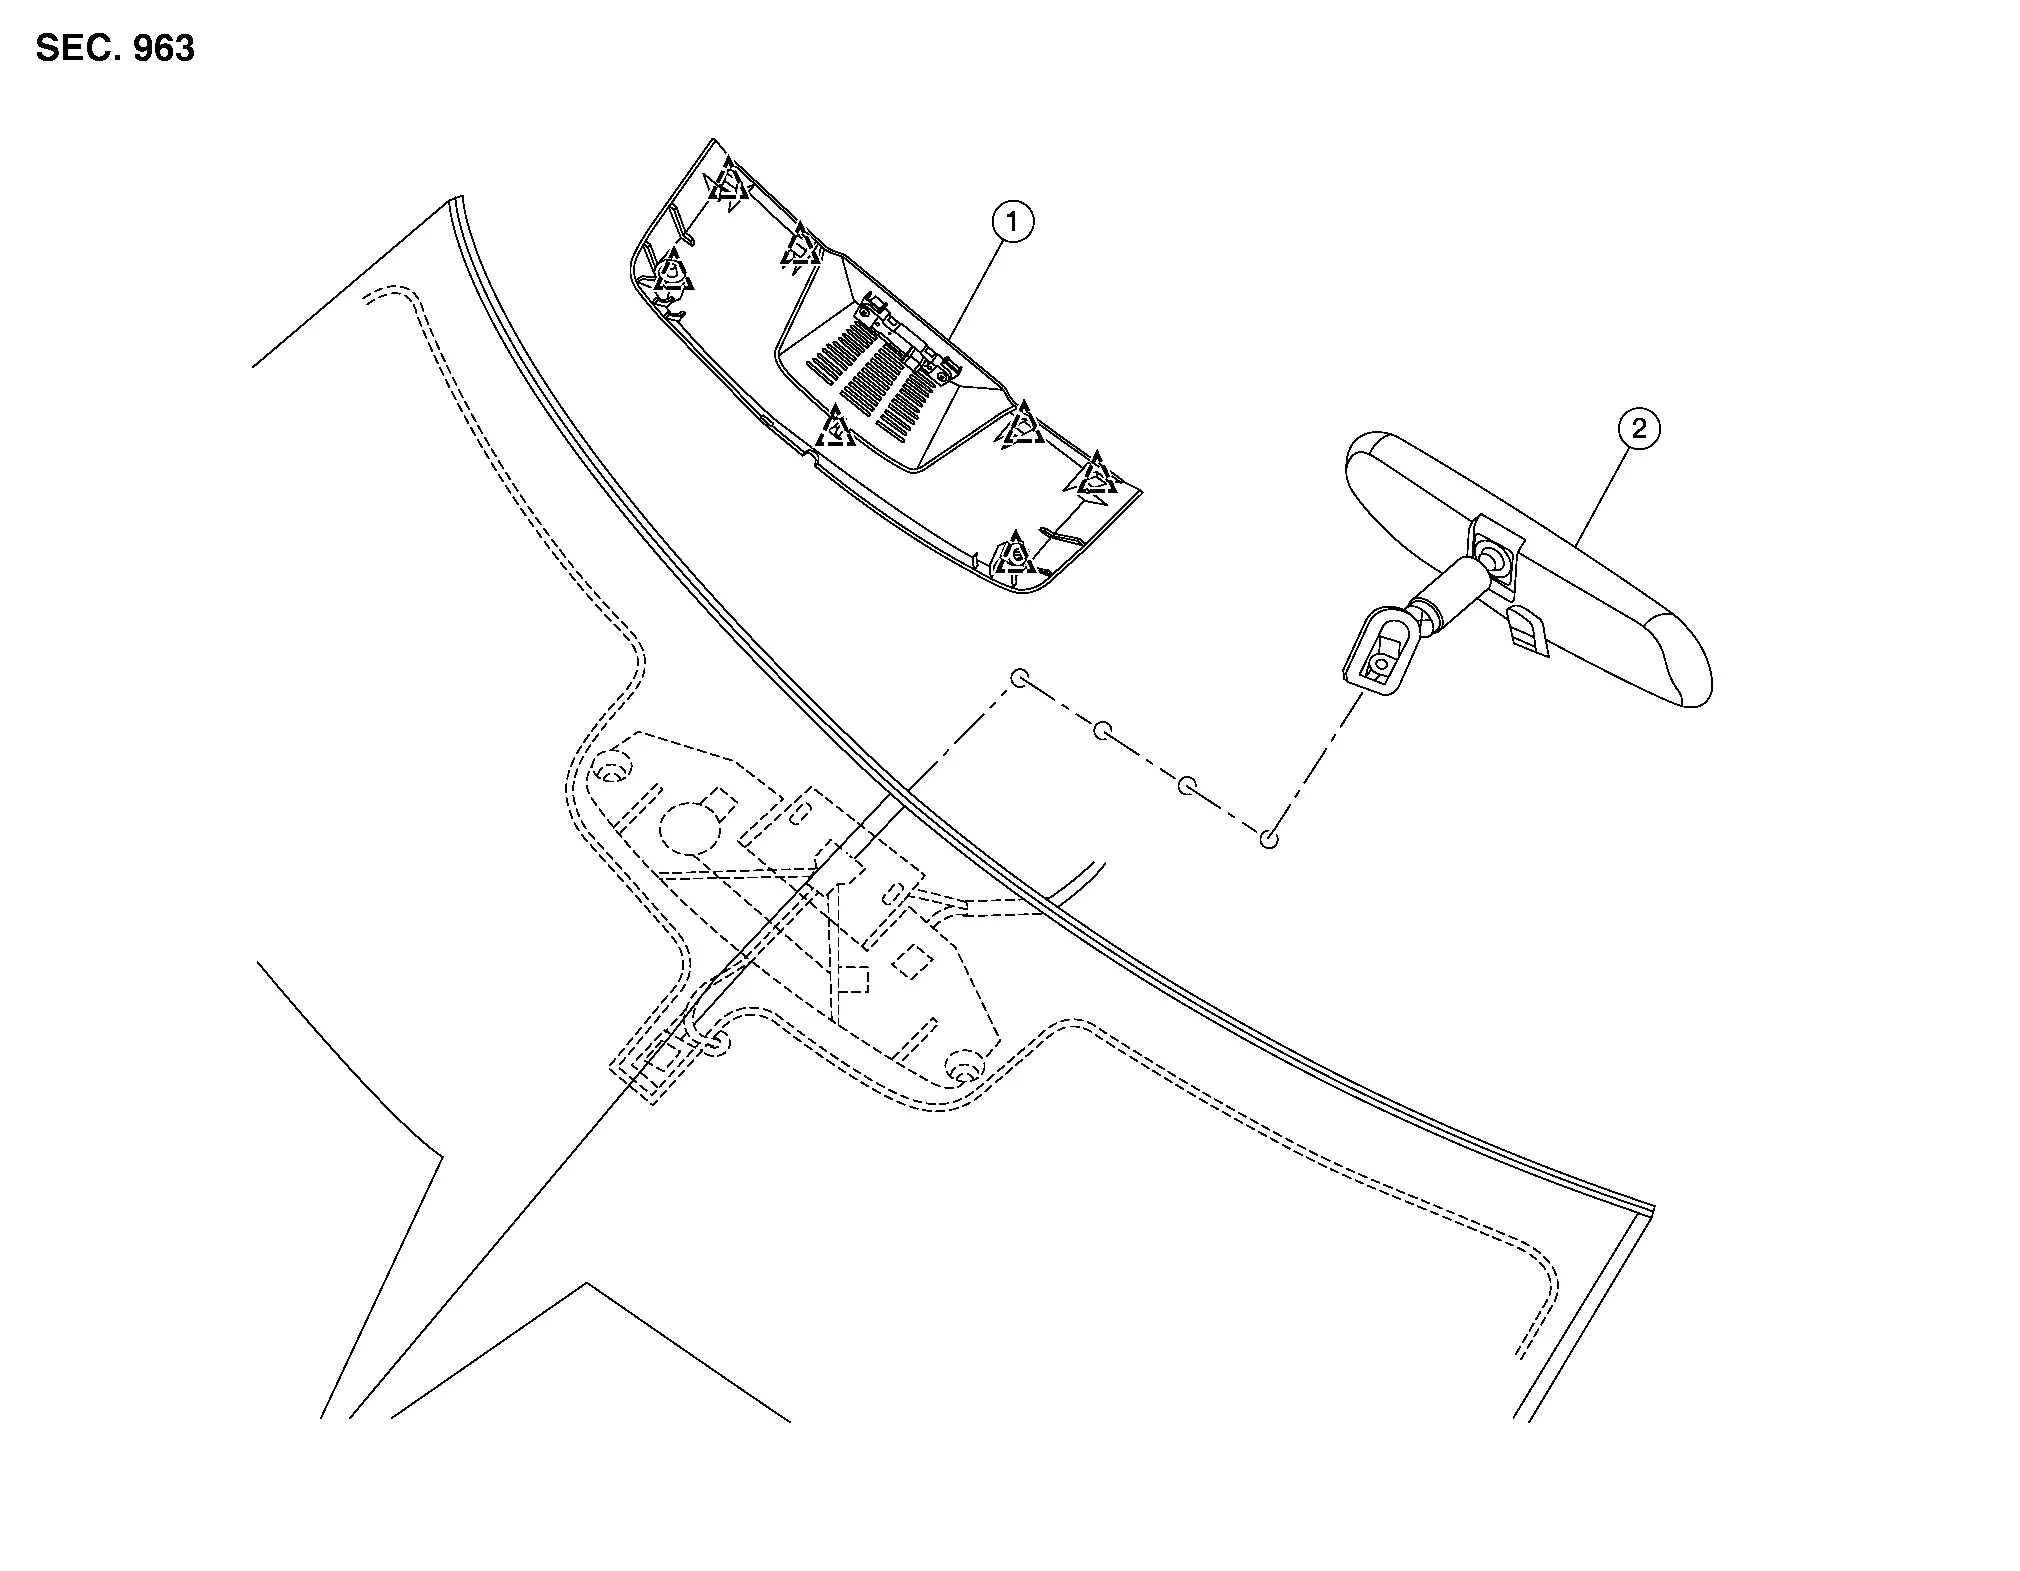
| 1. | Windshield glass finisher | 2. | Inside mirror |
 |
Clip |
AUTO ANTI-DAZZLING
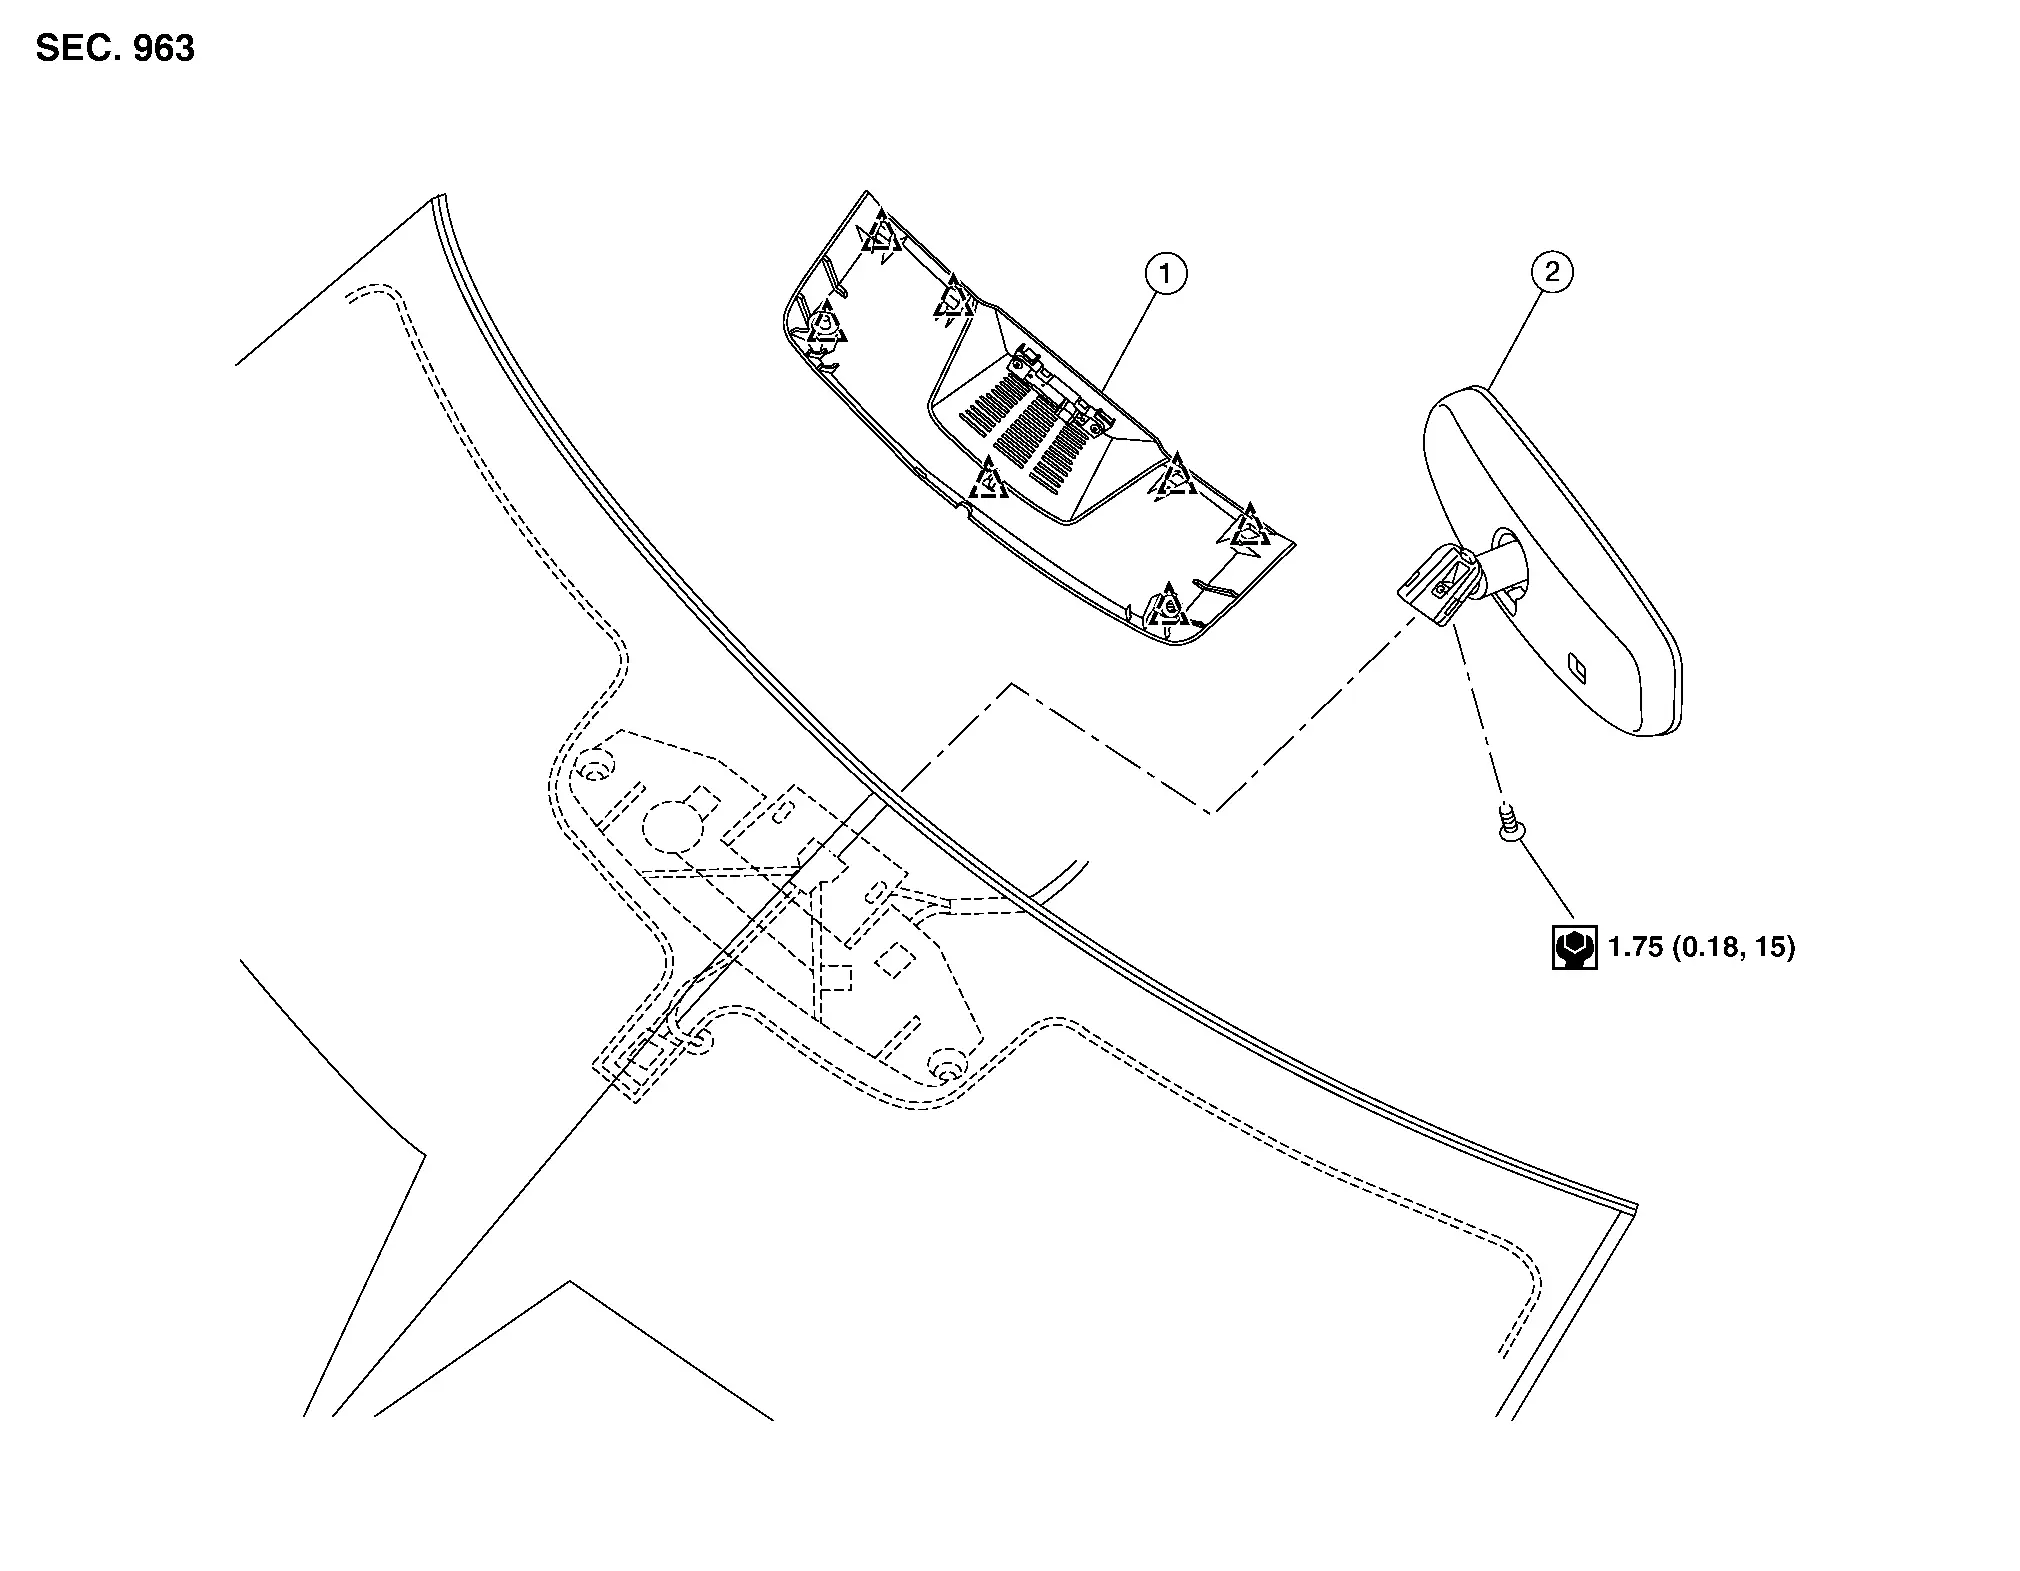
| 1. | Windshield glass finisher | 2. | Inside mirror |
 |
Clip |
SMART REARVIEW MIRROR
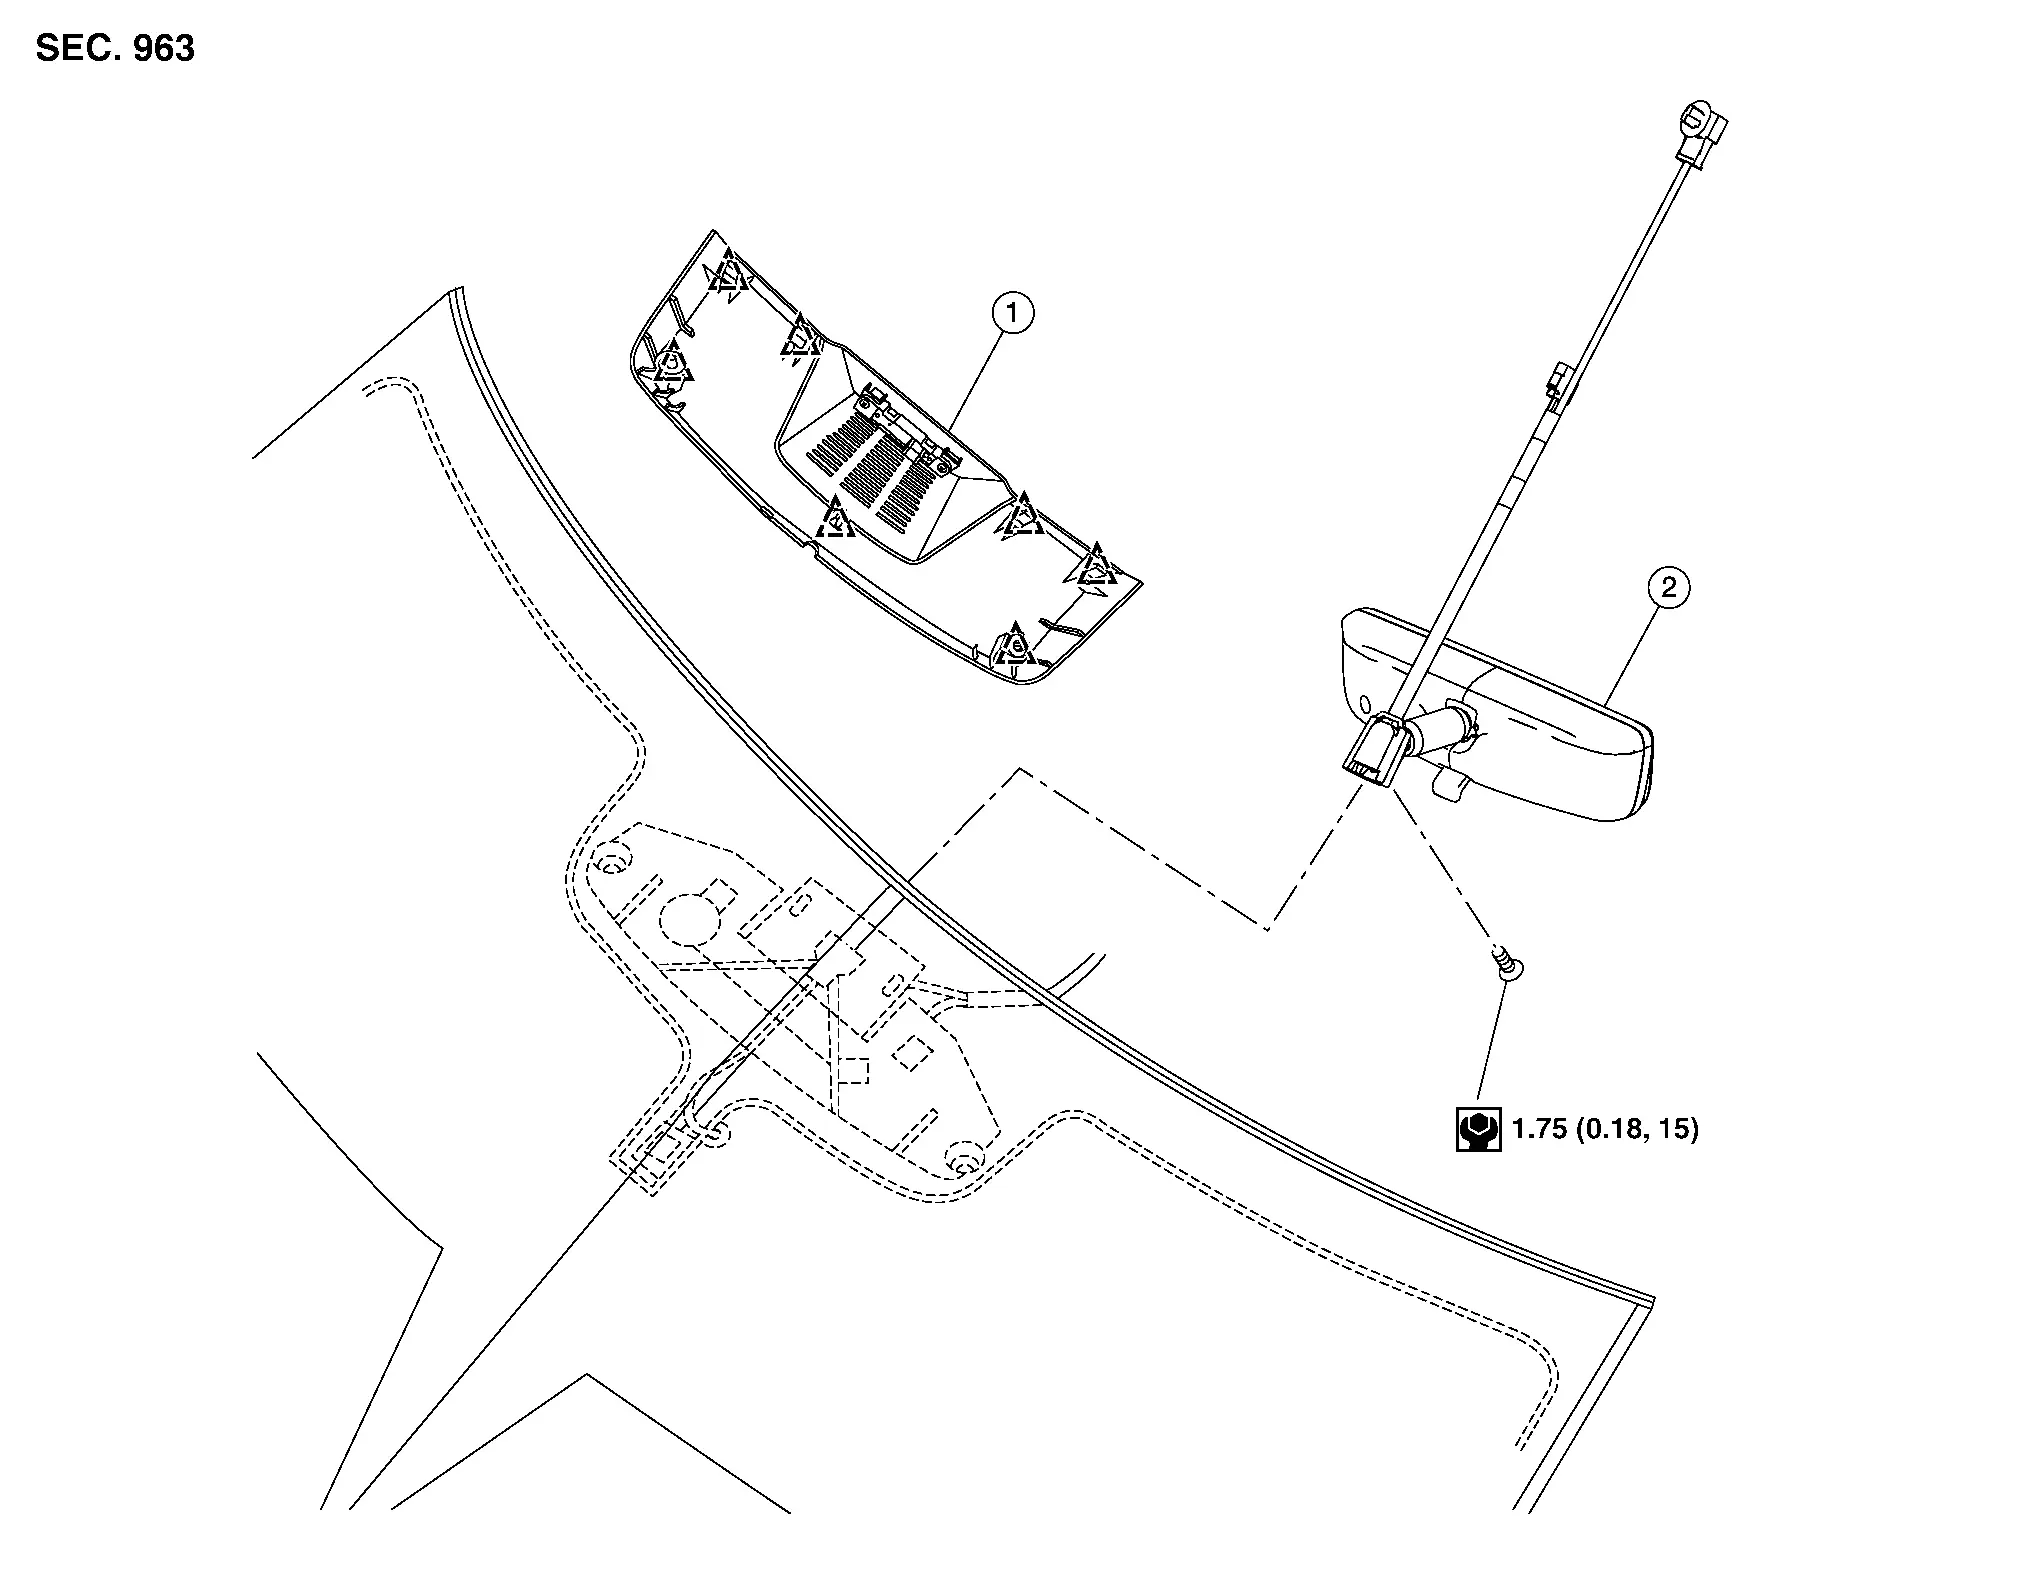
| 1. | Windshield glass finisher | 2. | Inside mirror |
 |
Clip |
Removal and Installation
MANUAL ANTI-DAZZLING
Removal
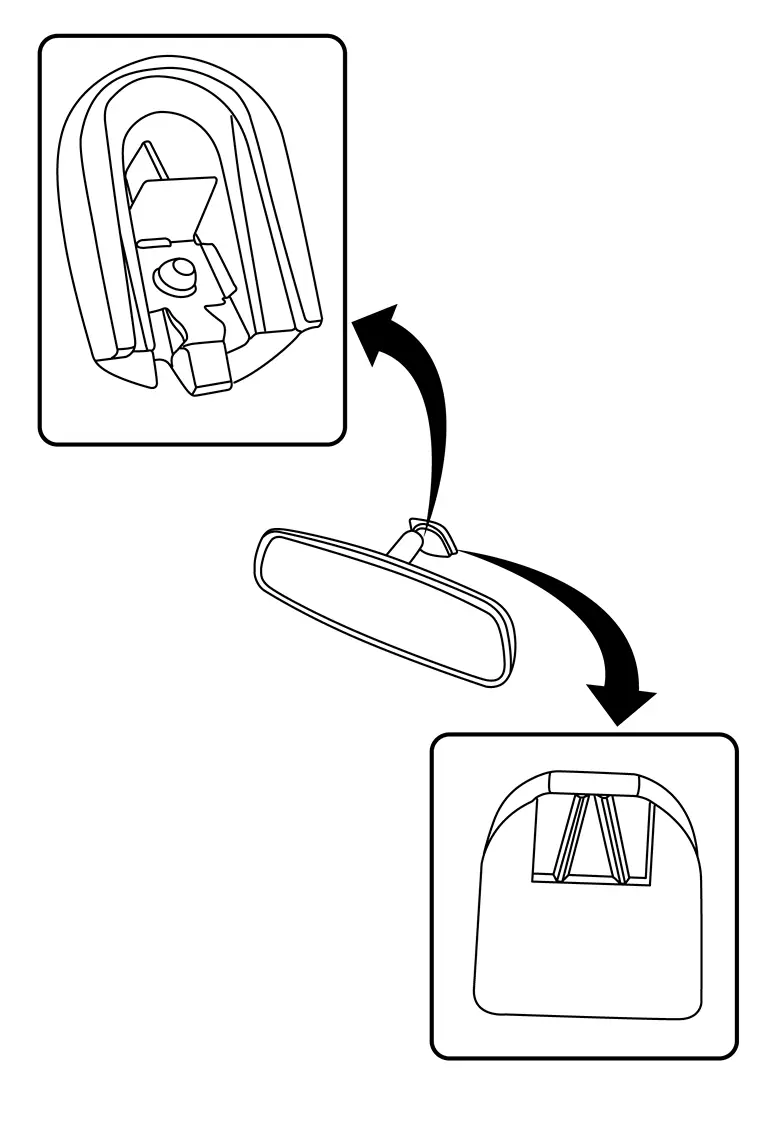
Hold inside mirror at the base and push upward while using a suitable tool to release the pawl and remove.
CAUTION:
Use care when removing inside mirror to avoid damage to mirror, mirror base or windshield glass.
Installation
Installation is in the reverse order of removal.
CAUTION:
Apply Genuine Mirror Adhesive or equivalent to bonding surface of mirror base if loose or removed. Refer to Recommended Chemical Products and Sealants.
AUTO ANTI-DAZZLING
Removal
Using a suitable tool, release clips and remove windshield glass finisher (1).
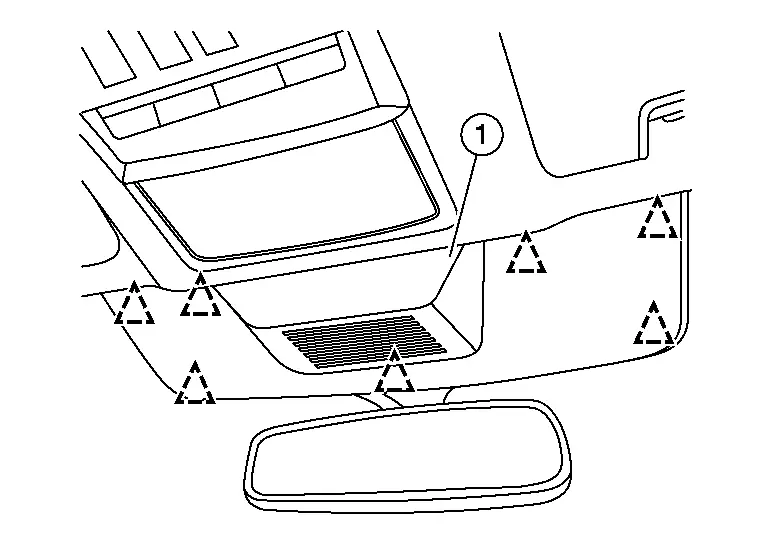
 |
: Clip |
Disconnect the harness connector from the inside mirror.
Loosen the bolt and slide the inside mirror upward to remove.
INSTALLATION
Installation is in the reverse order of removal.
SMART REARVIEW MIRROR
REMOVAL
Using a suitable tool, release clips and remove windshield glass finisher (1).

Disconnect the harness connector from the inside mirror.
Loosen the bolt and slide the inside mirror upward to remove.
INSTALLATION
Installation is in the reverse order of removal.
Door Mirror Nissan Pathfinder 2022
Exploded View
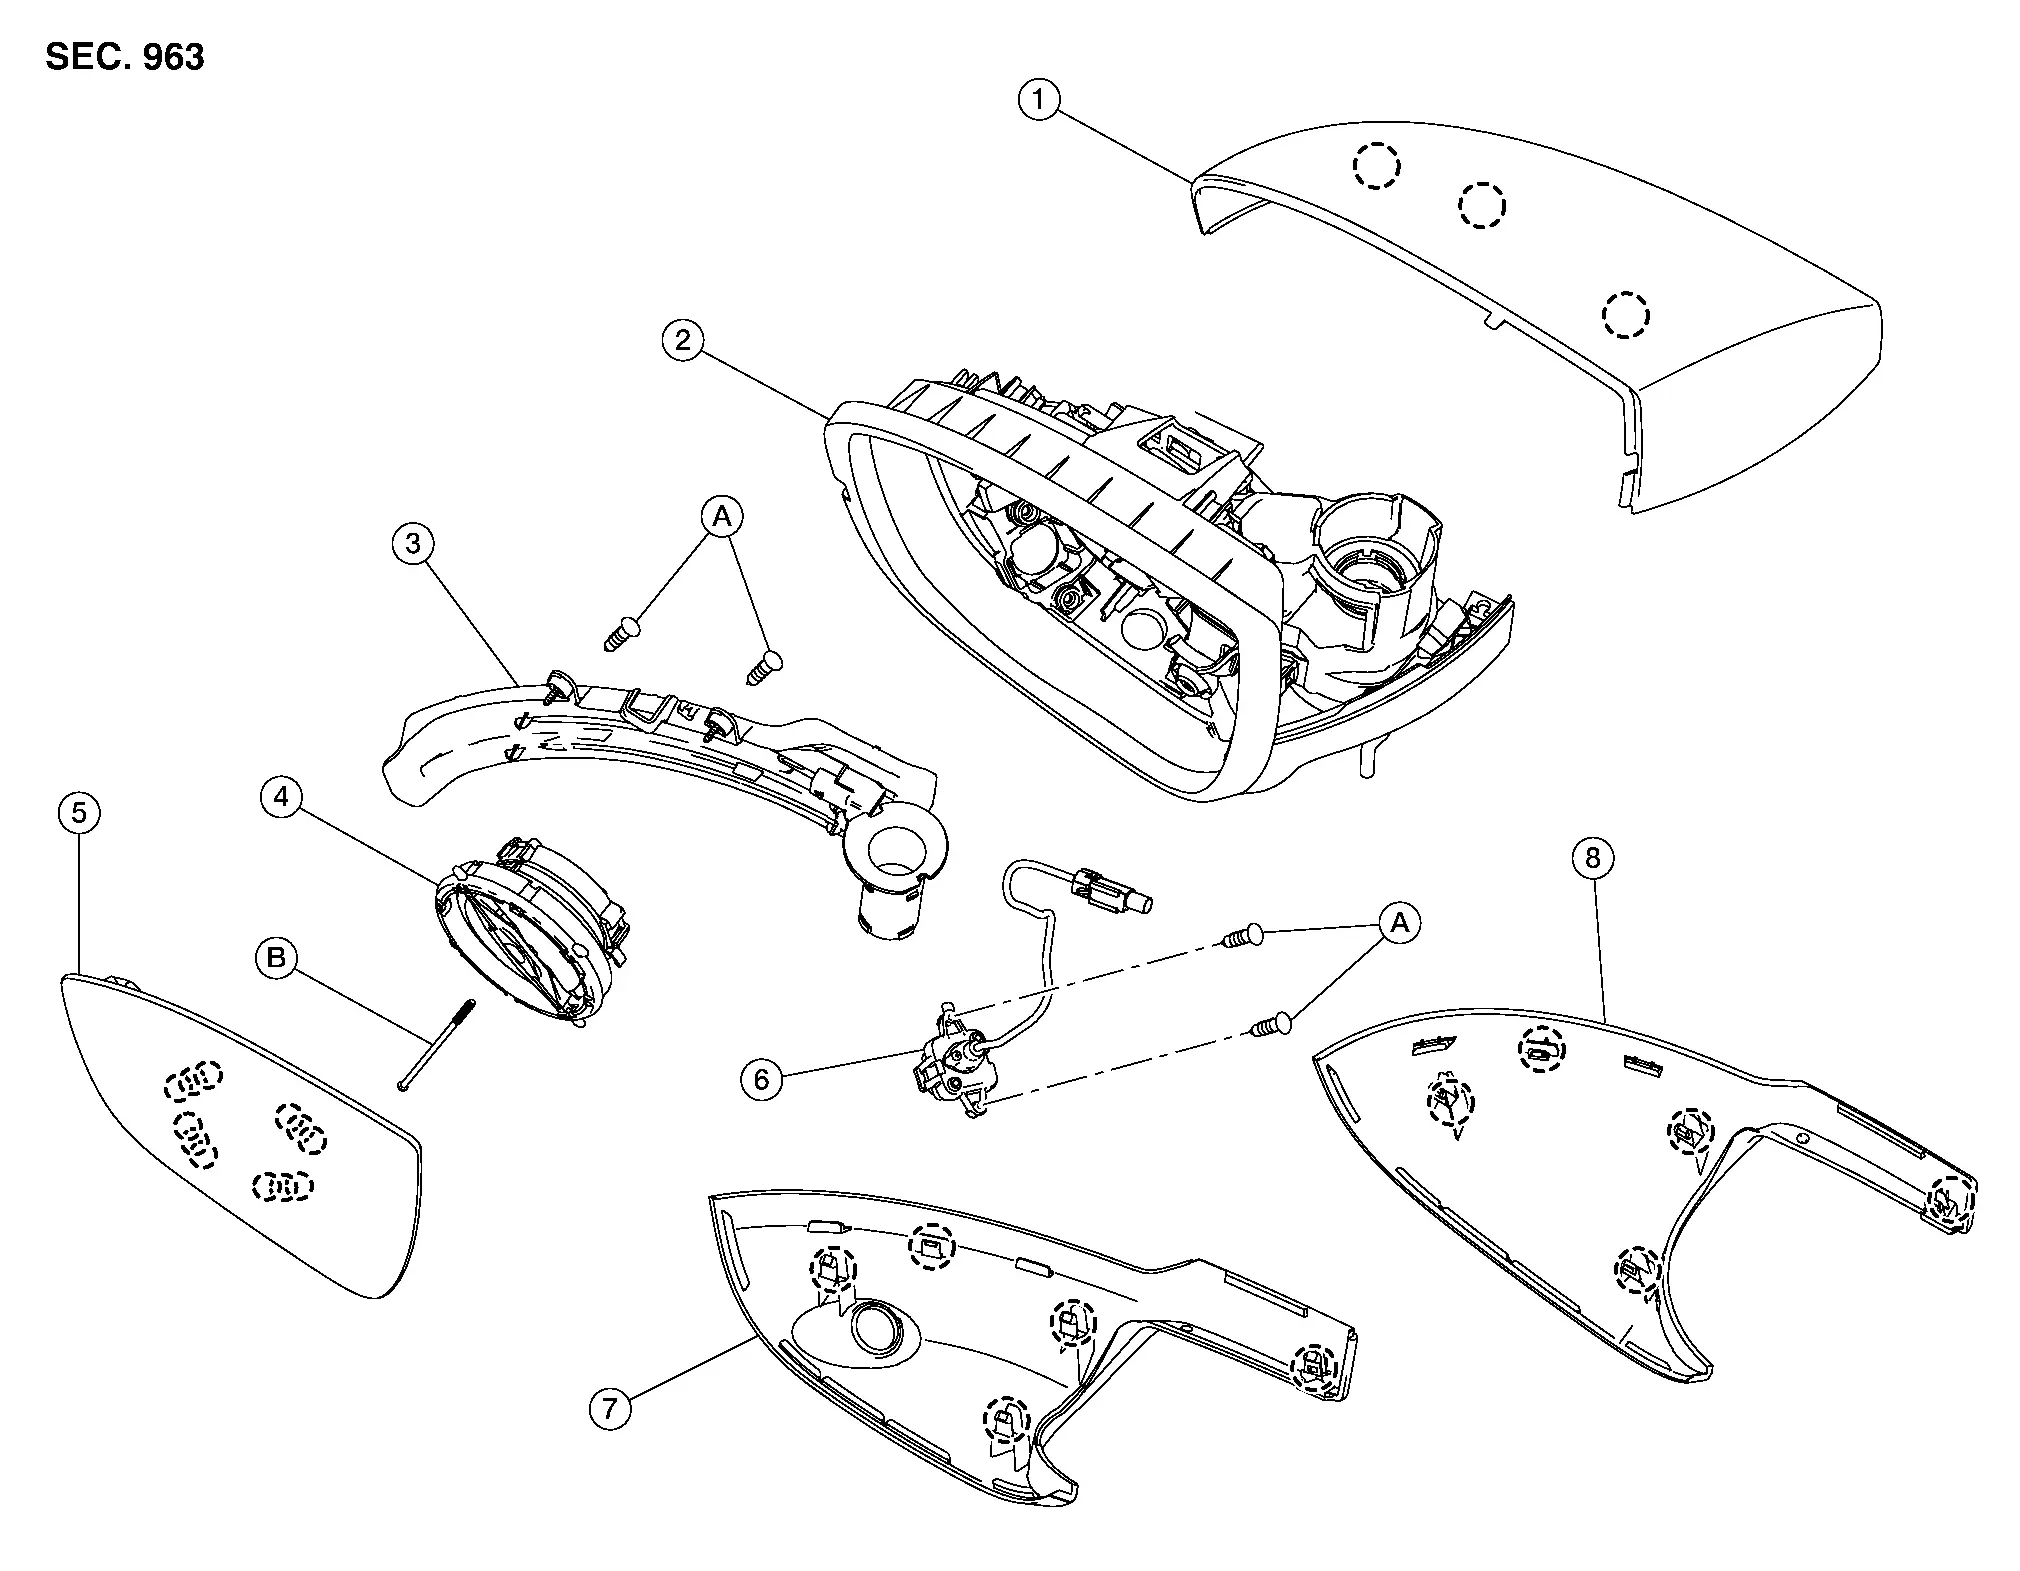
| 1. | Door mirror rear finisher | 2. | Door mirror housing | 3. | Side turn signal lamp |
| 4. | Door mirror actuator | 5. | Door mirror glass | 6. | Side camera (if equipped) |
| 7. | Door mirror finisher (with side camera) | 8. | Door mirror finisher (without side camera) | A. | Screw |
| B. | Door mirror actuator screw |
 |
Pawl |
Removal and Installation
REMOVAL
Remove front door finisher. Refer to Removal and Installation.
Remove bolts (A), then disconnect harness connectors.
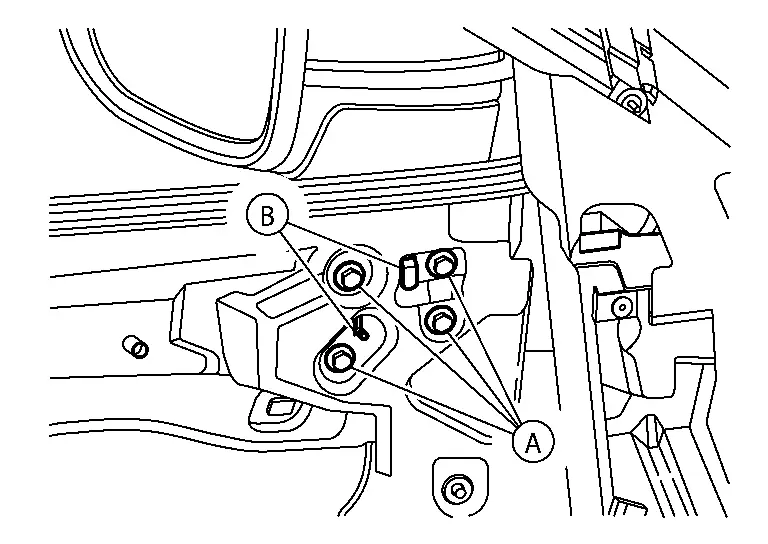
Release hooks (B) and remove door mirror.
INSTALLATION
Installation is in the reverse order of removal.
For installation, tighten door mirror nuts to specification in the sequence shown.
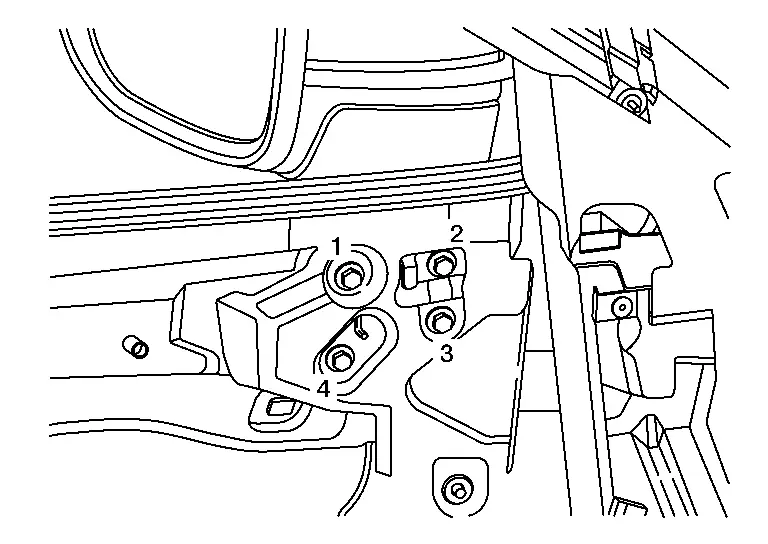
| Door mirror nuts No. 1-4 | : 8 N·m (0.82 kg-m, 71 in-lb) |
CAUTION:
Perform camera image calibration (if equipped with Intelligent Around View Monitor System). Refer to Description.
Door Mirror Glass Nissan Pathfinder
Removal and Installation
REMOVAL
Using a suitable tool, release pawls of door mirror glass (1).
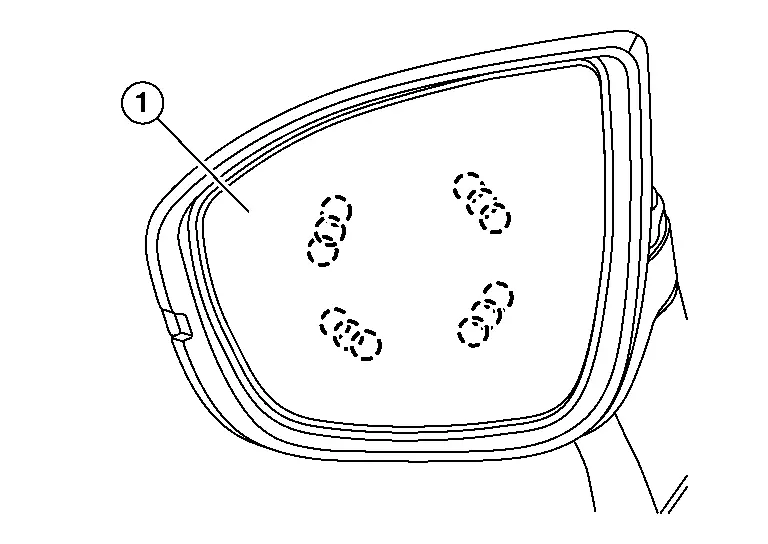
 |
: Pawl |
Disconnect harness connectors from the door mirror glass (if equipped).
Remove the door mirror glass.
INSTALLATION
Installation is in the reverse order of removal.
CAUTION:
After installation, visually inspect that pawls are securely engaged.
Door Mirror Rear Finisher Nissan Pathfinder SUV
Removal and Installation
REMOVAL
Remove the door mirror glass. Refer to Removal and Installation.
Using a suitable tool, release pawls and remove door mirror rear finisher.
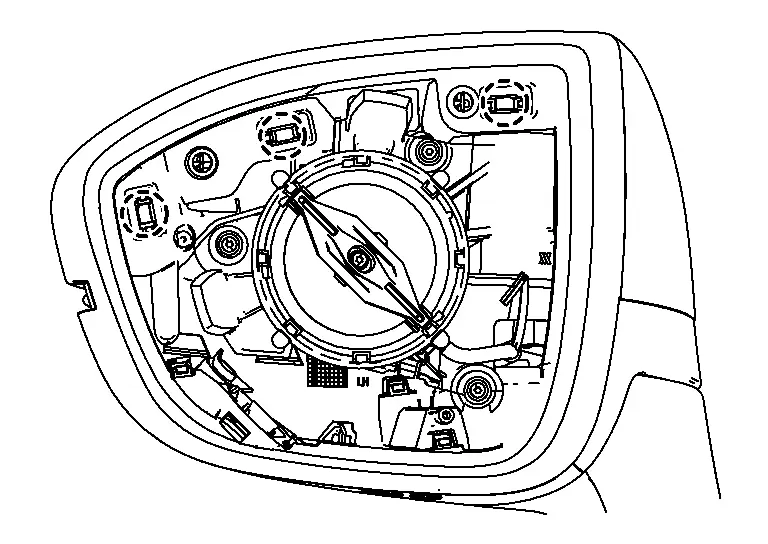
 |
: Pawl |
INSTALLATION
Installation is in the reverse order of removal.
CAUTION:
After installation, visually inspect that all pawls are securely engaged.
Door Mirror Actuator Nissan Pathfinder 5th Gen
Removal and Installation
REMOVAL
Remove the door mirror glass. Refer to Removal and Installation.
Remove the door mirror actuator screw (A).
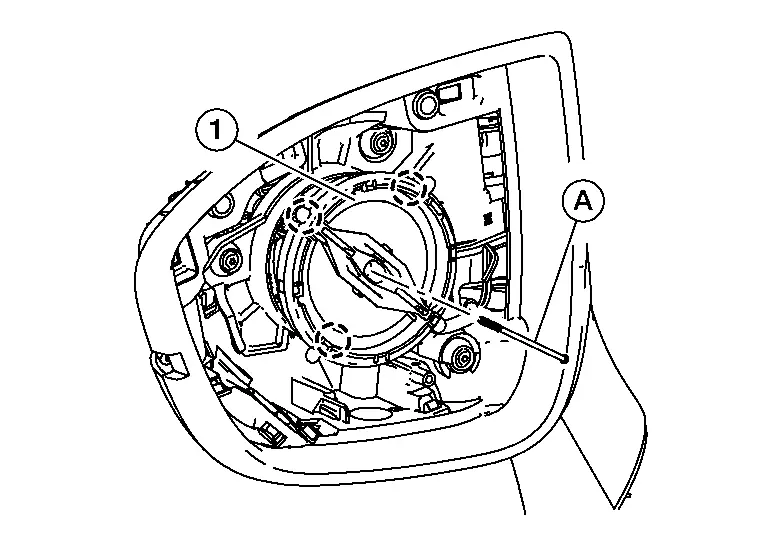
 |
: Pawl |
Using a suitable tool, release pawls and remove the door mirror actuator (1).
INSTALLATION
Installation is in the reverse order of removal.
Door Mirror Remote Control Switch Nissan Pathfinder R53
Removal and Installation
The door mirror switch is serviced with the main power window and door mirror switch. Refer to Removal and Installation.
Passenger Door Mirror Control Module Nissan Pathfinder
Removal and Installation
Remove passenger front door finisher. Refer to Removal and Installation.
Using a suitable tool, release clips (A).
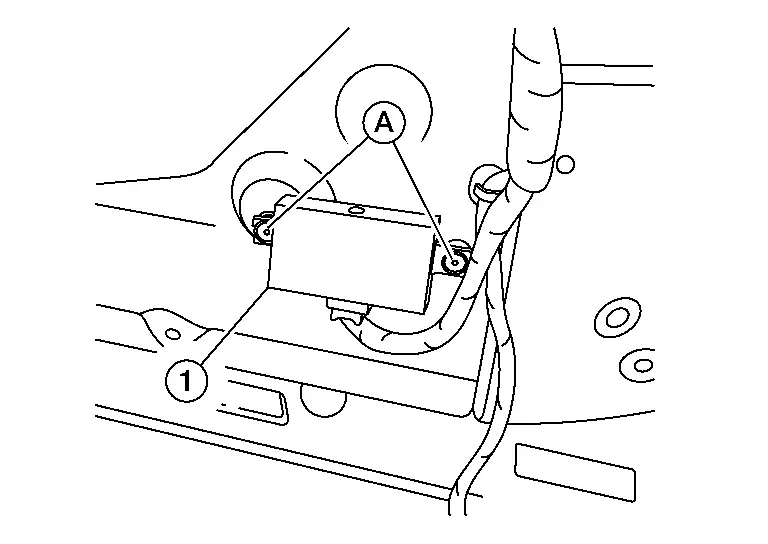
Disconnect harness connector and remove passenger door mirror control module (1).
INSTALLATION
Installation is in the reverse order of removal.

Nissan Pathfinder (R53) 2022-2026 Service Manual
Removal and Installation
- Inside Mirror
- Door Mirror
- Door Mirror Glass
- Door Mirror Rear Finisher
- Door Mirror Actuator
- Door Mirror Remote Control Switch
- Passenger Door Mirror Control Module
Contact Us
Nissan Pathfinder Info Center
Email: info@nipathfinder.com
Phone: +1 (800) 123-4567
Address: 123 Pathfinder Blvd, Nashville, TN 37214, USA
Working Hours: Mon–Fri, 9:00 AM – 5:00 PM (EST)
