Nissan Pathfinder: Front Suspension - Front Coil Spring and Strut
Exploded View
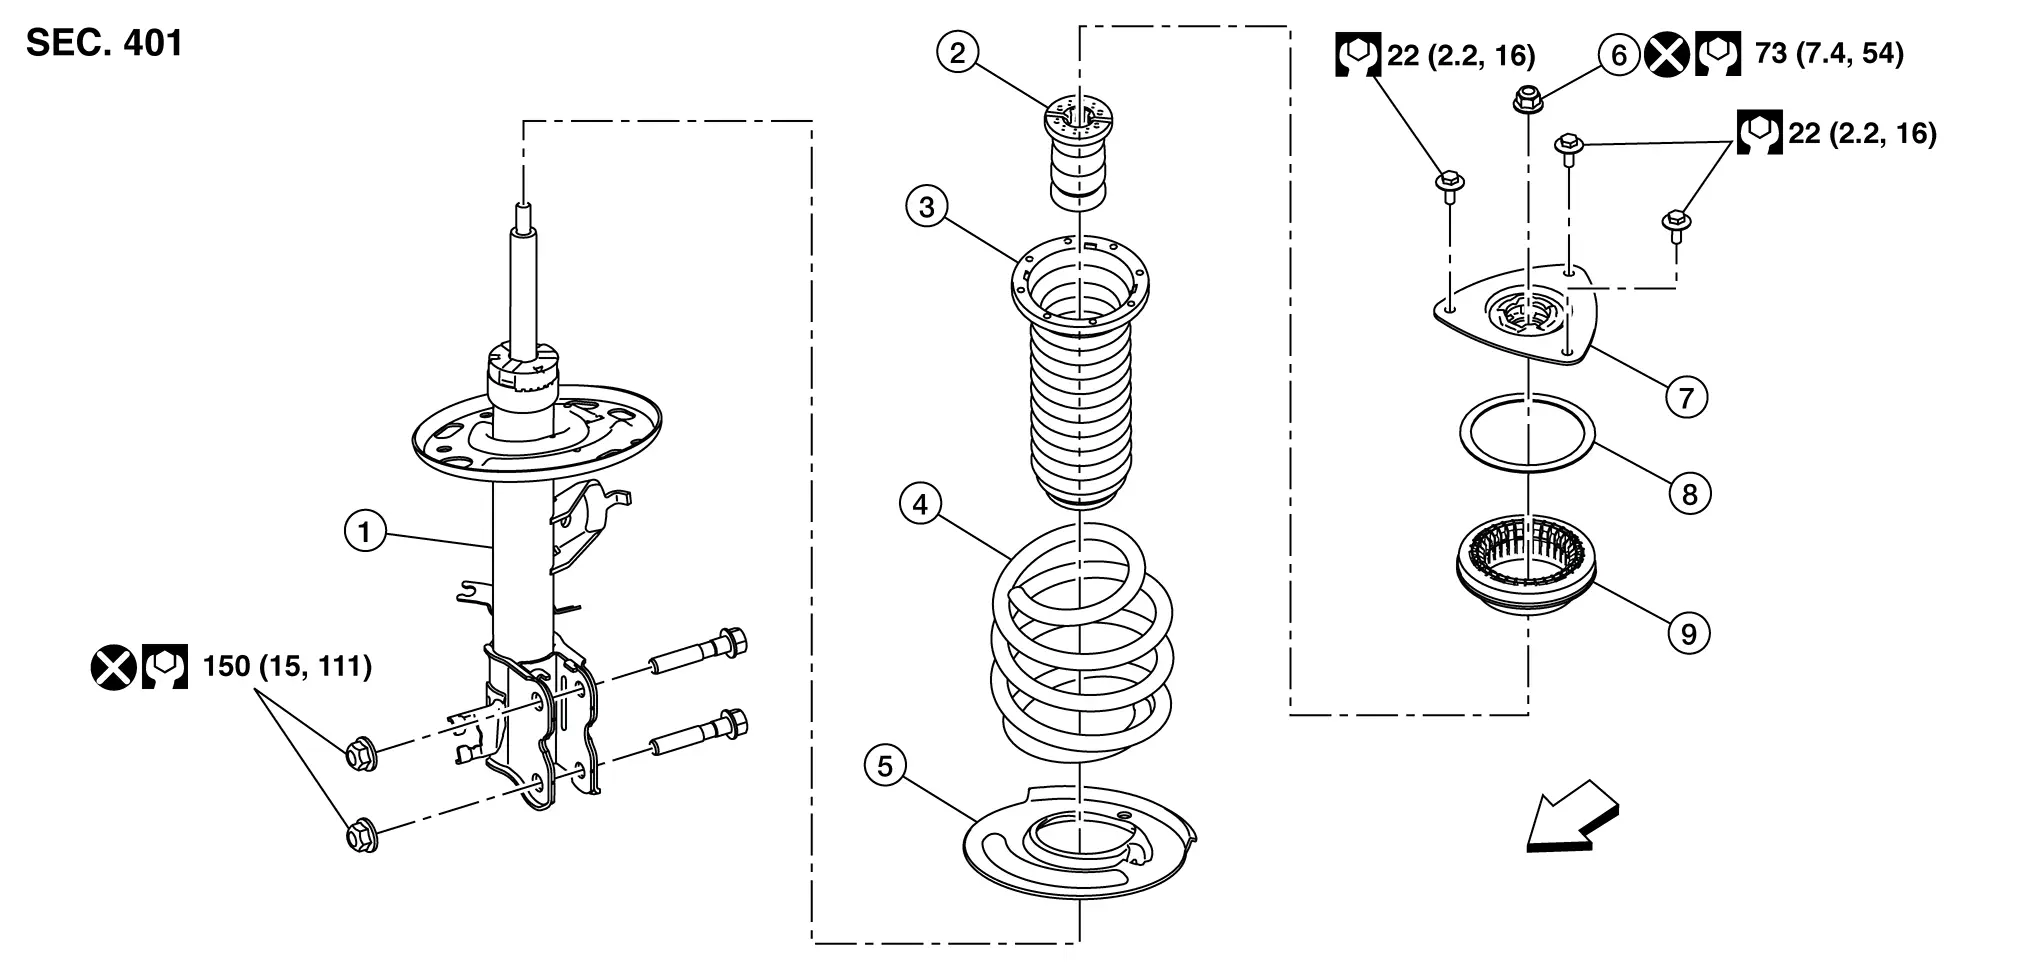
| 1. | Strut | 2. | Bound bumper | 3. | Upper rubber seat |
| 4. | Spring | 5. | Lower rubber seat | 6. | Piston rod lock nut |
| 7. | Strut mount insulator | 8. | Seal | 9. | Strut mount bearing |
 |
Front |
Disassembly and Assembly
DISASSEMBLY
CAUTION:
Do not damage the piston rod when removing components from the front coil spring and strut.
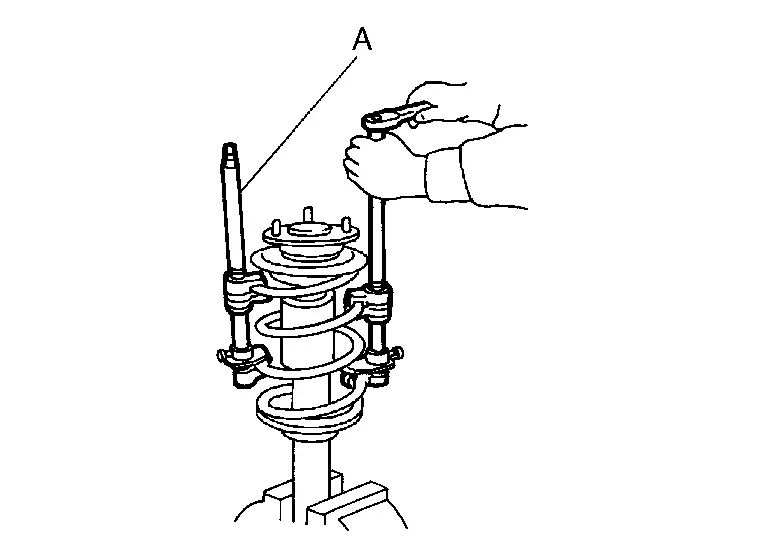
Install Tool (A) to the front coil spring and strut.

CAUTION:
When installing Tool (A), wrap a shop cloth around the front coil spring and strut to protect the parts from damage.
| Tool number | : ST35652000 ( – ) |
Secure Tool (A) in a vise.
Install a suitable tool to strut rod.
Slightly loosen the piston rod lock nut.
WARNING:
Do not remove the piston rod lock nut completely. If it is removed completely, the coil spring can jump out and may cause serious damage or injury.
Compress the coil spring using a suitable tool (A).
WARNING:
Make sure that the pawls of the suitable tool are firmly hooked on the coil spring. The suitable tool must be tightened alternately so as to not tilt the coil spring.
Make sure the coil spring is free between the strut mount insulator and the lower rubber seat.
Hold the piston rod and remove the piston rod lock nut.
CAUTION:
Do not reuse nut.
Remove the strut mount insulator, the strut mount bearing, and the bound bumper from the strut.
Gradually release the suitable tool and remove the upper rubber seat and coil spring.
CAUTION:
Release the suitable tool while making sure the position of the suitable tool on the coil spring does not move.
Remove the lower rubber seat.
Inspect the components. Refer to Inspection.
ASSEMBLY
CAUTION:
Do not damage the piston rod when installing components to the front coil spring and strut.
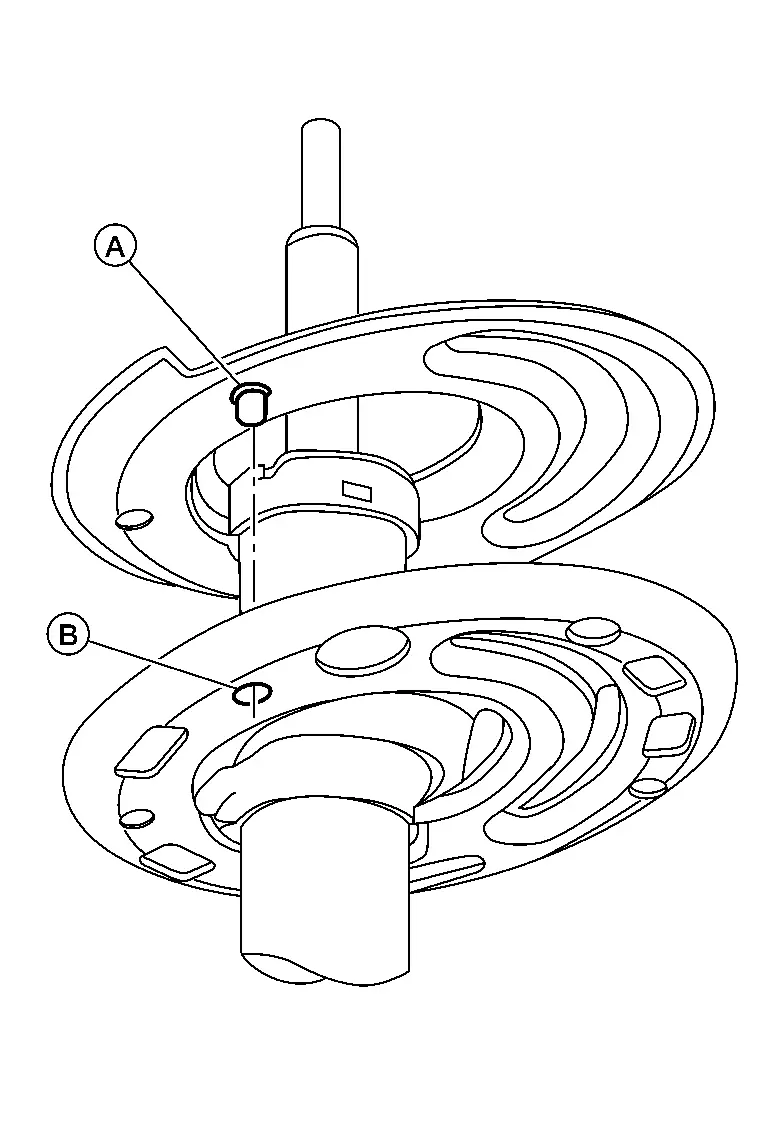
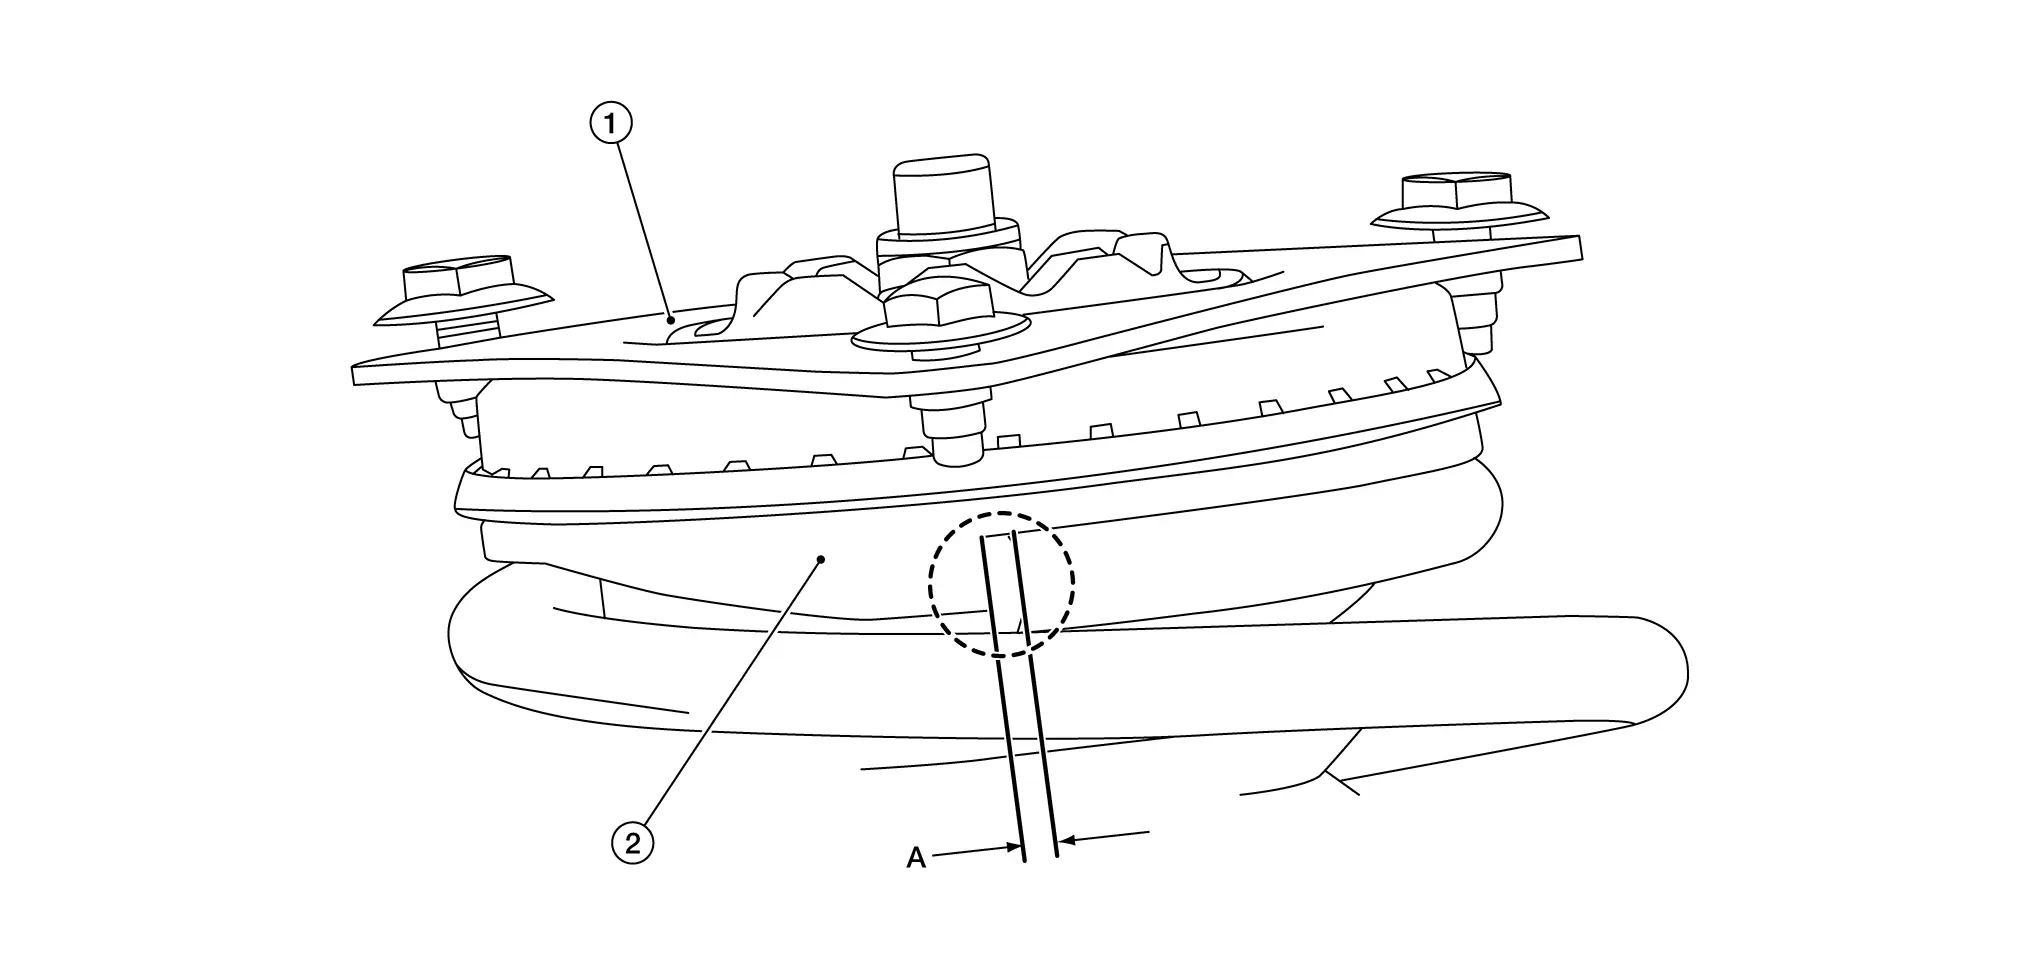
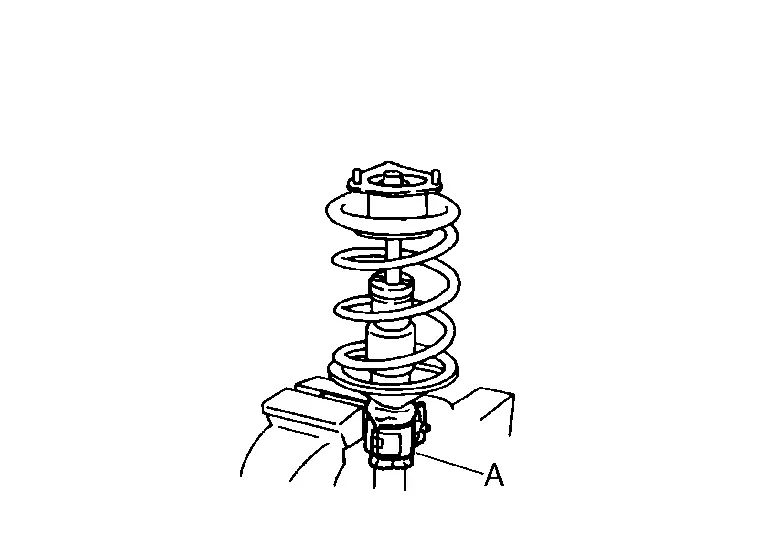
Install the lower rubber seat to the strut. Make sure that the pin (A) on the lower rubber seat is positioned into the hole (B) on the strut.
Compress the coil spring using a suitable tool.
WARNING:
Make sure that the pawls of the suitable tool are firmly hooked on the coil spring. The suitable tool must be tightened alternately so as to not tilt the coil spring.
Install the upper rubber seat.
Align the lower end of the lower coil spring support (1) with the bottom end of coil spring (2) and the lower rubber seat (3) as shown.
 NOTE:
NOTE:
No gap is preferred, if the gap (A) is greater than 5 mm (0.20 in) rotate the coil spring into the lower rubber seat to close the gap.
| Maximum Gap (A) | : 0 - 5 mm (0.0 - 0.20 in) |
Install the bound bumper to the strut.
CAUTION:
When installing the bound bumper, use soapy water. Do not use machine oil or other lubricants.
Install upper rubber seat (1) to the front coil spring. Align the upper end of the coil spring with the upper rubber seat (2) as shown.
 NOTE:
NOTE:
No gap is preferred, if the gap (A) is greater than 5 mm (0.20 in) rotate the coil spring into the upper rubber seat to close the gap.
| Maximum Gap (A) | : 0 - 5 mm (0.0 - 0.20 in) |
The side edge of the upper coil spring (2) , located 90° counter clockwise from the gap, needs to be as little as possible but it must be no more than 3.5 mm (0.14 in) from the edge of the upper rubber seat (1) as shown.
 NOTE:
NOTE:
No gap is preferred, if the gap (B) is greater than 3.5 mm (0.14 in) rotate the coil spring into the spring seat to close the gap.
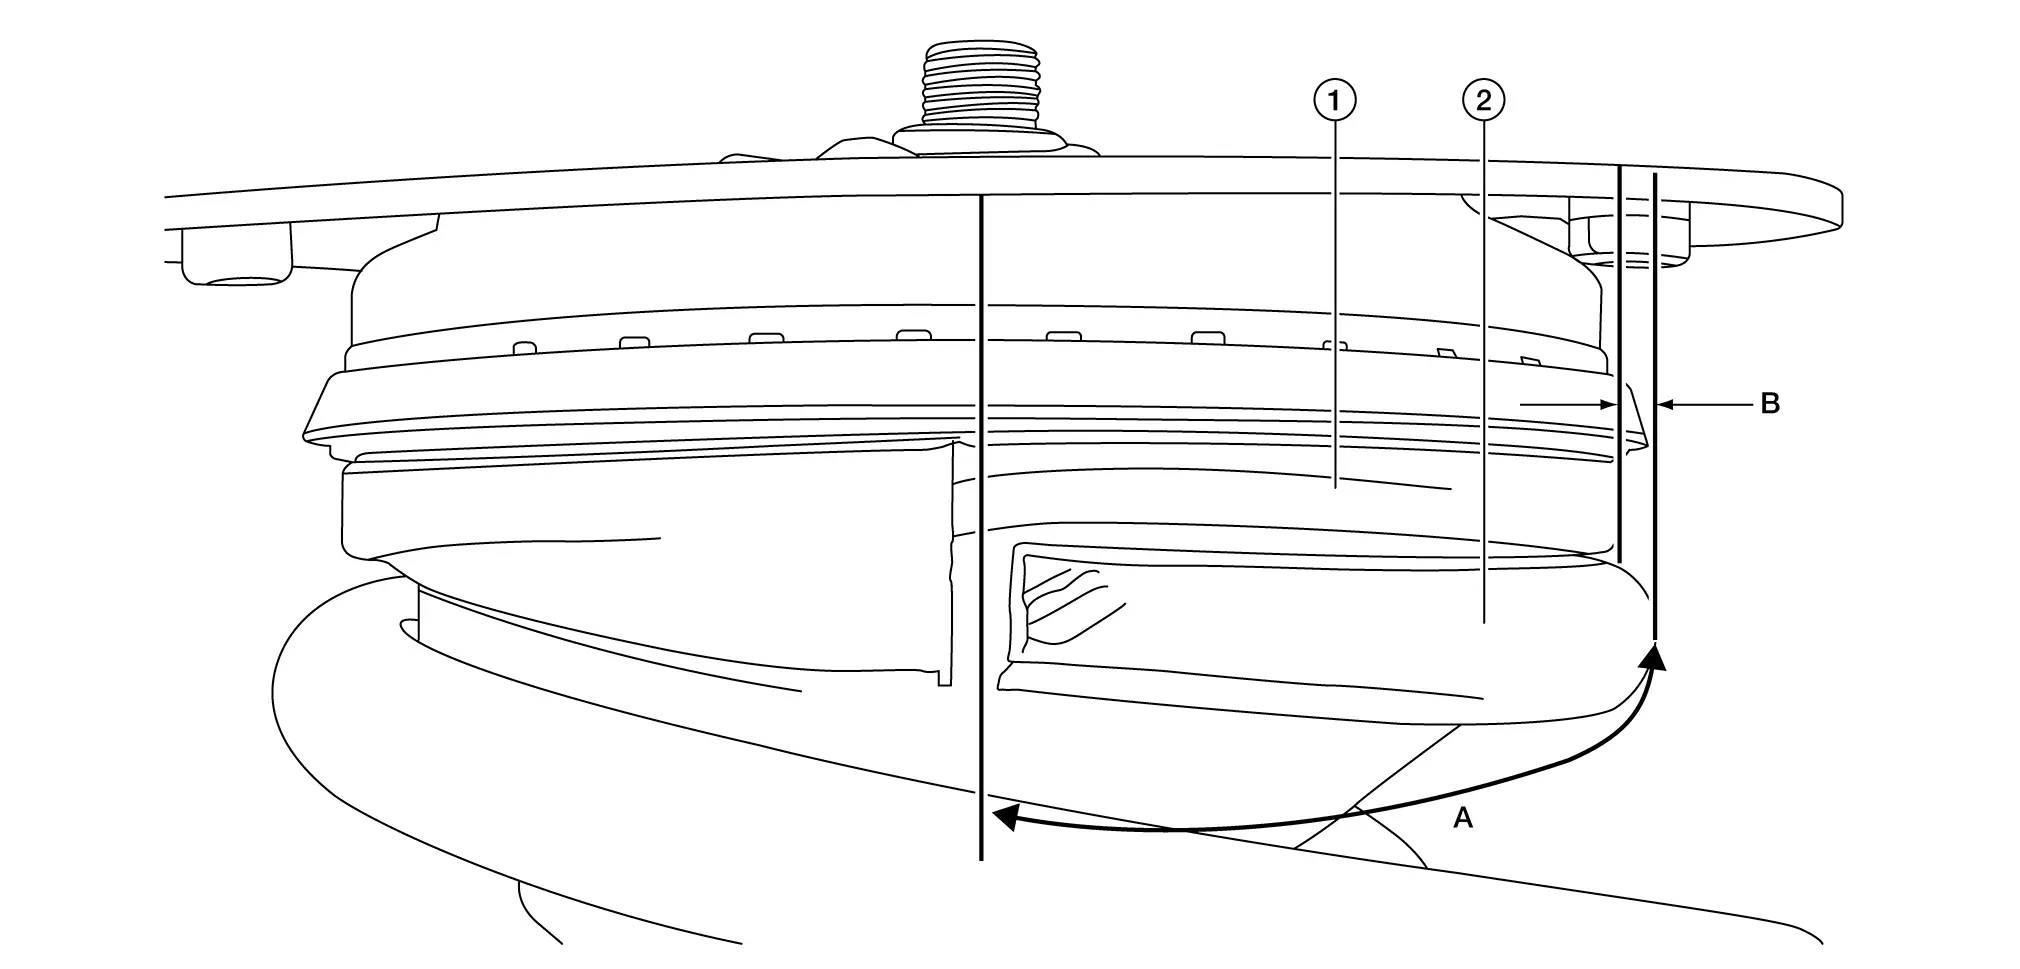
| (A) | Located 90° counter clockwise from the gap |
| Maximum Gap (B) | : 0 - 3.5 mm (0.0 - 0.14 in) |
Install the strut mount bearing and the strut mount insulator.
CAUTION:
Do not apply oil, such as grease, when installing the strut mount bearing.
Temporarily install the piston rod lock nut.
CAUTION:
Do not reuse the piston rod lock nut.
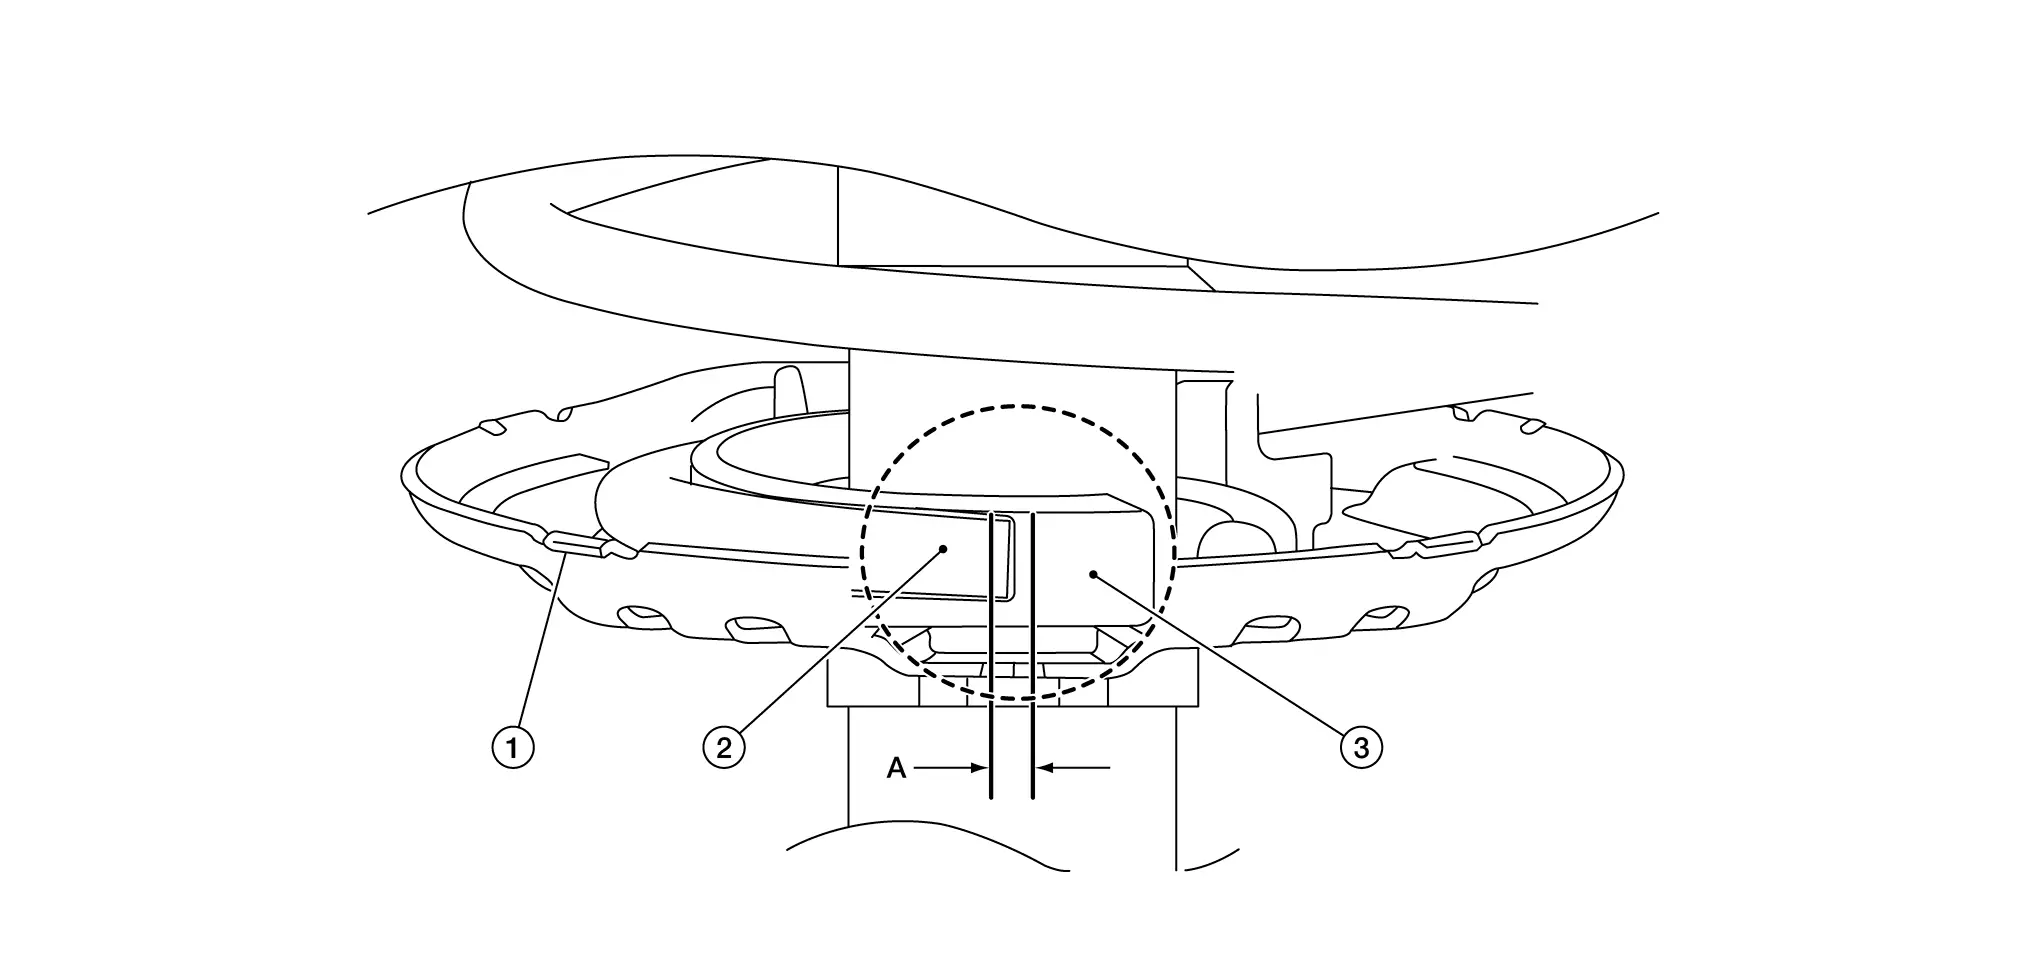
Be sure that the strut mount insulator is positioned as shown.
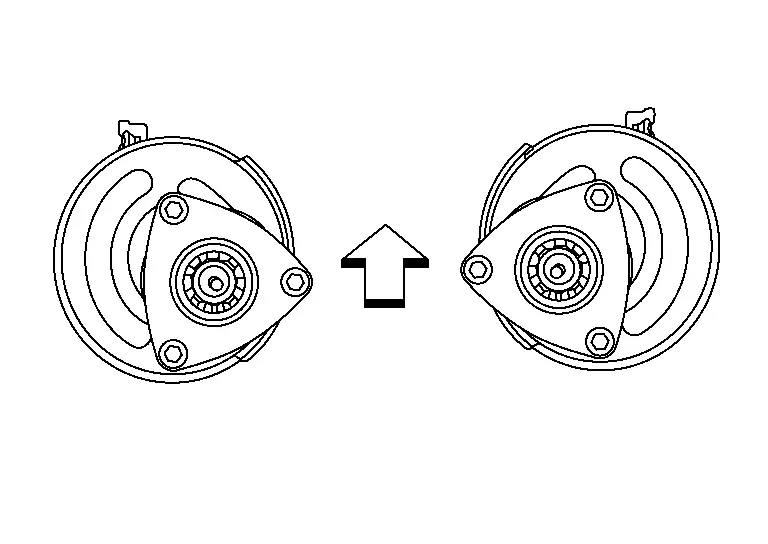
 |
: Front |
Gradually release the suitable tool (A) and remove the suitable tool from the coil spring.

CAUTION:
Release the suitable tool while making sure the position of the suitable tool on the coil spring does not move.
Tighten the piston rod lock nut to the specified torque. Refer to Exploded View.
Remove Tool (A) from the vise.
Remove Tool (A) from the front coil spring and strut.
After replacing the strut, always follow the disposal procedure to discard the old strut. Refer to Disposal.
Inspection
Inspection After Disassembly
Strut
Inspect the strut. Refer to Inspection.
Insulator and Rubber Parts
Check strut mount insulator for cracks, rubber parts for wear and replace if necessary.
Coil Spring
Check for cracks, wear, and damage and replace if necessary.

Nissan Pathfinder (R53) 2022-2026 Service Manual
Contact Us
Nissan Pathfinder Info Center
Email: info@nipathfinder.com
Phone: +1 (800) 123-4567
Address: 123 Pathfinder Blvd, Nashville, TN 37214, USA
Working Hours: Mon–Fri, 9:00 AM – 5:00 PM (EST)
