Nissan Pathfinder: Sonar System - Removal and Installation
Sonar Control Unit Nissan Pathfinder 5th Gen
Removal and Installation
CAUTION:
When replacing the sonar control unit, perform "ADDITIONAL SERVICE WHEN REPLACING SONAR CONTROL UNIT". Refer to Description.
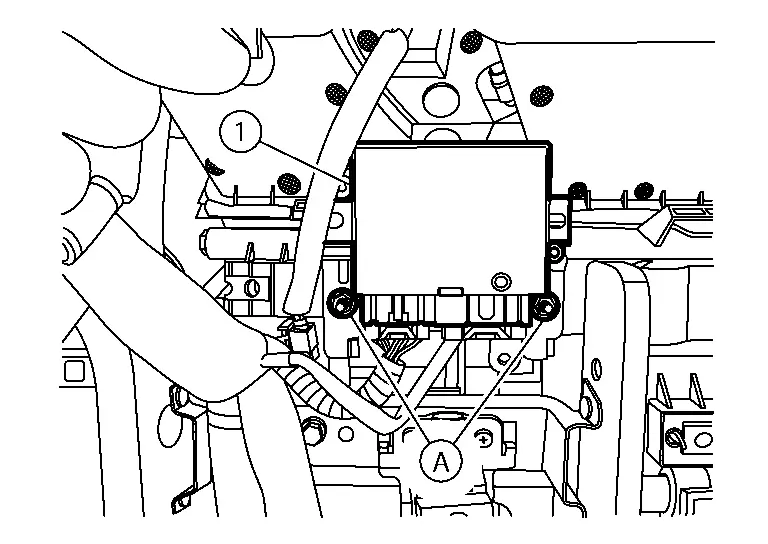
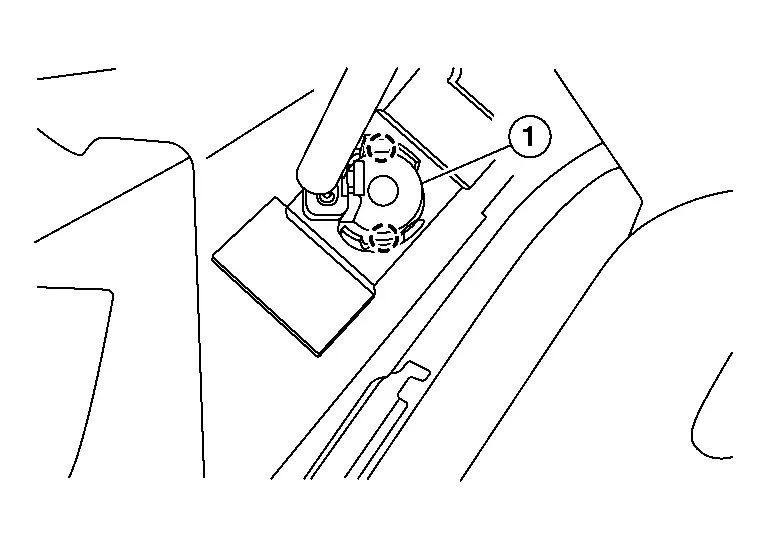
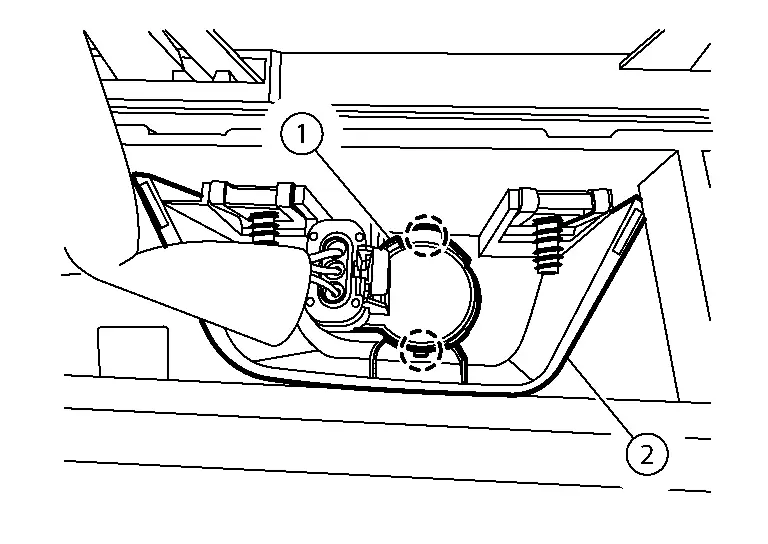
REMOVAL
Remove the instrument panel assembly. Refer to Removal and Installation.
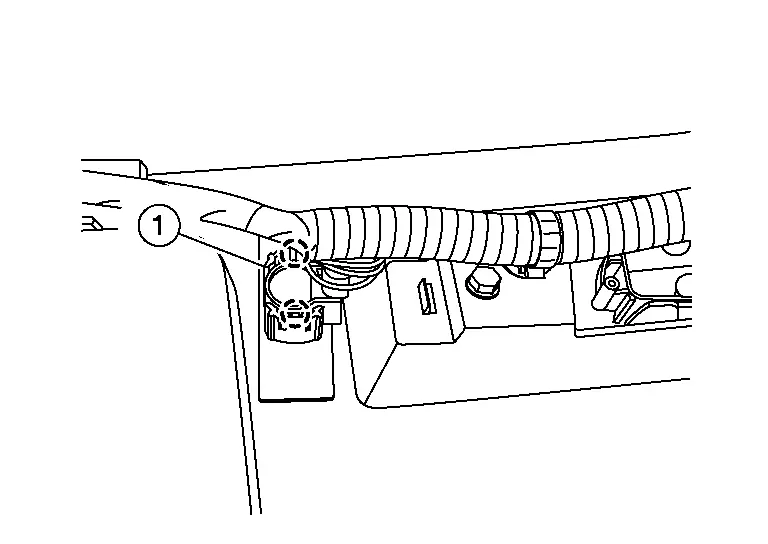
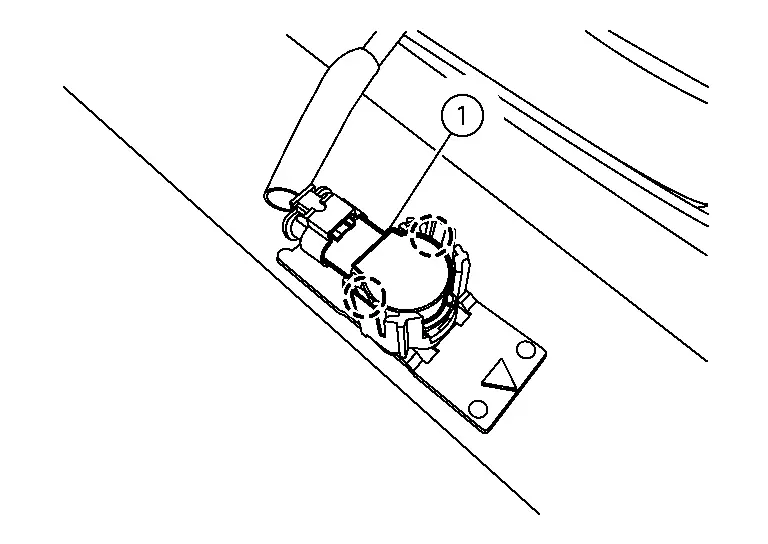
Disconnect the harness connector from the sonar control unit.
Remove nuts (A) and the sonar control unit (1).
INSTALLATION
Installation is in the reverse order of removal.
CAUTION:
When replacing the sonar control unit, perform "ADDITIONAL SERVICE WHEN REPLACING SONAR CONTROL UNIT". Refer to Description.
Sonar Sensor Nissan Pathfinder SUV
Removal and Installation
REAR SONAR SENSOR INNER
REMOVAL
Remove rear bumper fascia. Refer to Removal and Installation.
Disconnect the harness connector from the rear sonar sensor inner.
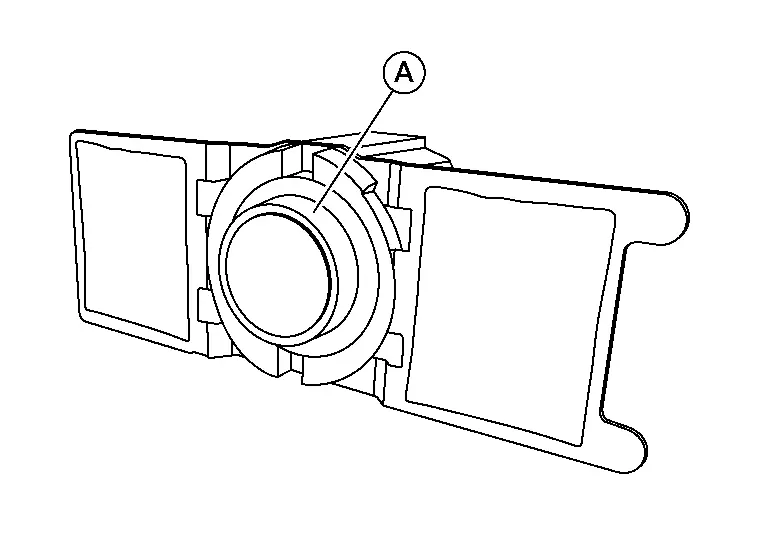
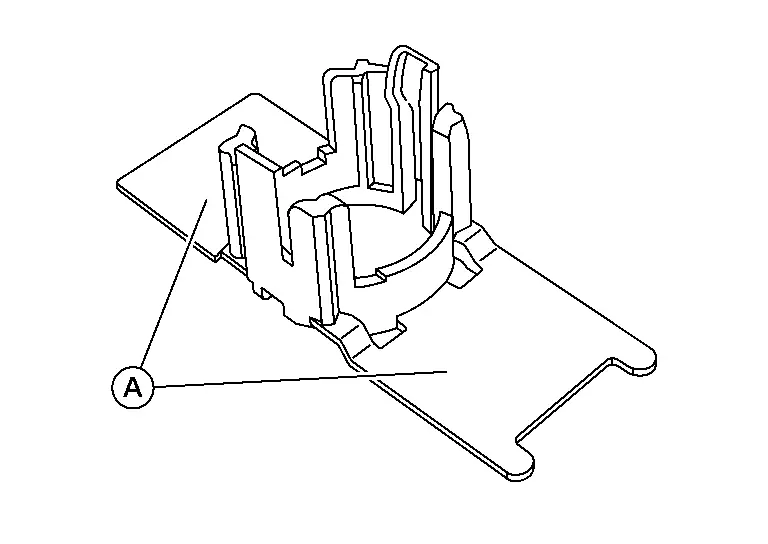
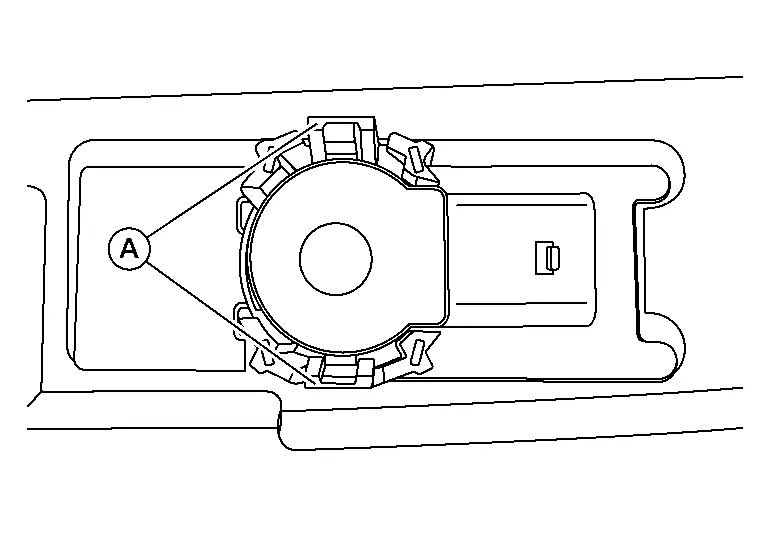
Using a suitable tool, release pawls from the rear sonar sensor inner (1) and remove.
 |
: Pawl |
Remove the rear sonar sensor inner finisher from the bumper fascia (if necessary).
INSTALLATION
CAUTION:
Verify that the connector direction is within the specification shown when assembling the bumper fascia.

| (A) | : Horizontal position |
| (a) | : ±10° |
Install sonar sensor to sensor finisher.
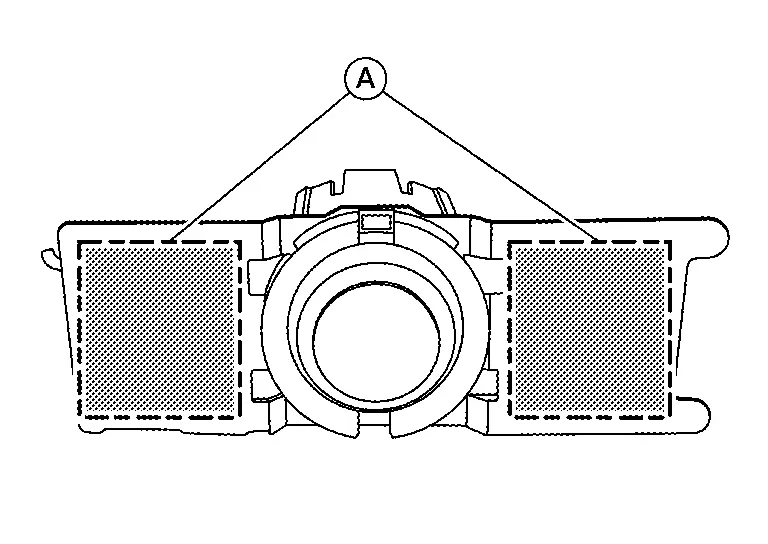
Degrease and clean the inner side of the rear bumper fascia and apply adhesion promoter to the area shown (A).
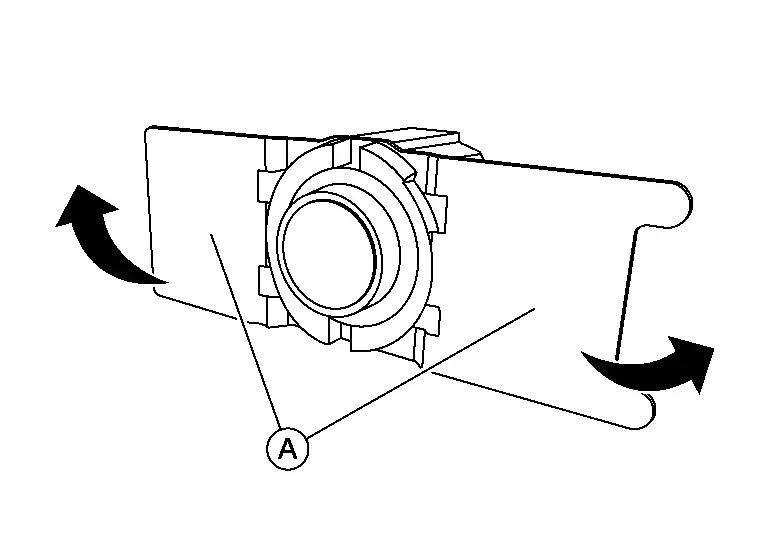
Let the adhesion promoter dry for more than 3 minutes and peel off the double sided tape film, and then taking precautions not to contact the bumper with the double sided tape (A), bend the sensor finisher in the direction shown.
Match the part of the sonar sensor (A) shown in the figure to the sensor installing hole of the rear bumper fascia.

Remove the sensor from the sensor finisher and press the adhesion face (A) for more than 2 seconds to securely bond the sensor finisher to rear bumper fascia inner.

| Target pressure | : 50.0 N (5.1 kg-m, 11.2 lb-f) |
CAUTION:
-
When temperature is less than 15 C (59 F), use a drier, etc., to warm the adhesion face and proceed.
-
After installing sensor finisher, do not move finisher for 2–3 hours.
Install sensor to the sensor finisher.
Shake the part of the sensor finisher (A) up and down and then right and left to confirm that the finisher has been installed (bonded) firmly.

Connect the harness connector to the sonar sensor.
Install rear bumper fascia. Refer to Removal and Installation.
REAR SONAR SENSOR OUTER
REMOVAL
Remove rear bumper fascia. Refer to Removal and Installation.
Disconnect the harness connector from the rear sonar sensor outer.
Using a suitable tool, release pawls from the rear sonar sensor outer (1) and remove.
 |
: Pawl |
Remove the rear sonar sensor outer finisher from the bumper fascia (if necessary).
INSTALLATION
CAUTION:
Verify that the connector direction is within the specification shown when assembling the bumper fascia.

| (A) | : Horizontal position |
| (a) | : ±10° |
Install sonar sensor to sensor finisher.
Degrease and clean the inner side of the rear bumper fascia and apply adhesion promoter to the area shown (A).

Let the adhesion promoter dry for more than 3 minutes and peel off the double sided tape film, and then taking precautions not to contact the bumper with the double sided tape (A), bend the sensor finisher in the direction shown.

Match the part of the sonar sensor (A) shown in the figure to the sensor installing hole of the rear bumper fascia.
Remove the sensor from the sensor finisher and press the adhesion face (A) for more than 2 seconds to securely bond the sensor finisher to rear bumper fascia inner.
| Target pressure | : 50.0 N (5.1 kg-m, 11.2 lb-f) |
CAUTION:
-
When temperature is less than 15 C (59 F), use a drier, etc., to warm the adhesion face and proceed.
-
After installing sensor finisher, do not move finisher for 2–3 hours.
Install sensor to the sensor finisher.
Shake the part of the sensor finisher (A) up and down and then right and left to confirm that the finisher has been installed (bonded) firmly.
Connect the harness connector to the sonar sensor.
Install rear bumper fascia. Refer to Removal and Installation.
FRONT SONAR SENSOR INNER
REMOVAL
Remove the front bumper fascia. Refer to Removal and Installation.
Disconnect the harness connector from the front sonar sensor (inner).
Using a suitable tool, release pawls from the front sonar sensor inner (1) and remove from the front sonar sensor inner finisher (2).
 |
: Pawl |
Remove the front sonar sensor inner finisher from the bumper fascia (if necessary).
INSTALLATION
Installation is in the reverse order of removal.
CAUTION:
Verify that the connector direction is within the specification shown when assembling the bumper fascia.

| (A) | : Horizontal position |
| (a) | : ±10° |
FRONT SONAR SENSOR OUTER
REMOVAL
Partially remove front portion of front fender protector. Refer to Exploded View.
Disconnect the harness connector from the front sonar sensor (outer).
Using a suitable tool, release pawls from the front sonar sensor outer (1) and remove.
 |
: Pawl |
Remove the front sonar sensor outer finisher from the bumper fascia (if necessary).
INSTALLATION
CAUTION:
Verify that the connector direction is within the specification shown when assembling the bumper fascia.

| (A) | : Horizontal position |
| (a) | : ±10° |
Install sonar sensor to sensor finisher.
Degrease and clean the inner side of the rear bumper fascia and apply adhesion promoter to the area shown (A).

Let the adhesion promoter dry for more than 3 minutes and peel off the double sided tape film, and then taking precautions not to contact the bumper with the double sided tape (A), bend the sensor finisher in the direction shown.

Match the part of the sonar sensor (A) shown in the figure to the sensor installing hole of the rear bumper fascia.

Remove the sensor from the sensor finisher and press the adhesion face (A) for more than 2 seconds to securely bond the sensor finisher to rear bumper fascia inner.

| Target pressure | : 50.0 N (5.1 kg-m, 11.2 lb-f) |
CAUTION:
-
When temperature is less than 15 C (59 F), use a drier, etc., to warm the adhesion face and proceed.
-
After installing sensor finisher, do not move finisher for 2–3 hours.
Install sensor to the sensor finisher.
Shake the part of the sensor finisher (A) up and down and then right and left to confirm that the finisher has been installed (bonded) firmly.

Connect the harness connector to the sonar sensor.
Install front portion of front fender protector. Refer to Exploded View.

Nissan Pathfinder (R53) 2022-2026 Service Manual
Removal and Installation
Contact Us
Nissan Pathfinder Info Center
Email: info@nipathfinder.com
Phone: +1 (800) 123-4567
Address: 123 Pathfinder Blvd, Nashville, TN 37214, USA
Working Hours: Mon–Fri, 9:00 AM – 5:00 PM (EST)
