Nissan Pathfinder: Interior Lighting System - Removal and Installation
- Front Room/map Lamp Assembly
- Vanity Mirror Lamp
- Personal Lamp
- Cargo Lamp
- Illumination Control Switch
- Luggage Room Lamp
- Mood Lamp (center Console)
- Mood Lamp (center Console Tray)
Front Room/map Lamp Assembly Nissan Pathfinder R53
Exploded View
With MOONROOF
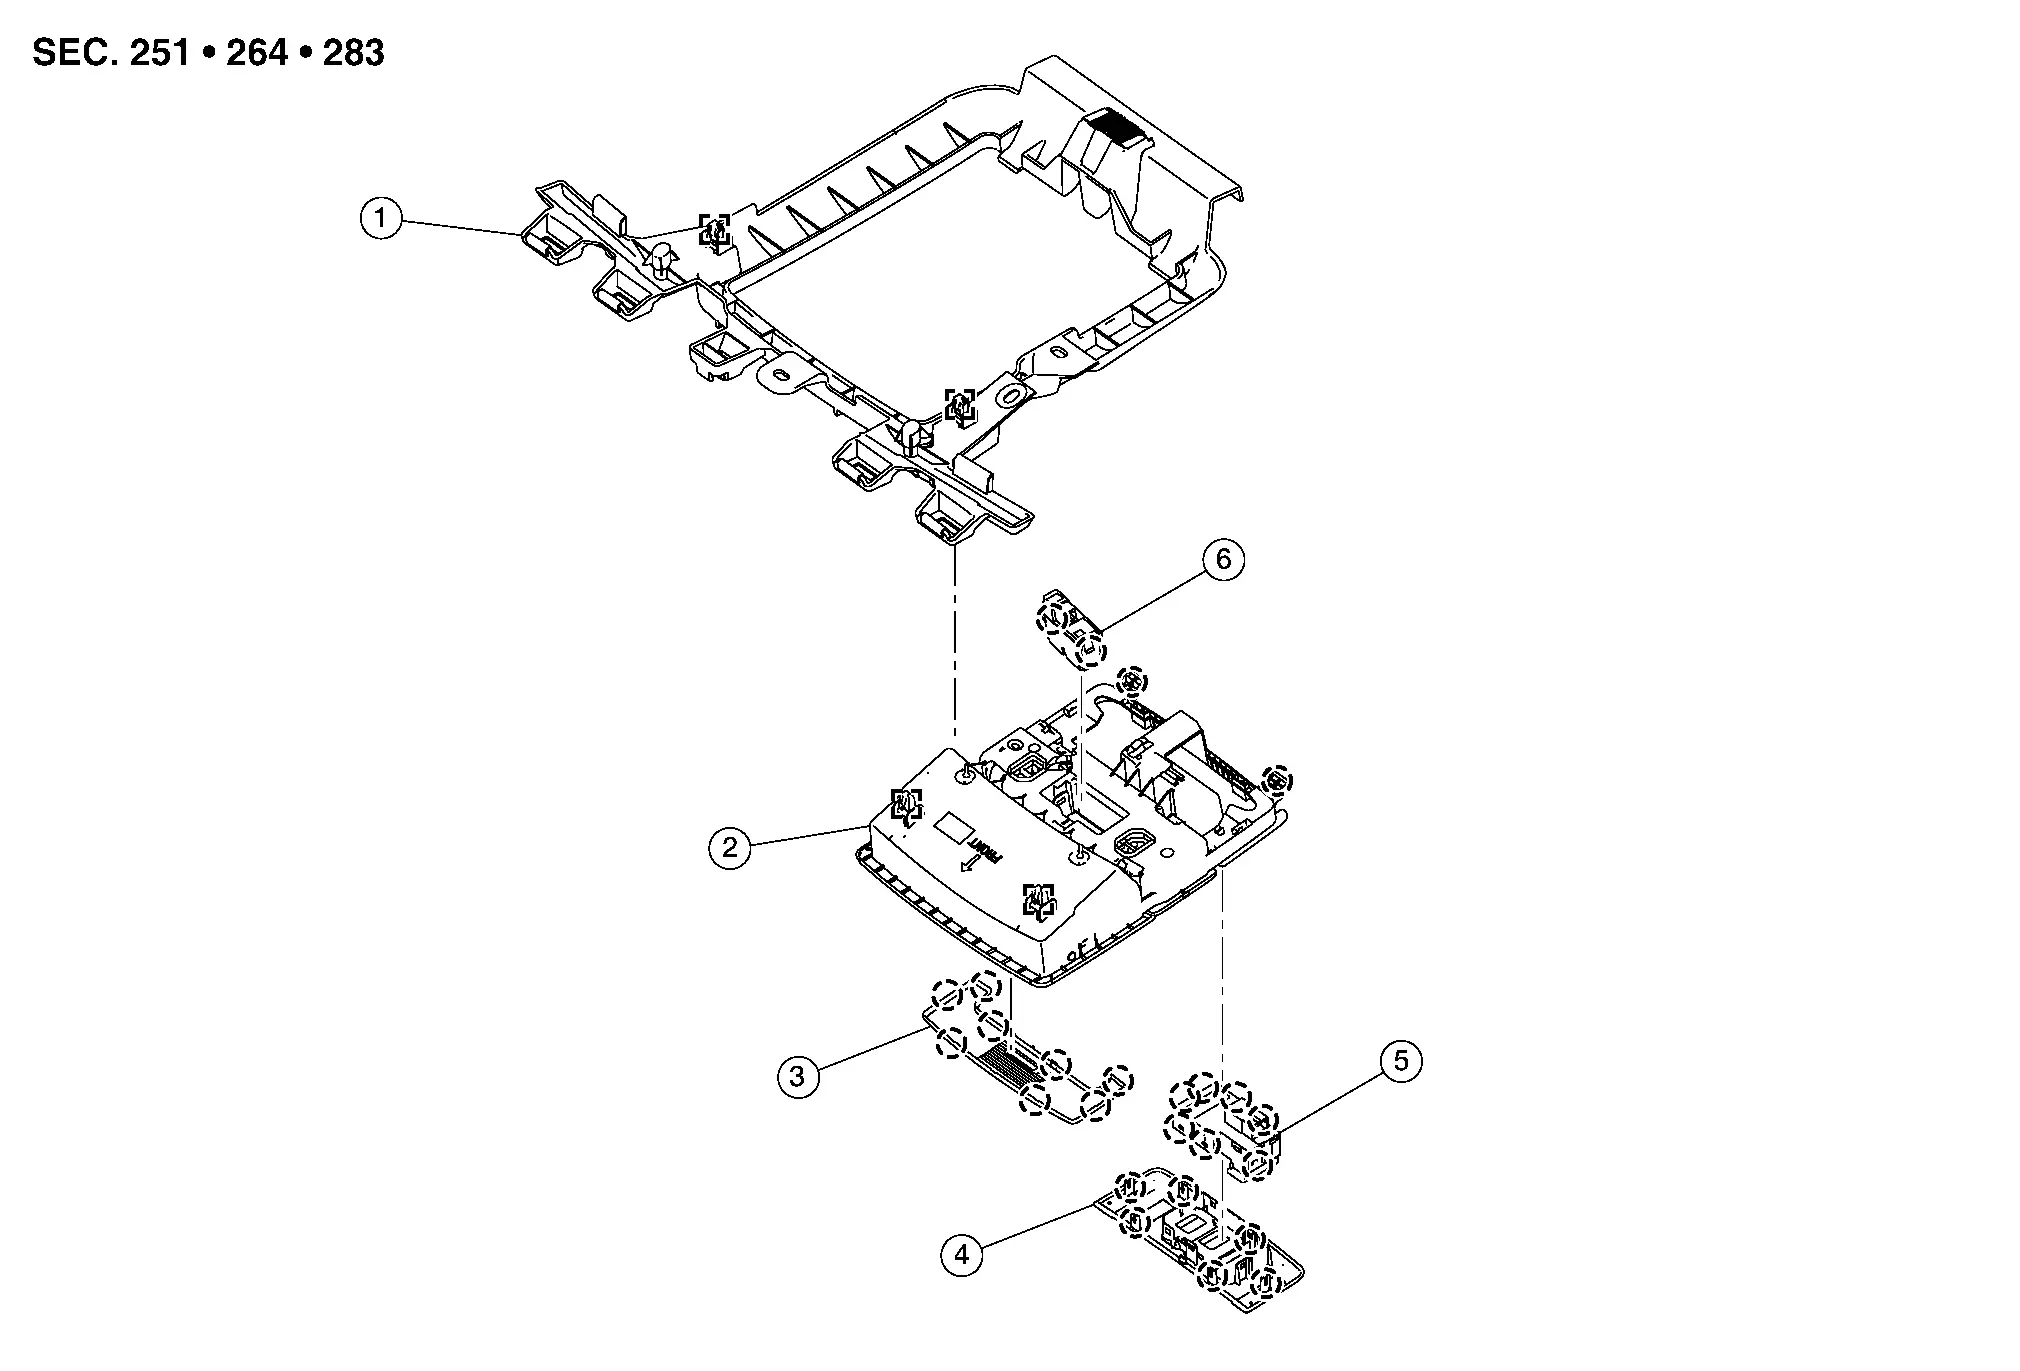
| 1. | Front room/map lamp assembly bracket | 2. | Front room/map lamp assembly | 3. | Front room/map lamp assembly lens |
| 4. | Moonroof switch finisher | 5. | Moonroof switch | 6. | Microphone |
 |
Pawl |
 |
Metal clip |
Without MOONROOF
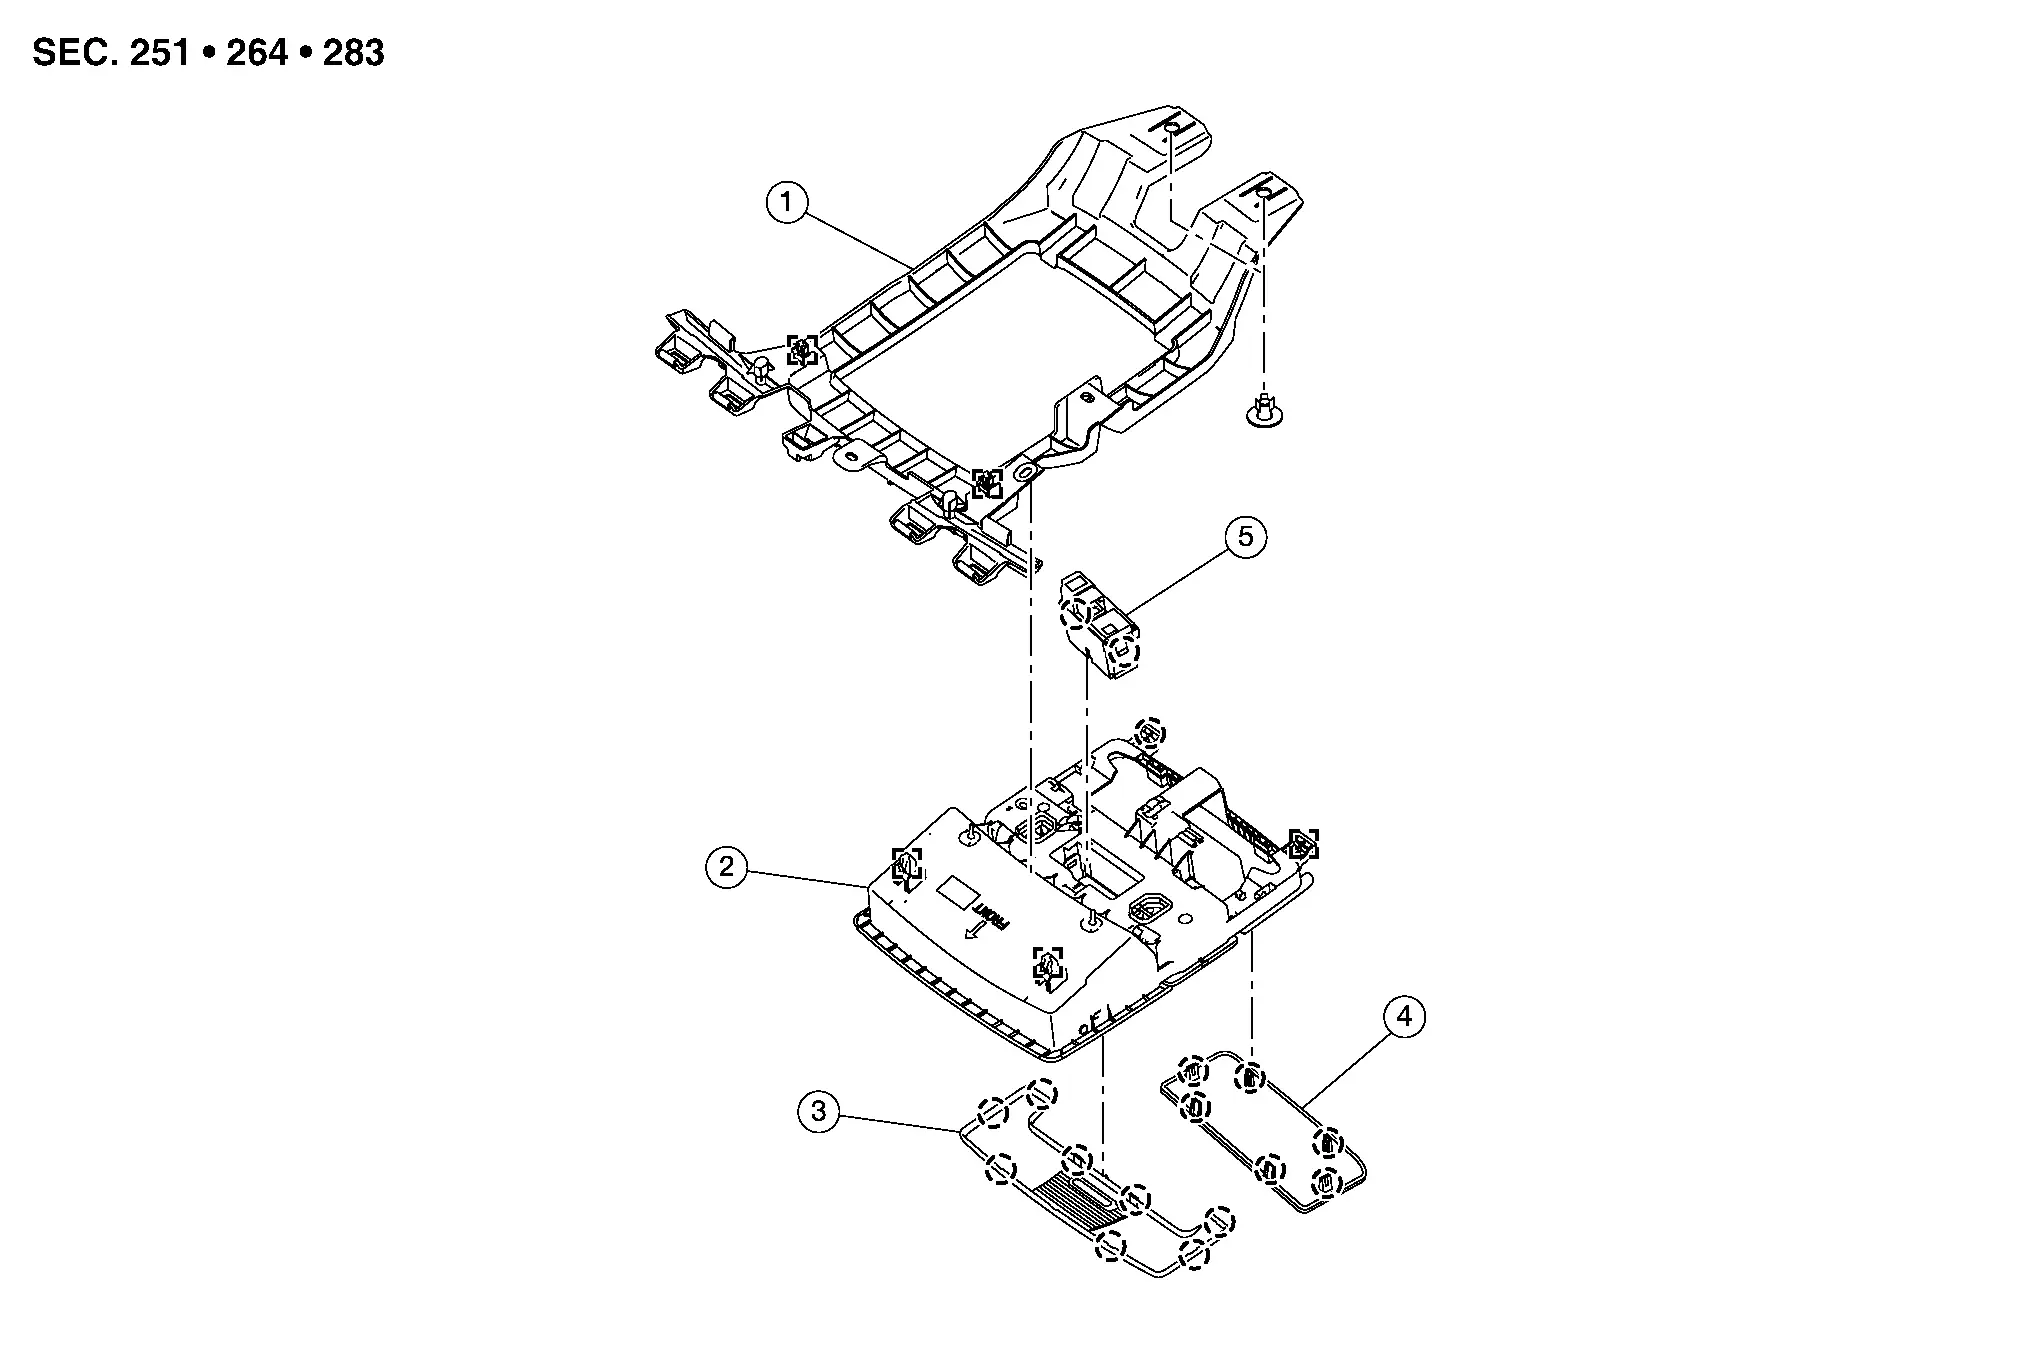
| 1. | Front room/map lamp assembly bracket | 2. | Front room/map lamp assembly | 3. | Front room/map lamp assembly lens |
| 4. | Switch finisher | 5. | Microphone |
 |
Pawl |
 |
Metal clip |
Removal and Installation
CAUTION:
Do not attempt to separate the front room/map lamp assembly from the headlining prior to removing headlining, or damage to the components may occur.
REMOVAL
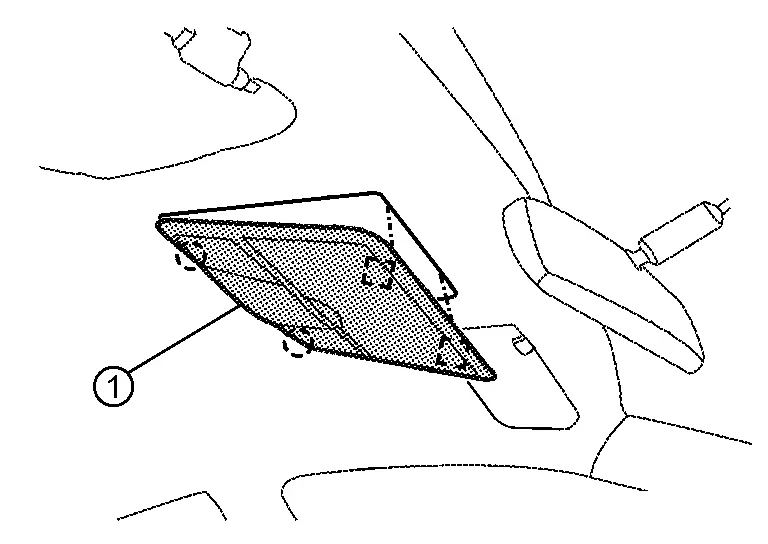
Lower front edge of front room/map lamp assembly (1) down from the headlining by releasing the metal clips, then slide forward to clear pawls at rear.
 |
: Pawl |
 |
: Metal clip |
Disconnect the harness connectors from the front room/map lamp assembly and remove.
INSTALLATION
Installation is in the reverse order of removal.
Bulb or Lens Replacement
WARNING:
Do not touch the glass surface of a bulb while it is lit or right after being turned OFF to prevent burns.
CAUTION:
-
Do not touch the glass of bulb directly by hand. Keep grease and other oily substances away from bulb surface.
-
Do not leave bulb out of lamp reflector for a long time because dust, moisture, smoke, etc. may affect the performance of lamp.
-
Do not attempt to separate the lamp from the front room/map lamp assembly or damage to the components may occur.
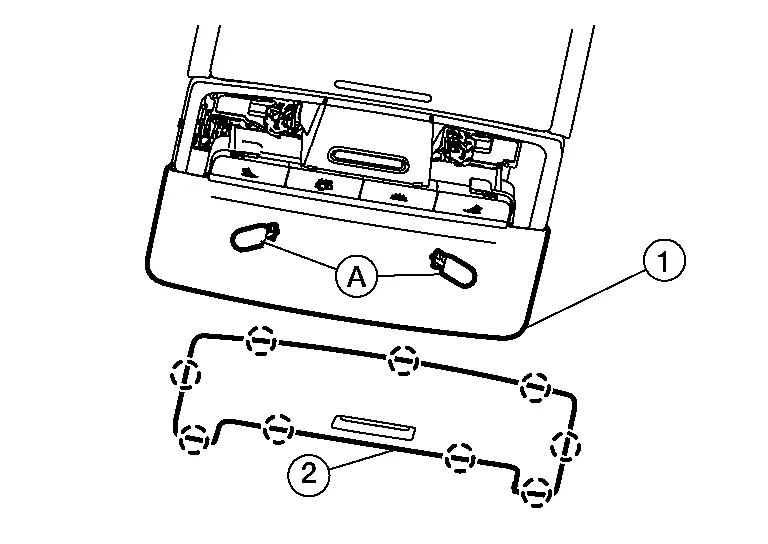
Using a suitable tool, release the pawls and remove lens (2) from the front room/map lamp assembly (1).
 |
: Pawl |
Grasp the bulb (A) and pull straight out from its socket to remove.
Install bulb to front room/map lamp assembly.
Install the front room/map lamp assembly lens.
Vanity Mirror Lamp Nissan Pathfinder 2022
Removal and Installation
CAUTION:
Do not attempt to separate the vanity mirror lamp from the headlining or damage to the components may occur.
The vanity mirror lamp is serviced as part of an assembly to the headlining. Refer to Removal and Installation.
Personal Lamp Nissan Pathfinder 5th Gen
Exploded View
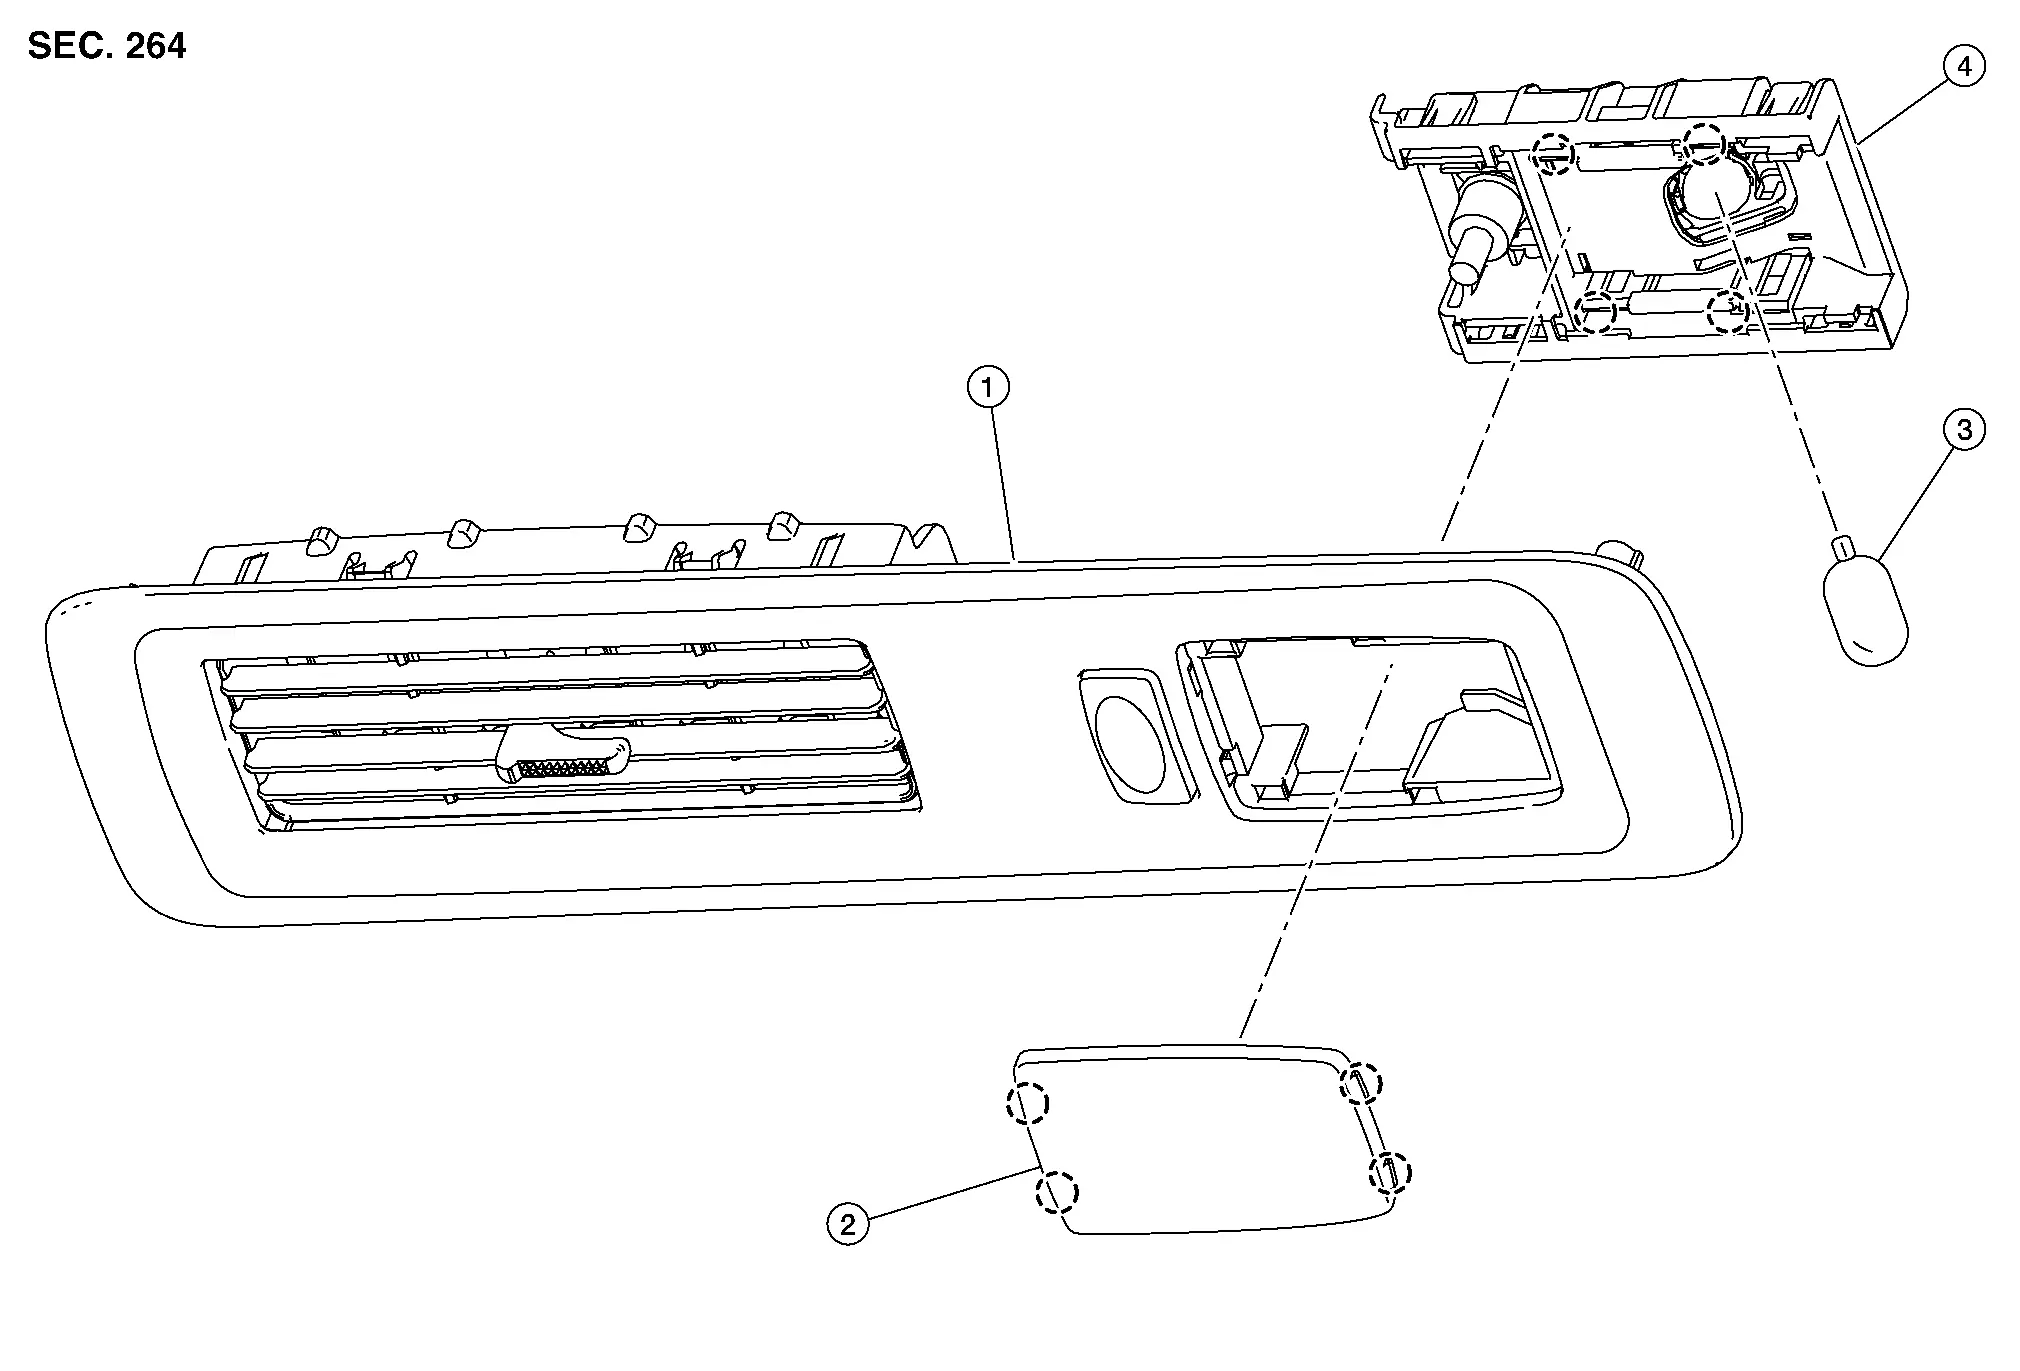
| 1. | Rear ventilator upper grille | 2. | Lens | 3. | Bulb |
| 4. | Personal lamp |
 |
Pawl |
Removal and Installation
REMOVAL
Remove the headlining. Refer to Removal and Installation.
Using a suitable tool, release pawls and remove personal lamp (1) from rear ventilator upper grille (2).
 |
: Pawl |
Disconnect the harness connector from personal lamp.
INSTALLATION
Installation is in the reverse order of removal.
Bulb or Lens Replacement
WARNING:
Do not touch the glass surface of a bulb while it is lit or right after being turned OFF to prevent burns.
CAUTION:
-
Do not touch the glass of bulb directly by hand. Keep grease and other oily substances away from bulb surface.
-
Do not leave bulb out of lamp reflector for a long time because dust, moisture, smoke, etc. may affect the performance of lamp.
-
Do not attempt to separate the personal lamp from the headlining or damage may occur.
Insert a suitable tool into the gap between the lens and personal lamp, then gently release the lens pawls and remove.
Grasp the bulb and pull straight out from its socket to remove.
Install personal lamp bulb to personal lamp.
Install the personal lamp lens.
Cargo Lamp Nissan Pathfinder 2022
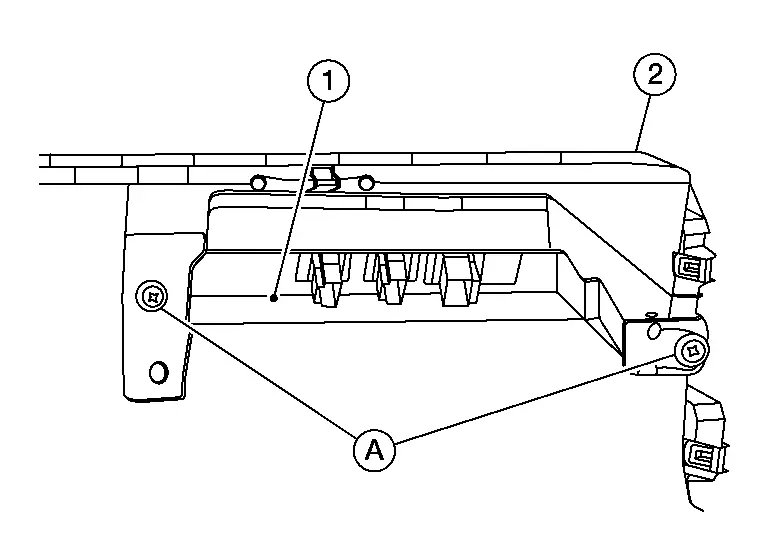
Exploded View
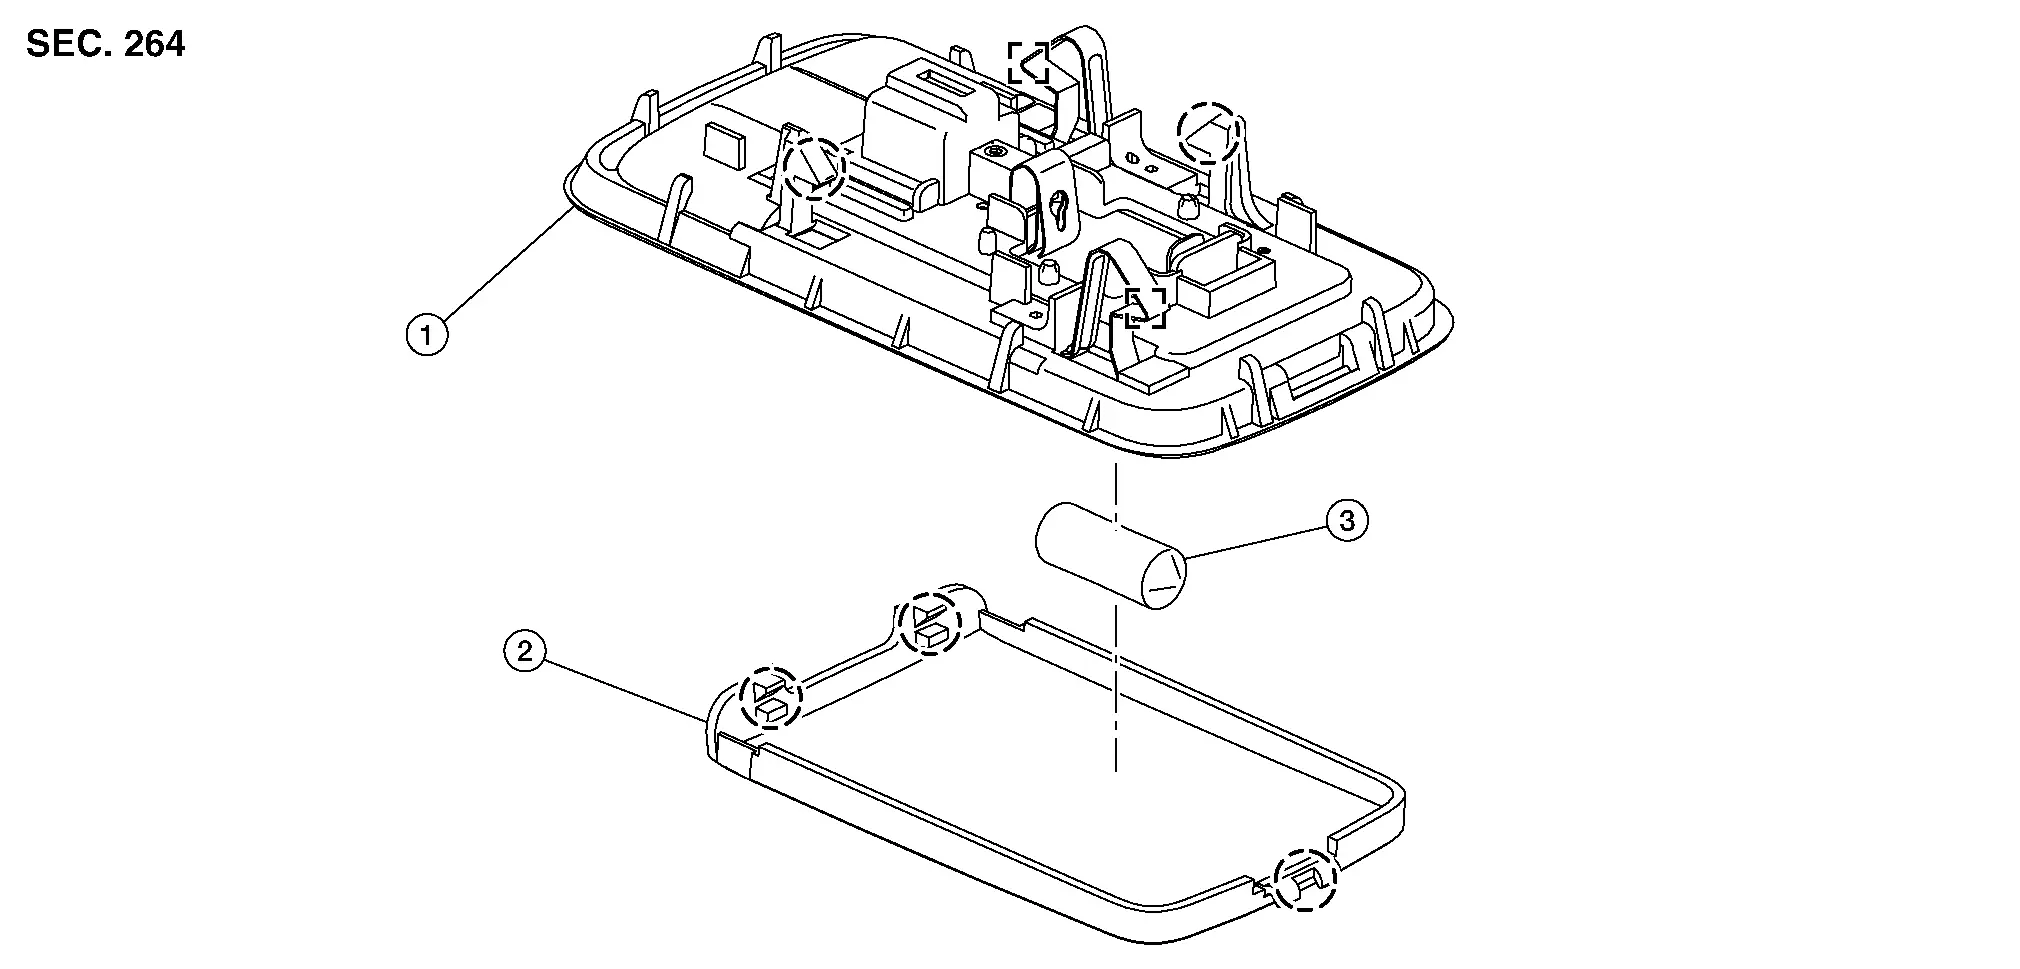
| 1. | Cargo lamp | 2. | Lens | 3. | Bulb |
 |
Pawl |
 |
Metal clip |
Removal and Installation
REMOVAL
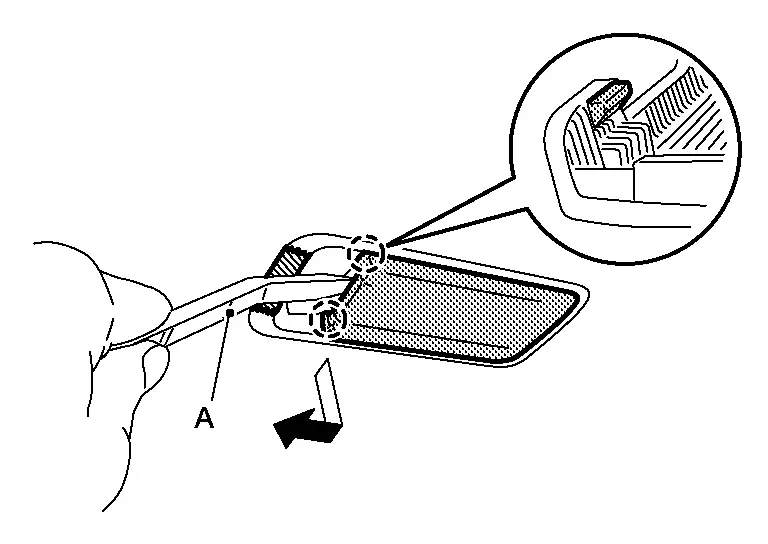
Using a suitable tool (A), release pawls and remove lens as shown.
 |
: Pawl |
Using a suitable tool, release metal clips and remove cargo lamp. Refer to Exploded View.
Disconnect the harness connector from cargo lamp.
INSTALLATION
Installation is in the reverse order of removal.
Bulb or Lens Replacement
WARNING:
Do not touch the glass surface of a bulb while it is lit or right after being turned OFF to prevent burns.
CAUTION:
-
Do not touch the glass of bulb directly by hand. Keep grease and other oily substances away from bulb surface.
-
Do not leave bulb out of lamp reflector for a long time because dust, moisture, smoke, etc. may affect the performance of lamp.
-
Release and insert pawl as indicated in exploded view or damage may occur.
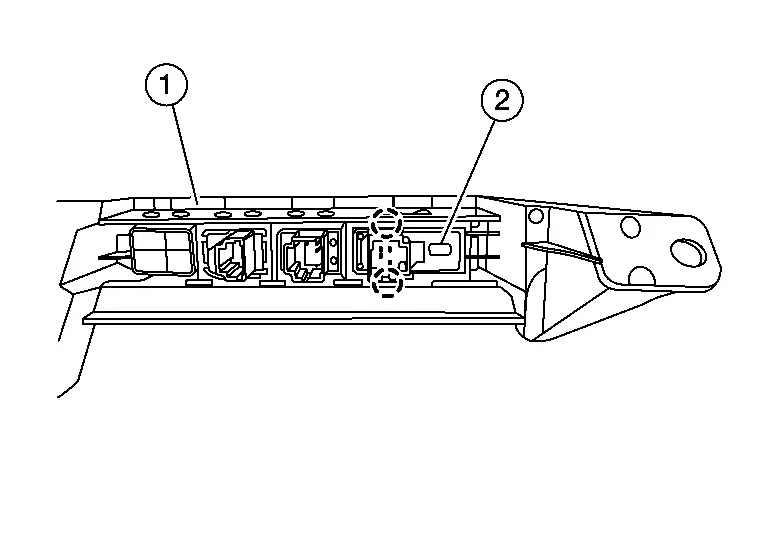
Beginning at the switch end, insert a suitable tool into the gap between the lens and cargo lamp, then gently release the lens pawls and remove.
Push the tab to release one bulb end, then grasp the bulb and pull out the second end from its socket to remove.
Install cargo lamp bulb to cargo lamp.
Insert pawl at the end opposite the switch first, then insert the remaining two pawls to lock the lens in position.
Illumination Control Switch Nissan Pathfinder
Removal and Installation
REMOVAL
Remove instrument lower panel (LH). Refer to Removal and Installation.
Remove screws (A) and remove switch bracket (1) from instrument lower panel [(LH) (2)].
Using a suitable tool, release pawls and remove switch bracket (1) from Illumination control switch (2).
 |
: Pawl |
INSTALLATION
Installation is in the reverse order of removal.
Luggage Room Lamp Nissan Pathfinder Fifth generation
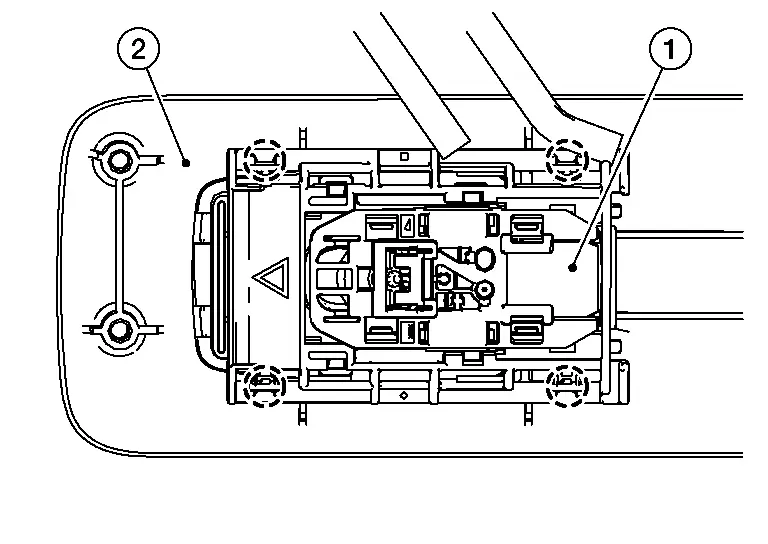
Exploded View
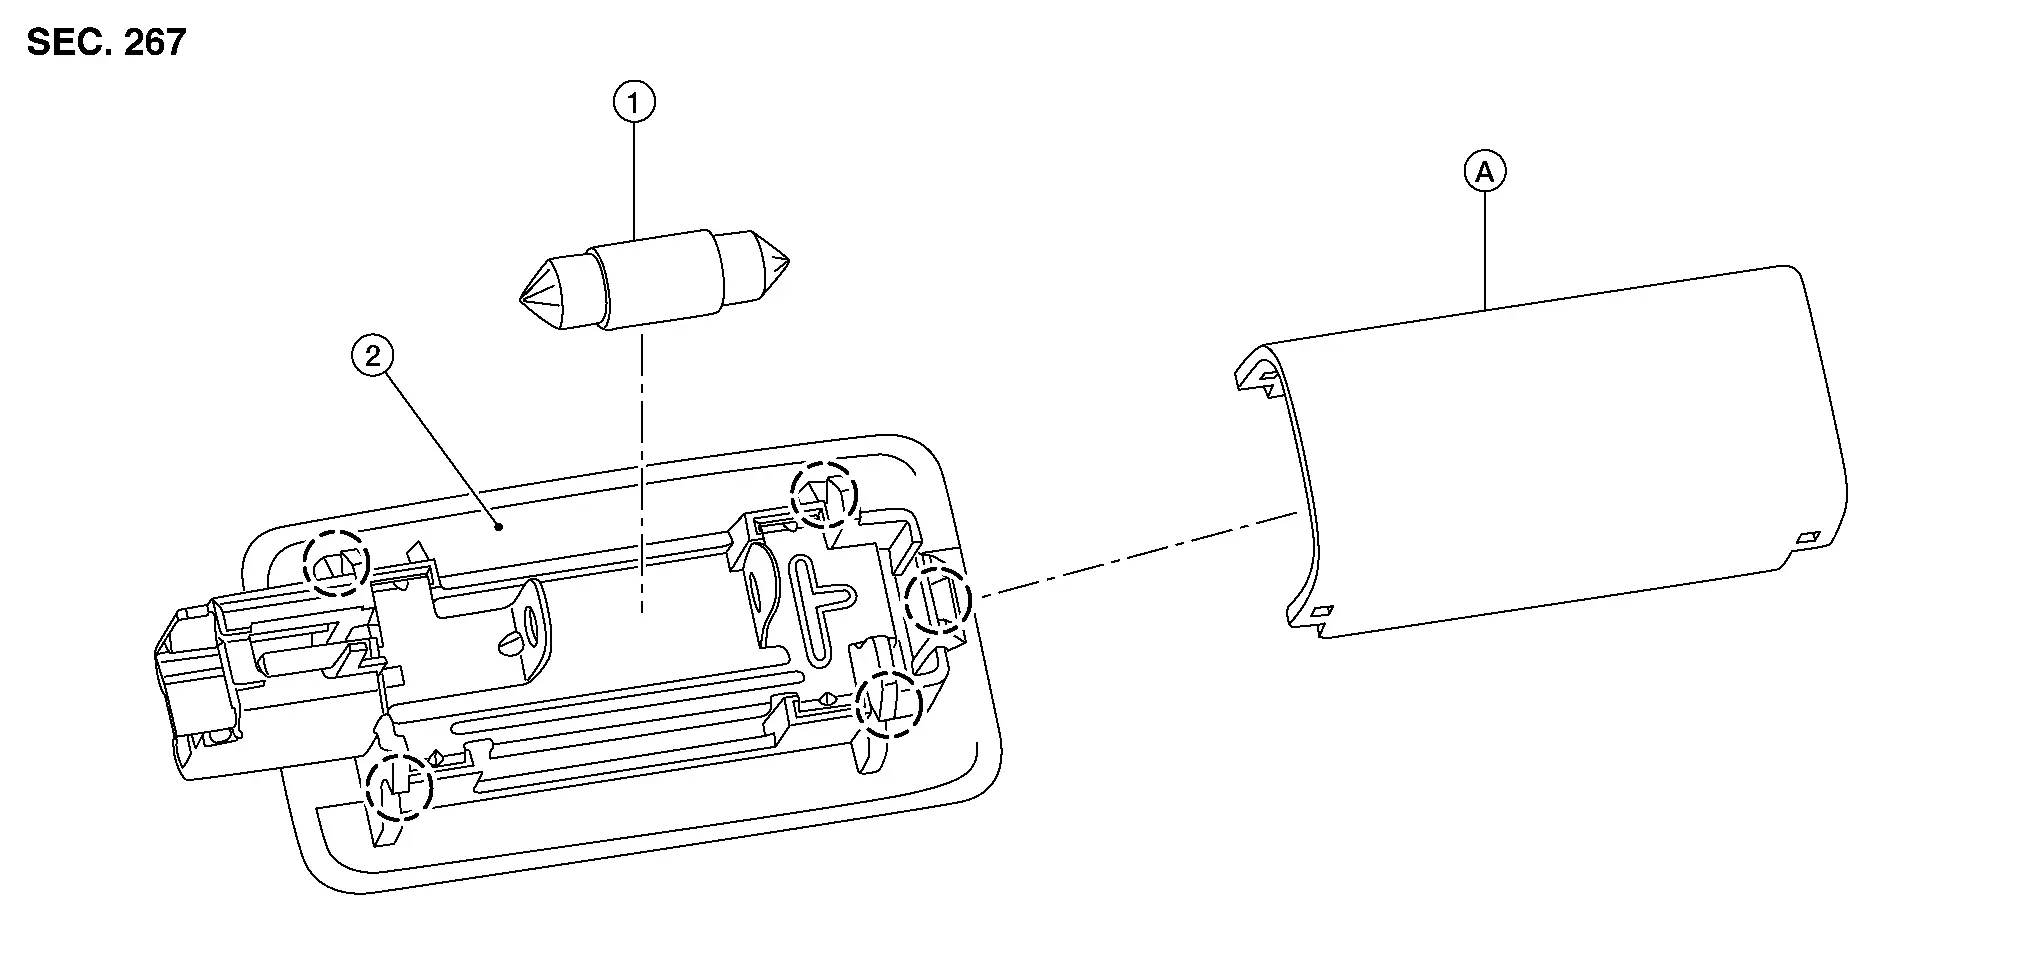
| 1. | Bulb | 2. | Luggage room lamp | A. | Lamp cover |
 |
Pawl |
Removal and Installation
REMOVAL
Using a suitable tool, release pawl and remove luggage room lamp (1).
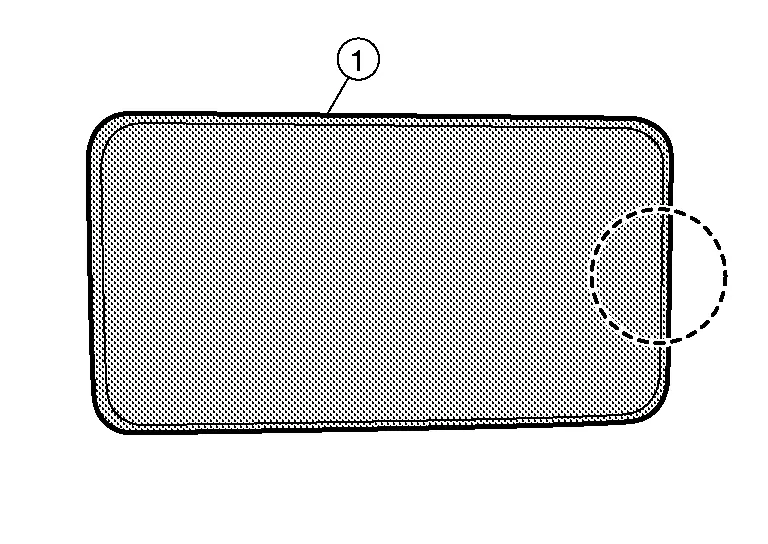
 |
: Pawl |
Disconnect the harness connector from luggage room lamp and remove.
INSTALLATION
Installation is in the reverse order of removal.
Bulb Replacement
WARNING:
Do not touch the glass surface of a bulb while it is lit or right after being turned OFF to prevent burns.
CAUTION:
-
Do not touch the glass of bulb directly by hand. Keep grease and other oily substances away from bulb surface.
-
Do not leave bulb out of lamp reflector for a long time because dust, moisture, smoke, etc. may affect the performance of lamp.
Remove the luggage room lamp. Refer to Removal and Installation.
Using a suitable tool, release pawls from lamp cover (1), and remove from luggage room lamp (2).
 |
: Pawl |
Push tab to release one bulb end, then grasp bulb and pull out second end from its socket to remove.
Install bulb to luggage room lamp.
Install lamp cover.
Install luggage room lamp. Refer to Removal and Installation.
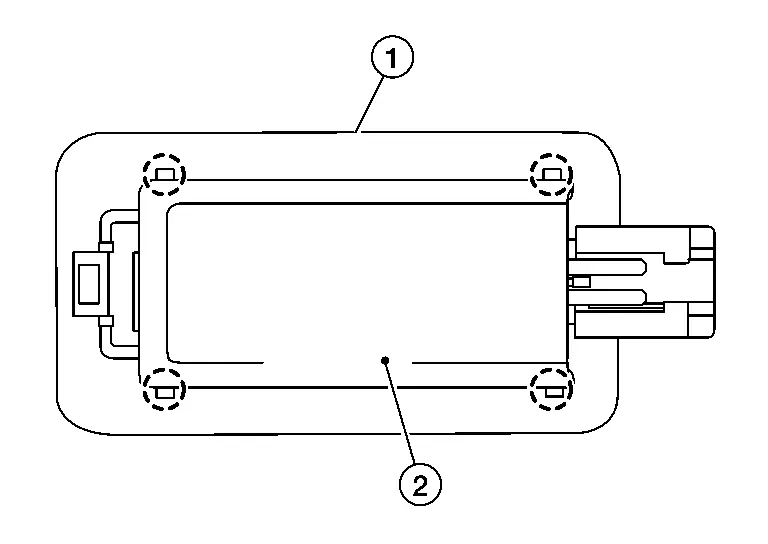
Mood Lamp (center Console) Nissan Pathfinder 2026
Exploded View
| 1. | Mood lamp (center console) | 2. | Cluster lid E |
 |
Pawl |
Removal and Installation
REMOVAL
Remove cluster lid E. Refer to Removal and Installation.
Using a suitable tool, release pawls, rotate mood lamp (center console) counterclockwise and remove. Refer to Exploded View.
INSTALLATION
Installation is in the reverse order of removal.
Bulb Replacement
The mood lamp (center console) bulb is LED and is not serviced separately from the mood lamp (center console). Refer to Removal and Installation.
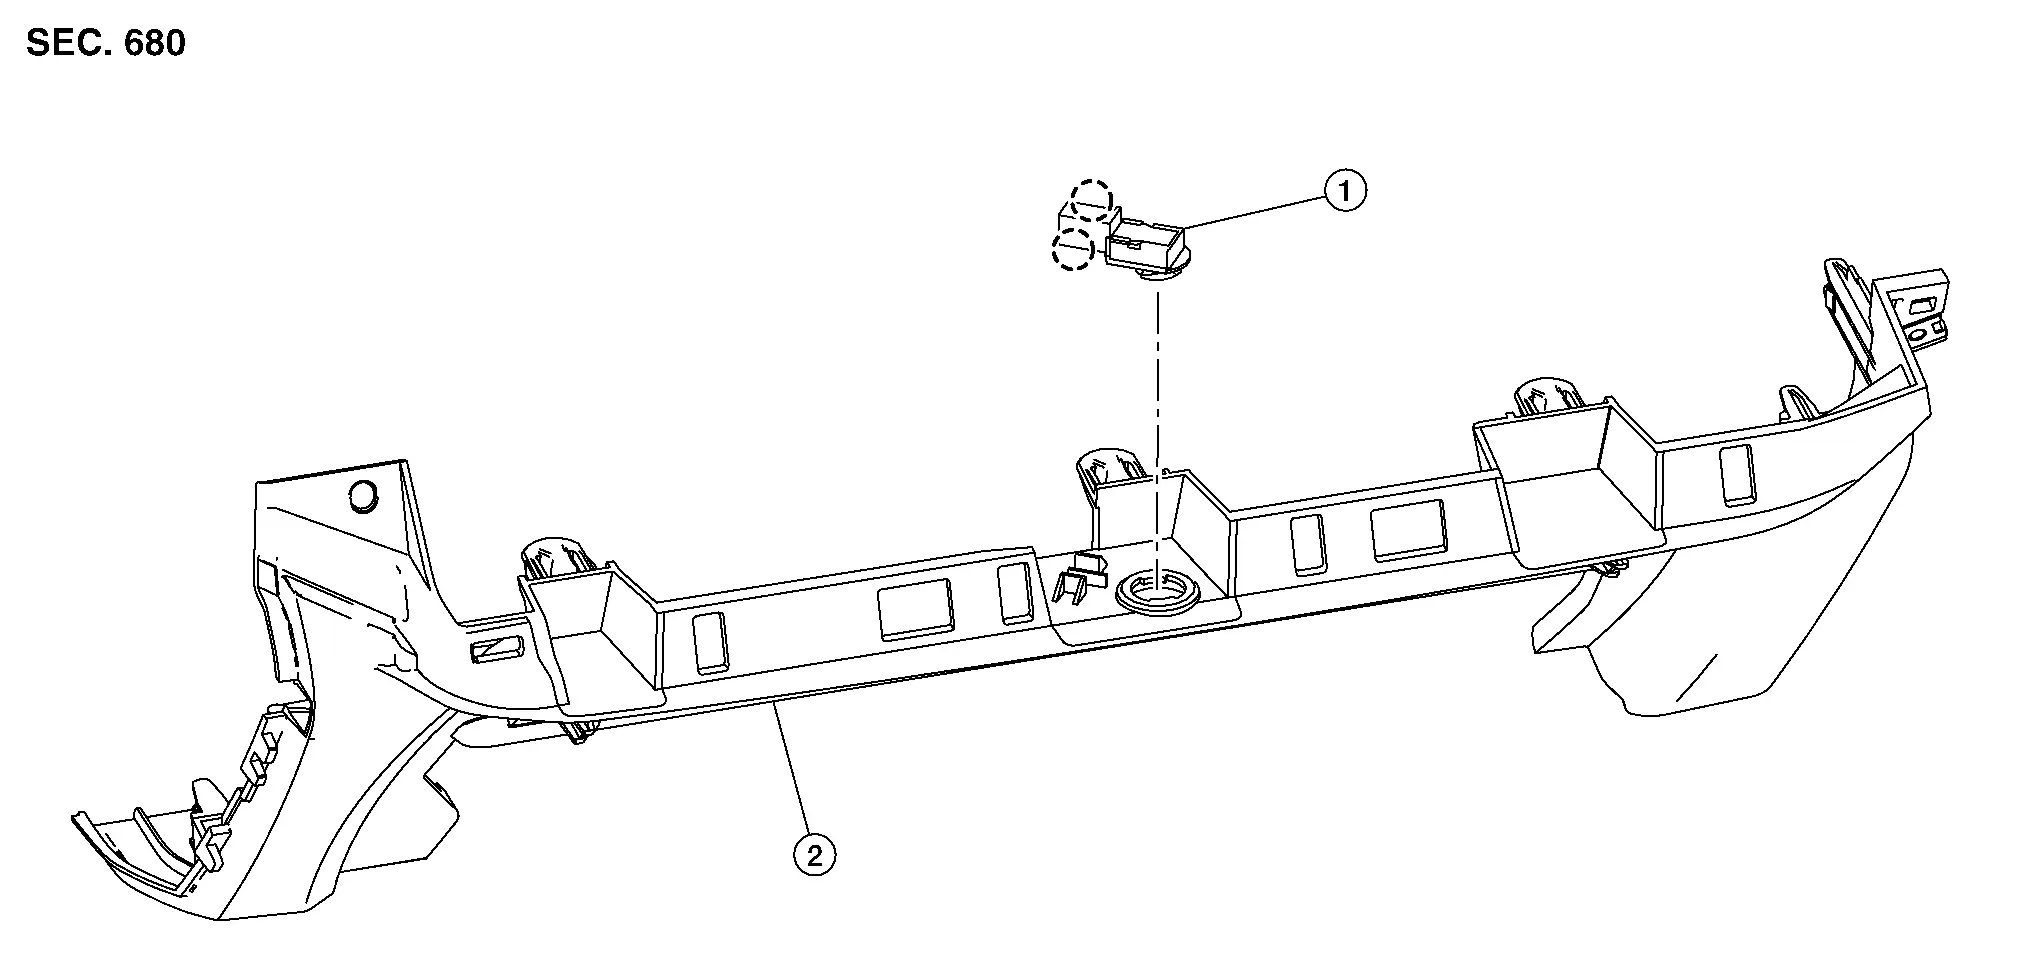
Mood Lamp (center Console Tray) Nissan Pathfinder 2022
Removal and Installation
REMOVAL
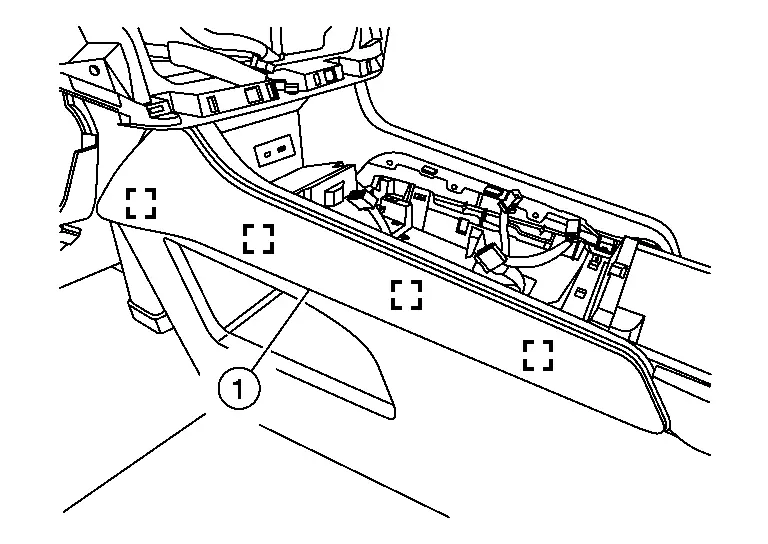
Remove front console tray and cup holder mat.
Remove screws (A).
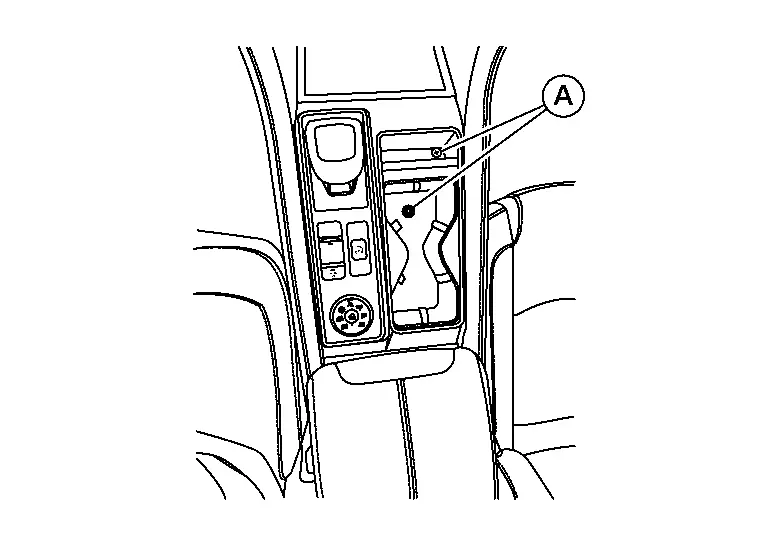
Using a suitable tool, release clips and pawls from shift selector finisher (1).
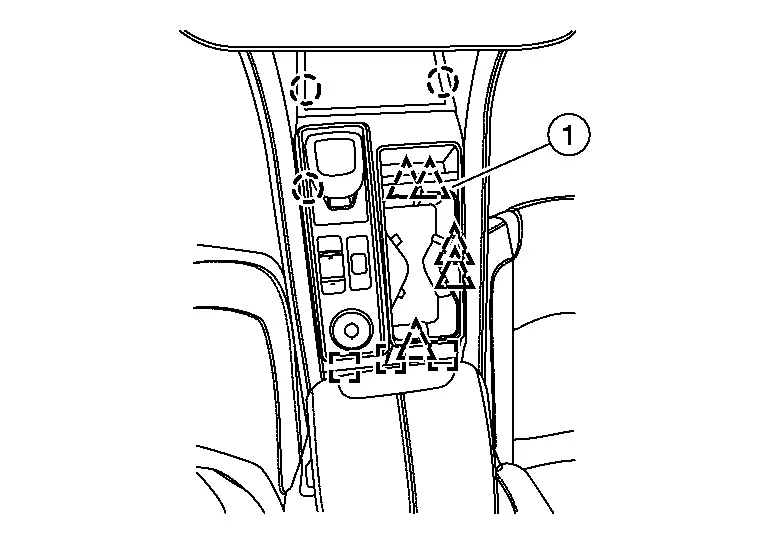
 |
: Metal clip |
 |
: Clip |
 |
: Pawl |
Disconnect harness connectors and remove shift selector finisher.
Using a suitable tool, release clips, disconnect harness connector and remove center console side finisher [1 (LH/RH)].
 NOTE:
NOTE:
LH shown; RH similar.
 |
: Metal clip |
Remove screws (A) and remove mood lamp [center console tray (1)] from center console side finisher [LH/RH (2)].
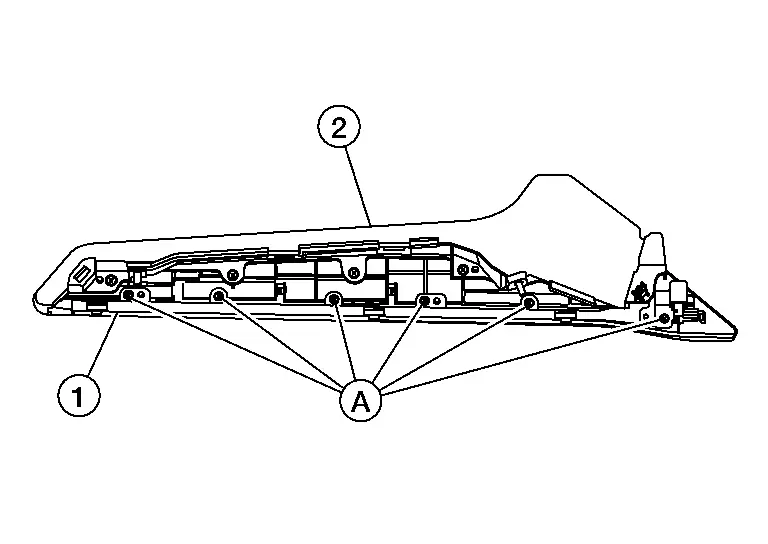
 NOTE:
NOTE:
LH shown; RH similar.
INSTALLATION
Installation is in the reverse order of removal.

Nissan Pathfinder (R53) 2022-2026 Service Manual
Removal and Installation
- Front Room/map Lamp Assembly
- Vanity Mirror Lamp
- Personal Lamp
- Cargo Lamp
- Illumination Control Switch
- Luggage Room Lamp
- Mood Lamp (center Console)
- Mood Lamp (center Console Tray)
Contact Us
Nissan Pathfinder Info Center
Email: info@nipathfinder.com
Phone: +1 (800) 123-4567
Address: 123 Pathfinder Blvd, Nashville, TN 37214, USA
Working Hours: Mon–Fri, 9:00 AM – 5:00 PM (EST)
