Nissan Pathfinder: Door & Lock - Removal and Installation
- Radiator Core Support. Radiator Core Support
- Front Fender
- Inside Key Antenna
- Intelligent Key Warning Buzzer
- Intelligent Key Unit
- Intelligent Key Battery
- Back Door Opener Switch
- Automatic Back Door Control Unit
- Automatic Back Door Switch
- Automatic Back Door Lock and Close Switch Assembly
Radiator Core Support. Radiator Core Support Nissan Pathfinder 2026
Exploded View
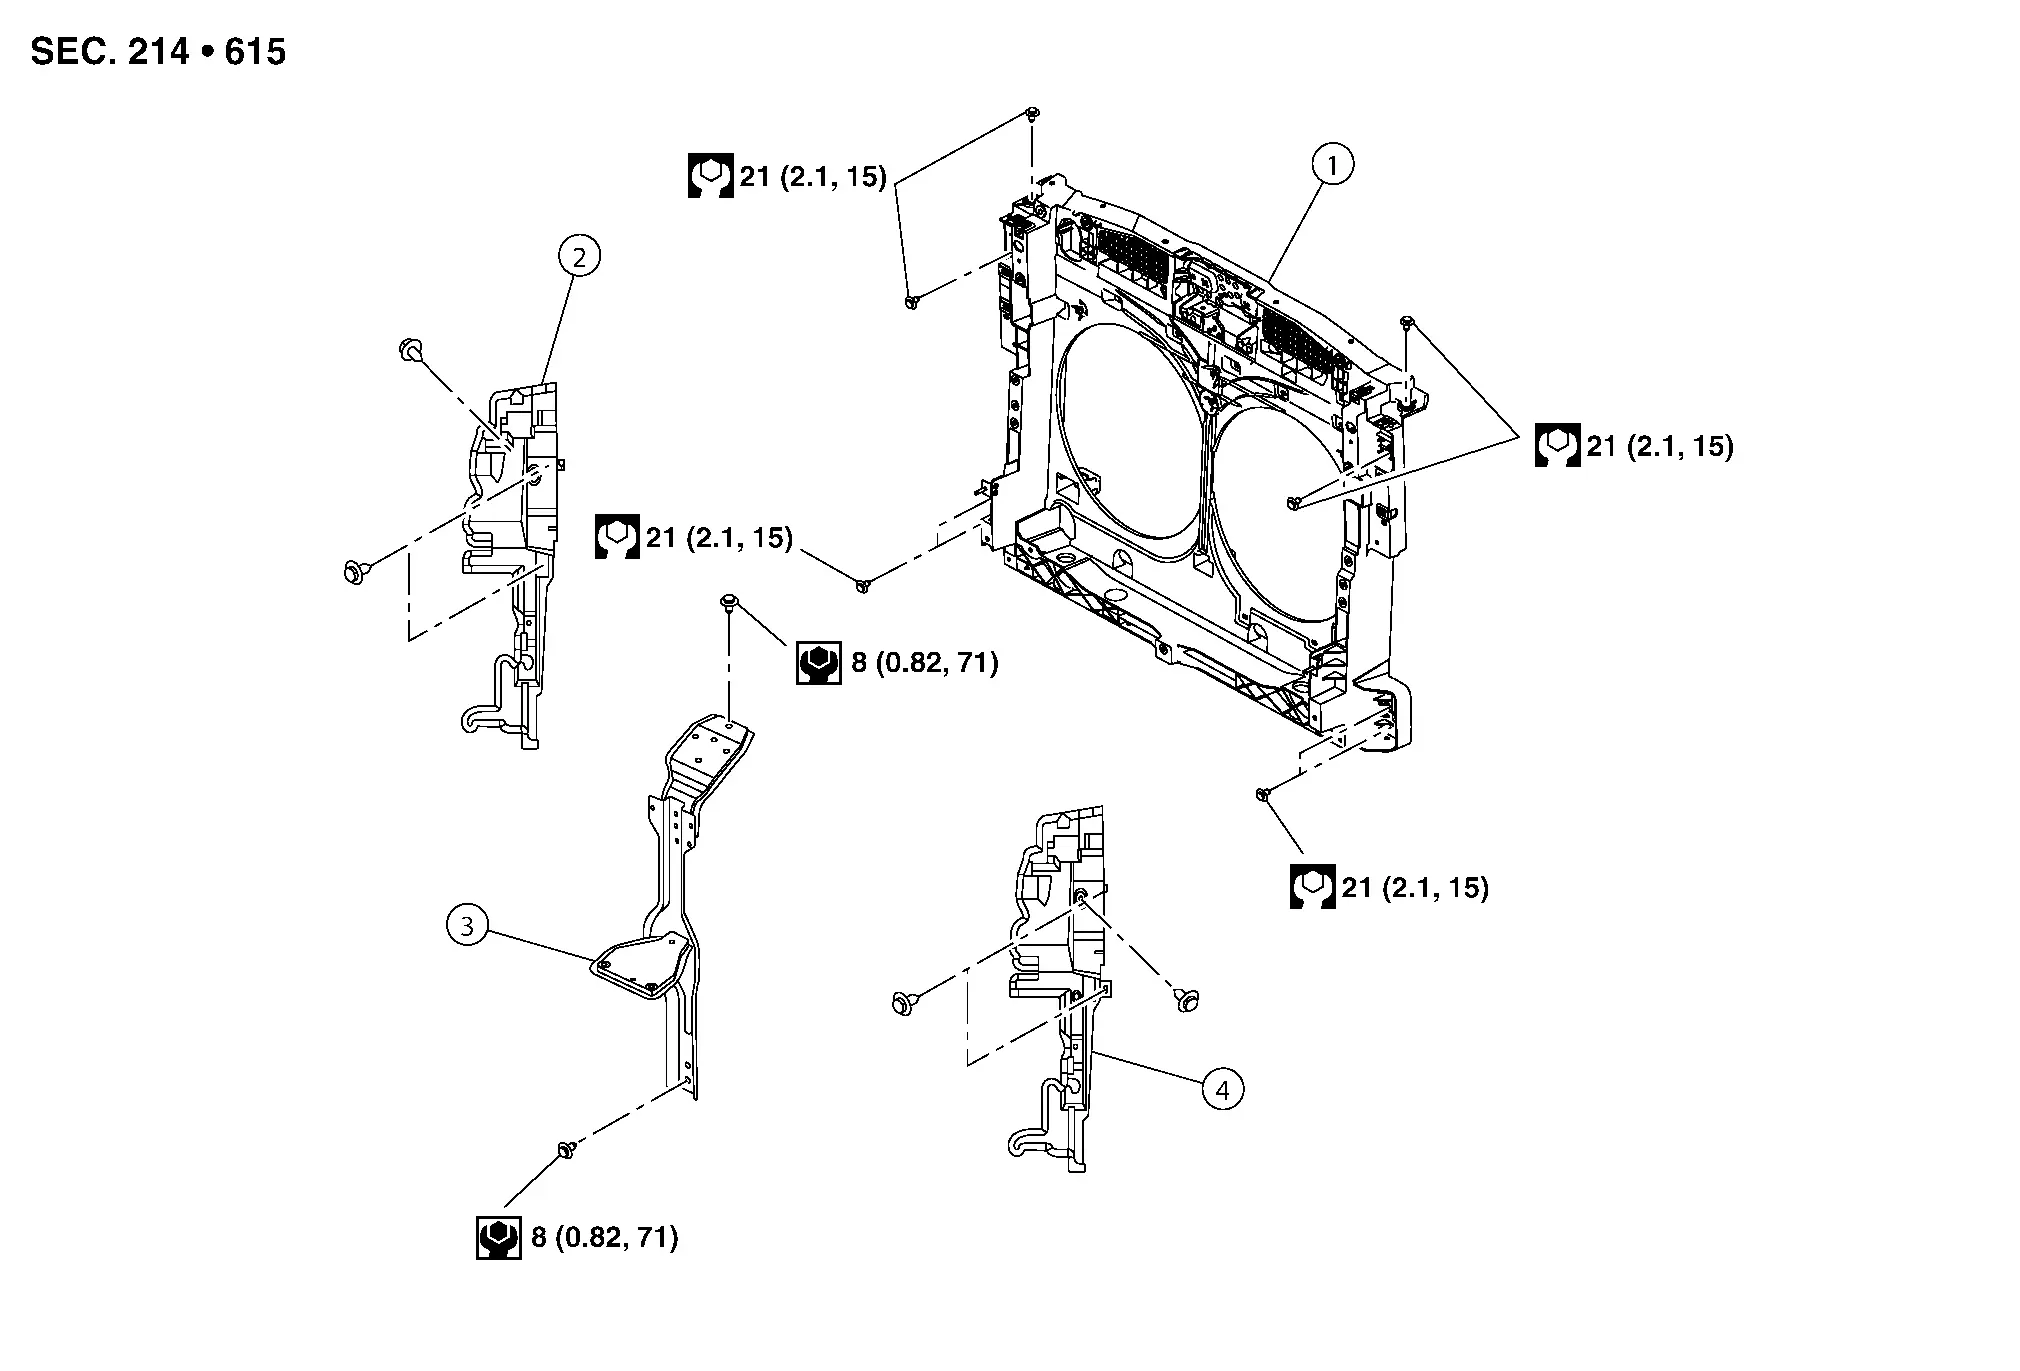
| 1. | Radiator core support | 2. | Radiator air guide (RH) | 3. | Front fascia support stay |
| 4. | Radiator air guide (LH) |
Removal and Installation
REMOVAL
Remove cooling fan. Refer to Removal and Installation.
Remove radiator. Refer to Removal and Installation.
Remove front combination lamp. Refer to Exploded View.
Remove radiator air guides (LH/RH). Refer to Exploded View.
Remove front fascia support stay. Refer to Exploded View.
Remove hood lock assembly. Refer to Removal and Installation.
Remove crash zone sensor. Refer to Removal and Installation.
Using a suitable tool, remove hood lock control cable clips from radiator core support.
Using a suitable tool, remove harness clips from radiator core support.
Remove radiator core support bolts, and remove radiator core support.
INSTALLATION
Installation is in the reverse order of removal.
Front Fender Nissan Pathfinder R53
Exploded View
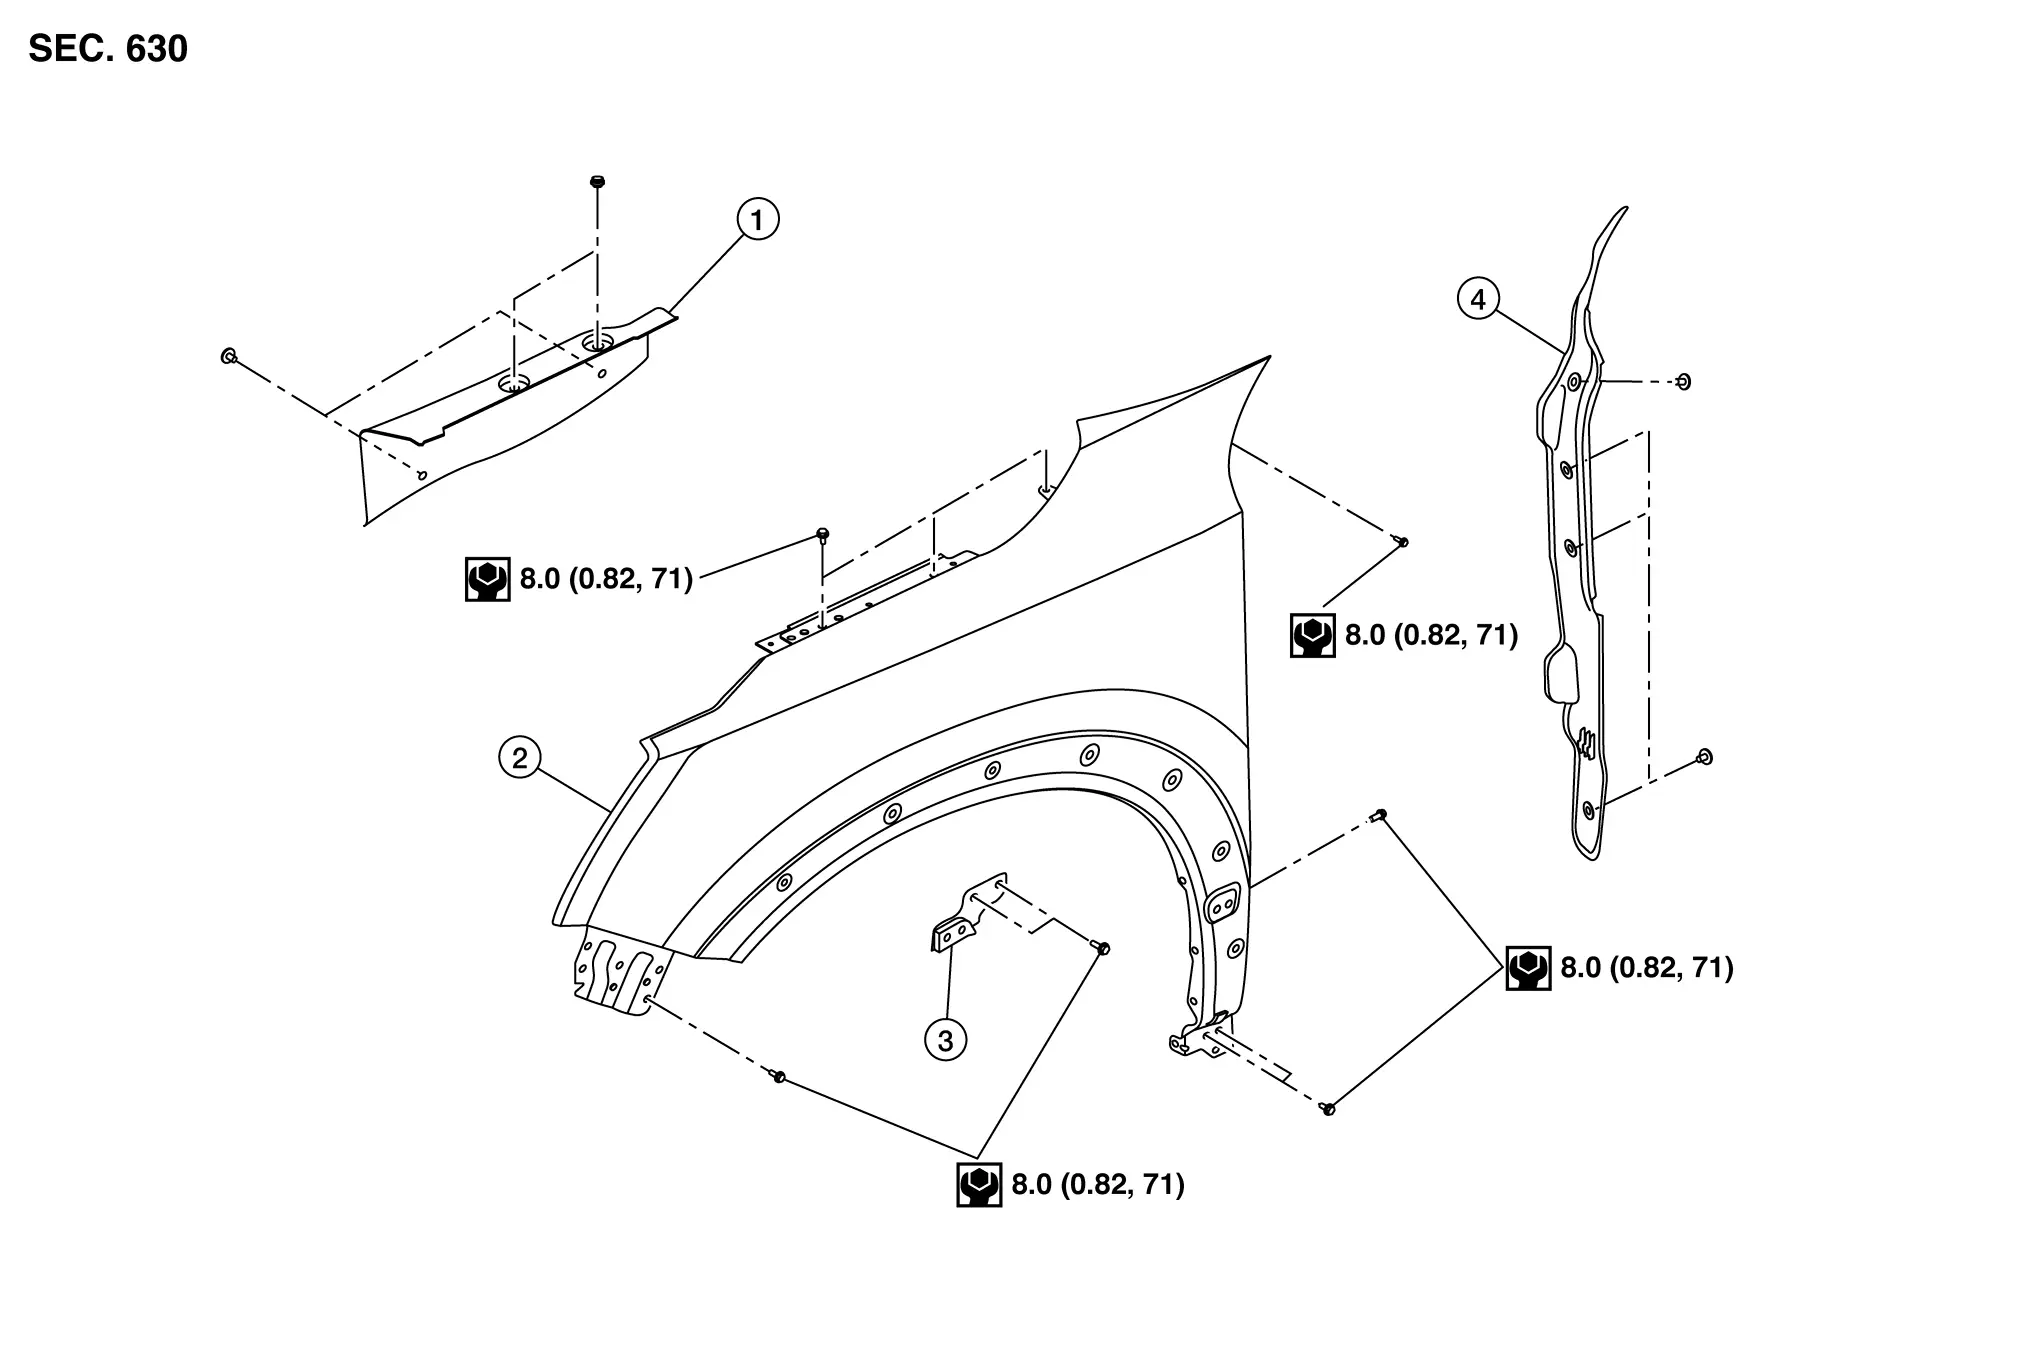
| 1. | Front fender ledge cover | 2. | Front fender | 3. | Front fender bracket |
| 4. | Front fender baffle |
 |
: Clip |
Removal and Installation
CAUTION:
Use shop cloths to protect body from damage during removal and installation.
REMOVAL
Remove front fender protector. Refer to Removal and Installation.
Remove front combination lamp. Refer to Removal and Installation.
Remove front bumper side bracket. Refer to Exploded View.
Using a suitable tool, remove front fender baffle clips, and remove front fender baffle. Refer to Exploded View.
Using a suitable tool, remove hood ledge cover clips and remove hood ledge cover. Refer to Exploded View.
Using a suitable tool, remove fender cover clips and remove fender cover. Refer to Exploded View.
Remove front fender bolts, and then remove front fender.
If necessary, remove front fender bracket bolts, and then remove front fender bracket.
INSTALLATION
Installation is in the reverse order of removal.
CAUTION:
-
After installation, apply the touch-up paint (body color) onto the head of front fender bolts.
-
After installation, adjust the following components as necessary.
-
Hood assembly. Refer to Adjustment.
-
Front door. Refer to Adjustment.
-
Inside Key Antenna Nissan Pathfinder SUV
Removal and Installation
CONSOLE
REMOVAL
Remove center console rear finisher. Refer to Exploded View.
Remove screws and remove inside key antenna (console).
INSTALLATION
Installation is in the reverse order of removal.
LUGGAGE ROOM
REMOVAL
Remove third row seat. Refer to Removal and Installation.
Using a suitable tool, remove clips and remove inside key antenna (luggage room).
Disconnect the harness connector from inside key antenna (luggage room).
INSTALLATION
Installation is in the reverse order of removal.
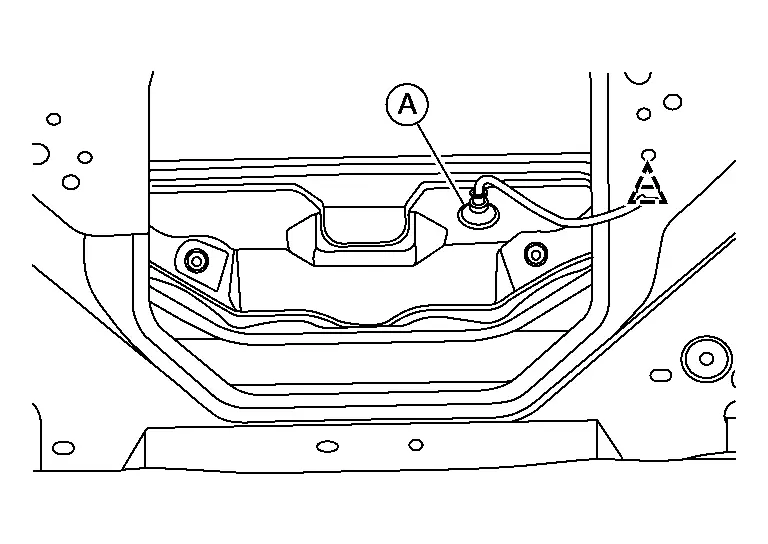
Intelligent Key Warning Buzzer Nissan Pathfinder Fifth generation
Removal and Installation
REMOVAL
Remove the rear bumper fascia. Refer Removal and Installation.
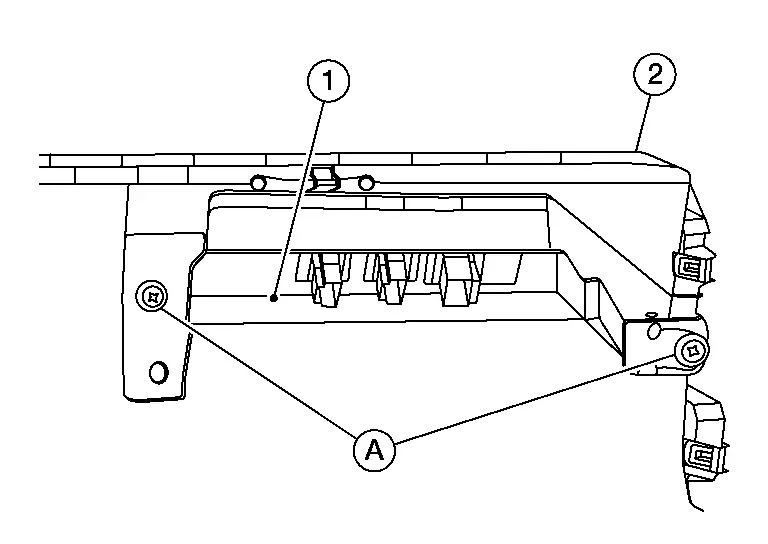
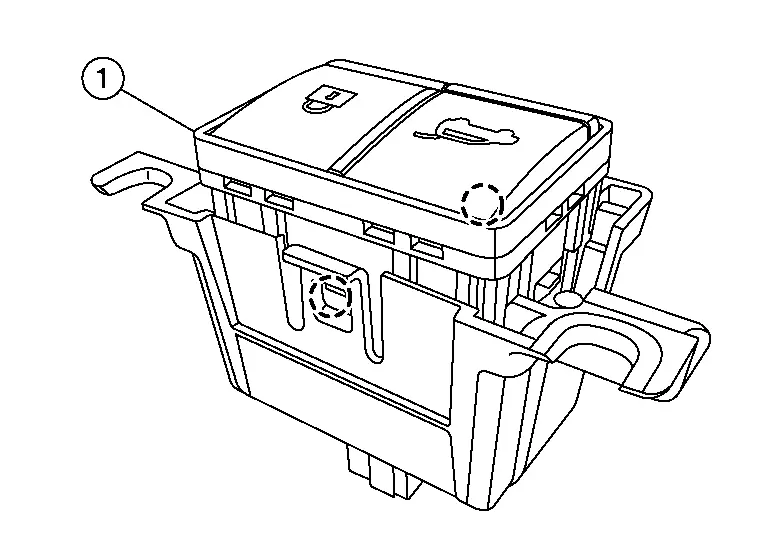
Remove bolts (A) from the Intelligent Key warning buzzer (1).
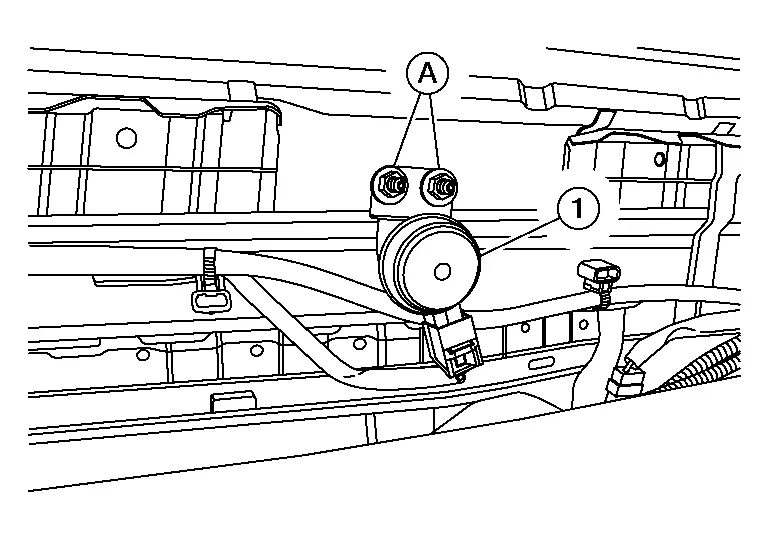
Disconnect the harness connector and remove the Intelligent Key warning buzzer.
INSTALLATION
Install in the reverse order of removal.
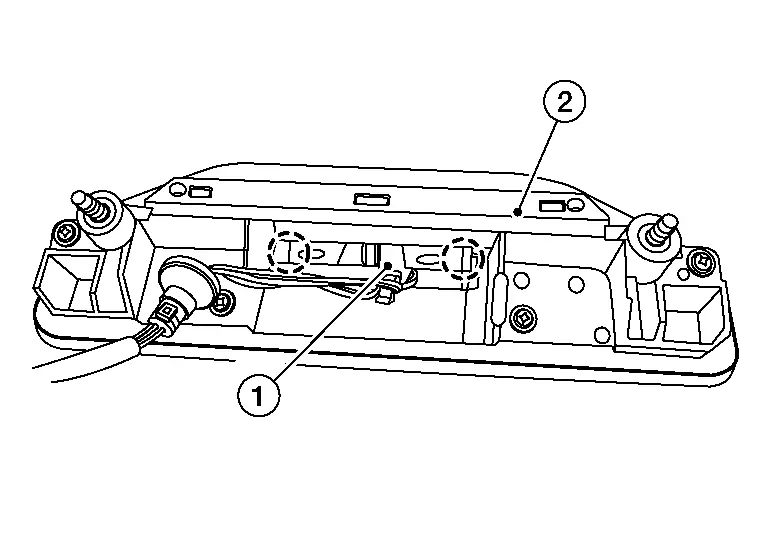
Intelligent Key Unit Nissan Pathfinder Fifth generation
Removal and Installation
REMOVAL
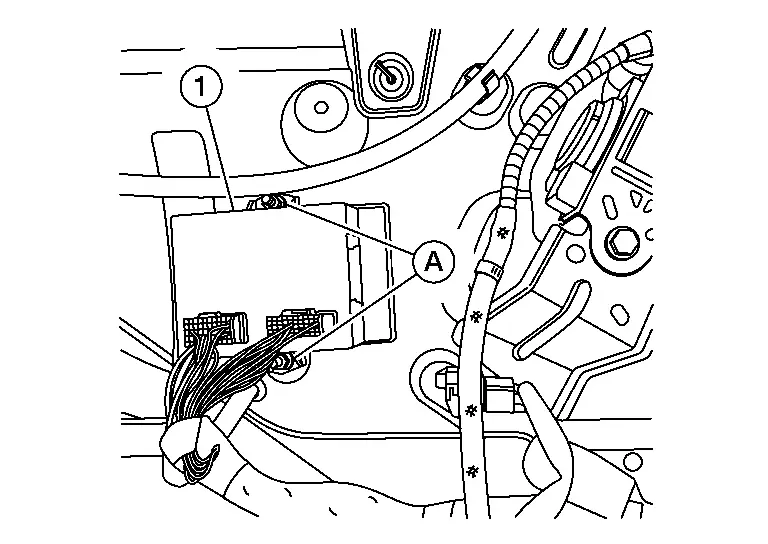
Remove glove box. Refer to Removal and Installation.
Remove Intelligent Key unit (1) from steering member (2) in direction shown.
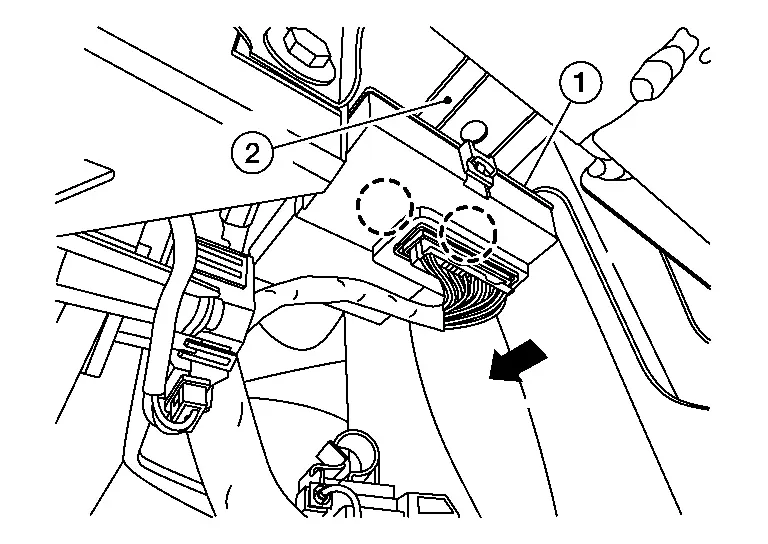
Disconnect the harness connector from Intelligent Key unit.
INSTALLATION
Installation is in the reverse order of removal.
CAUTION:
When replacing Intelligent Key unit, perform "ADDITIONAL SERVICE WHEN REPLACING INTELLIGENT KEY UNIT". Refer to Description.
Intelligent Key Battery Nissan Pathfinder Fifth generation
Removal and Installation
-
Release the lock knob at the back of the Intelligent Key and remove the mechanical key.
-
Insert remover tool (A) wrapped with a cloth into the slit of the corner and twist it to separate the upper part from the lower part as shown.
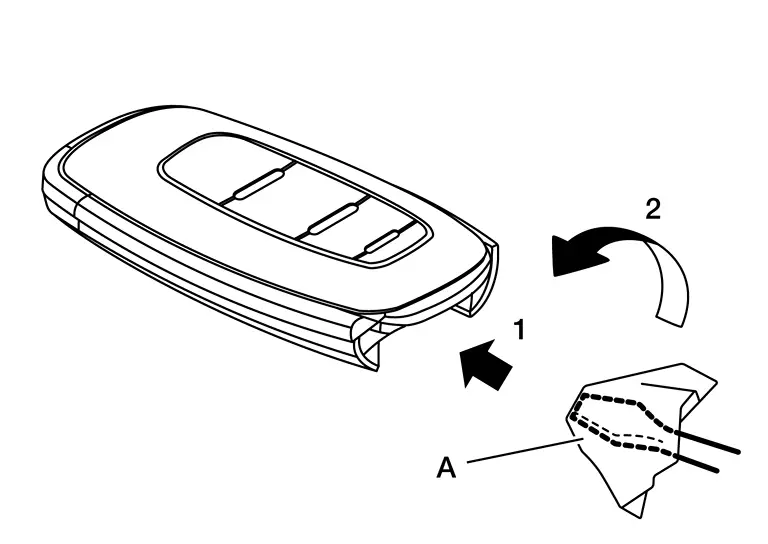
CAUTION:
-
Do not touch the circuit board or battery terminal.
-
The Intelligent Key is water-resistant. However, if it does get wet, immediately wipe it dry.
-
-
Replace the battery with new one.
Battery replacement : Coin-type lithium battery (CR2032) -
Align the tips of the upper and lower parts, and then push them together until it is securely closed as shown.

CAUTION:
-
When replacing battery, keep dirt, grease, and other foreign materials off the electrode contact area.
-
After replacing the battery, check that all Intelligent Key functions work normally.
-
Back Door Opener Switch Nissan Pathfinder 5th Gen
Removal and Installation
REMOVAL
-
Remove back door inner finisher. Refer to Removal and Installation.
-
Disconnect the harness connector from the back door opener switch connector.
-
Using a suitable tool, release clip and grommet (A) from back door.

: Clip -
Remove nuts (A) from back door (1) and remove back door outside handle assembly.
-
Using a suitable tool, release pawls and remove back door opener switch (1) from back door outside handle assembly (2).

: Pawl
INSTALLATION
Installation is in the reverse order of removal.
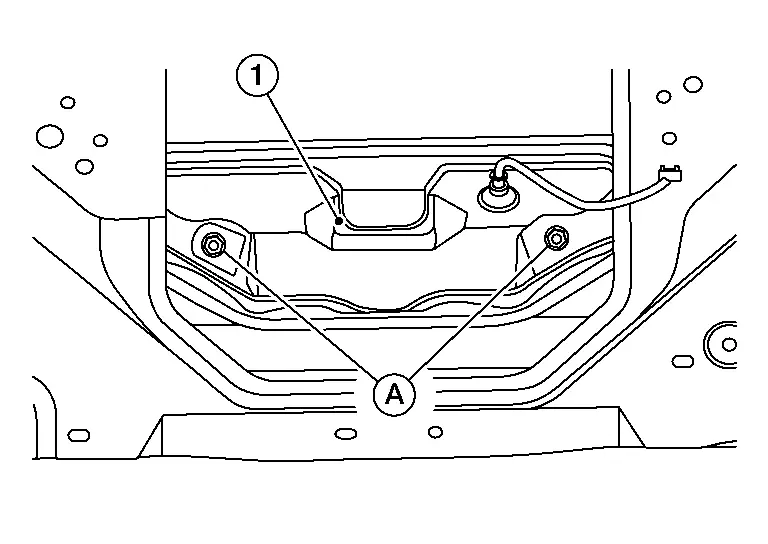
Automatic Back Door Control Unit Nissan Pathfinder 2022
Removal and Installation
REMOVAL
Remove luggage side lower finisher (LH). Refer to Removal and Installation.
Remove nuts (A) from automatic back door control unit, and remove automatic back door control unit (1).
Disconnect the harness connector from automatic back door control unit.
INSTALLATION
Installation is in the reverse order of removal.
CAUTION:
When replacing automatic back door control unit, perform "ADDITIONAL SERVICE WHEN REPLACING AUTOMATIC BACK DOOR CONTROL UNIT". Refer to Description.
Automatic Back Door Switch Nissan Pathfinder Fifth generation
Removal and Installation
REMOVAL
Remove instrument lower panel (LH). Refer to Removal and Installation.
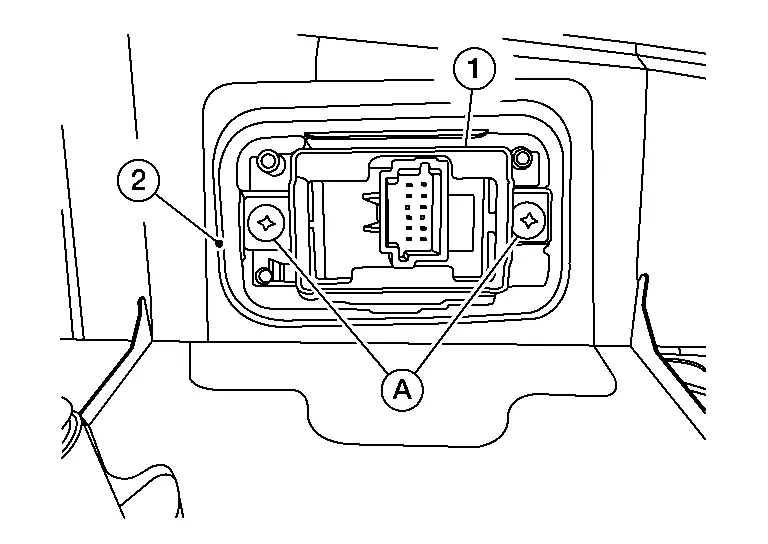
Remove screws (A) and remove switch bracket (1) from instrument lower panel [(LH) (2)].
Using a suitable tool, release pawls and remove back door switch (1) from switch bracket (2).
 |
: Pawl |
INSTALLATION
Installation is in the reverse order of removal.
Automatic Back Door Lock and Close Switch Assembly Nissan Pathfinder 2022
Removal and Installation
REMOVAL
Remove back door lower finisher. Refer to Removal and Installation.
Remove screws (A) and remove automatic back door lock and close switch assembly (1) from back door lower finisher (2).
Using a suitable tool, release pawls and remove automatic back door lock and close switch assembly (1) from switch bracket.
 |
: Pawl |
INSTALLATION
Installation is in the reverse order of removal.

Nissan Pathfinder (R53) 2022-2026 Service Manual
Removal and Installation
- Radiator Core Support. Radiator Core Support
- Front Fender
- Inside Key Antenna
- Intelligent Key Warning Buzzer
- Intelligent Key Unit
- Intelligent Key Battery
- Back Door Opener Switch
- Automatic Back Door Control Unit
- Automatic Back Door Switch
- Automatic Back Door Lock and Close Switch Assembly
Contact Us
Nissan Pathfinder Info Center
Email: info@nipathfinder.com
Phone: +1 (800) 123-4567
Address: 123 Pathfinder Blvd, Nashville, TN 37214, USA
Working Hours: Mon–Fri, 9:00 AM – 5:00 PM (EST)
