Nissan Pathfinder: Roof - Basic Inspection
- Diagnosis and Repair Work Flow
- Inspection and Adjustment. Additional Service When Replacing Control Unit
Diagnosis and Repair Work Flow Nissan Pathfinder SUV
Work Flow
OVERALL SEQUENCE
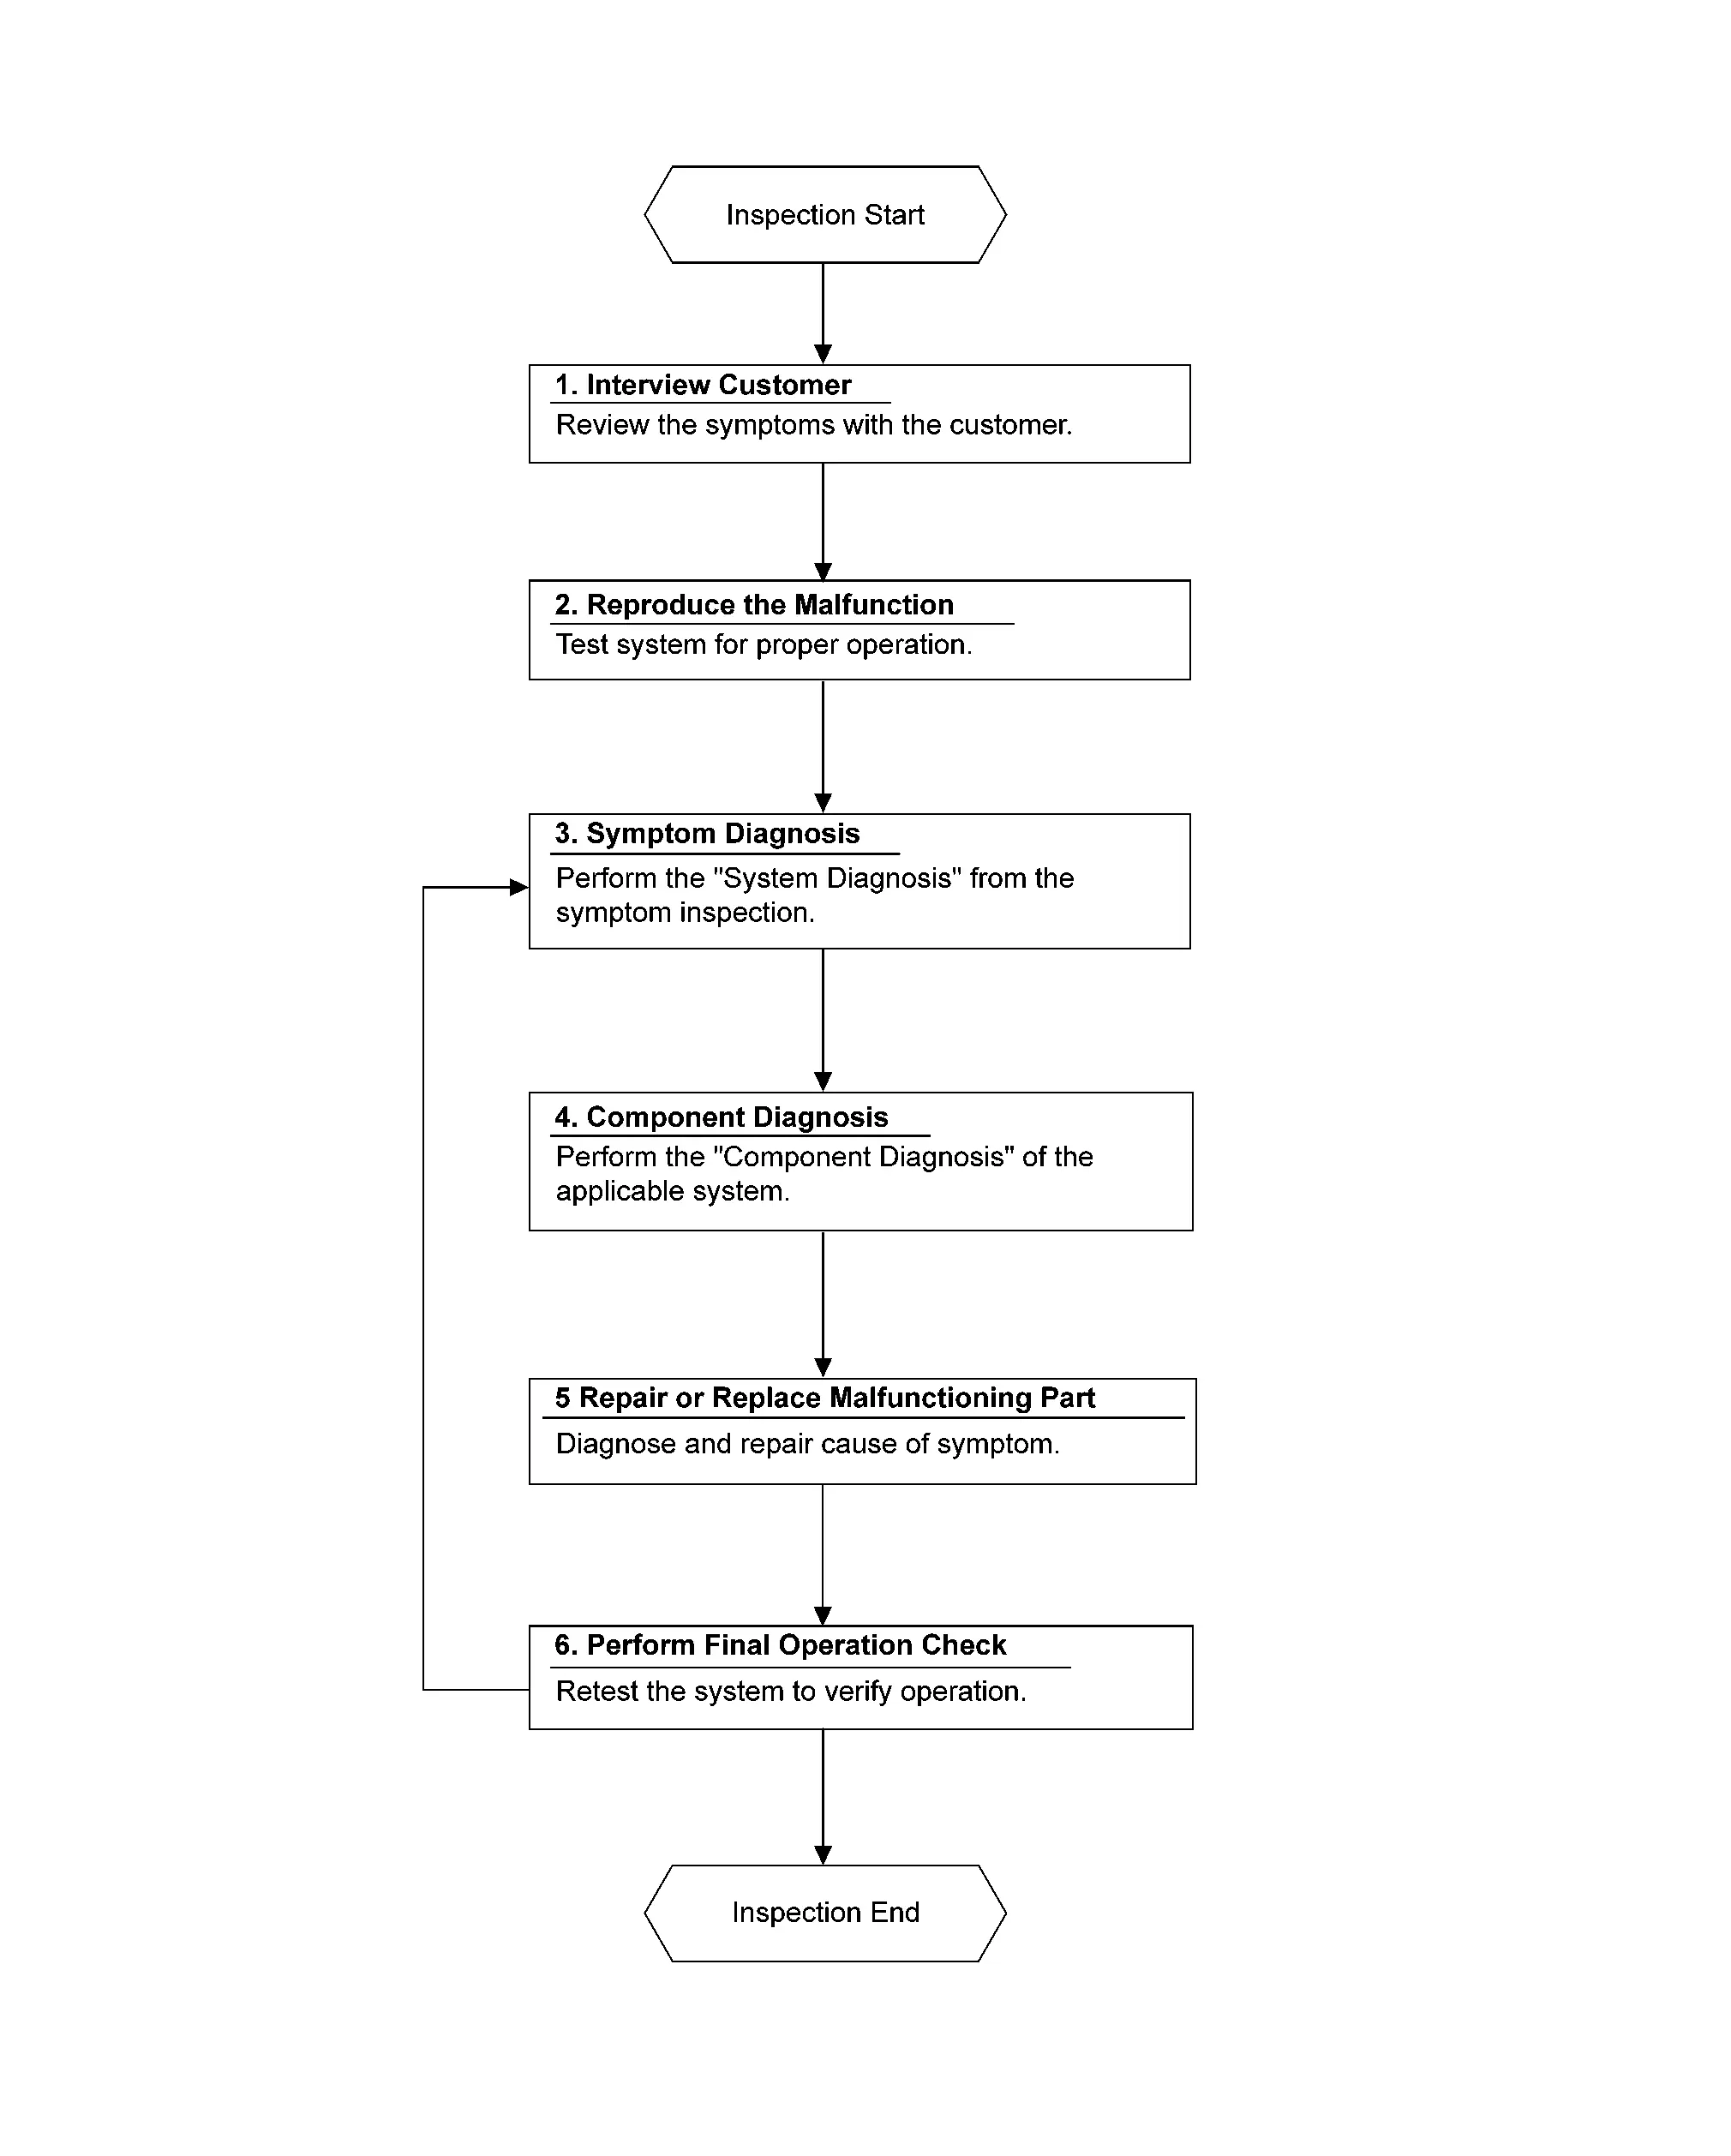
DETAILED FLOW
INTERVIEW CUSTOMER
Interview the customer to obtain as much information as possible about the conditions and environment under which the malfunction occurred.
>>
GO TO 2.
REPRODUCE THE MALFUNCTION
Check the malfunction on the Nissan Pathfinder vehicle that the customer describes.
Inspect the relation of the symptoms and the condition when the symptoms occur.
>>
GO TO 3.
SYMPTOM DIAGNOSIS
Use Symptom diagnosis from the symptom inspection result in step 2 and then identify where to start performing the diagnosis based on possible causes and symptoms.
>>
GO TO 4.
COMPONENT DIAGNOSIS
Perform the diagnosis with Component diagnosis of the applicable system.
>>
GO TO 5.
REPAIR OR REPLACE MALFUNCTIONING PART
Repair or replace the specified malfunctioning parts.
>>
GO TO 6.
PERFORM FINAL OPERATION CHECK
Check that malfunctions are not reproduced when obtaining the malfunction information from the customer, referring to the symptom inspection result in step 2.
Are the malfunctions corrected?
YES>>Inspection End.
NO>>GO TO 3.
Inspection and Adjustment. Additional Service When Replacing Control Unit Nissan Pathfinder 5th Gen
Special Repair Requirement
INITIALIZATION PROCEDURE
 NOTE:
NOTE:
Vehicle speed must be less than 2 MPH (3 km/h) throughout entire process.
 NOTE:
NOTE:
Ignition switch must be ON.
Initialization process
-
Press and hold GLASS CLOSE/TILT DOWN on moonroof switch assembly.
-
The glass panel shall move towards hard stop. Glass panel detects the hard stop and rest at full tilt up position.
-
Once glass motor stops, shade initialization process shall begin.
-
Shade shall move towards close position.
-
Shade detects the hard stop and rest at full close position.
-
After motor stops, release GLASS CLOSE/TILT DOWN on the moonroof switch assembly. Initialization process is complete.
Teach process
-
Within 6 seconds after step 6 is completed, press and hold GLASS CLOSE/TILT DOWN on moonroof switch assembly.
-
Shade shall start to move within 4 seconds from close position to open position.
-
Glass shall move from tilt up to close to full open postion.
-
Glass shall move from open position to close position.
-
Shade shall move from open position to close position.
-
After motor stop, release GLASS CLOSE/TILT DOWN on the moonroof switch assembly.
-
Ignition switch OFF. Teach process is complete.
RE-INITIALIZATION PROCEDURE
 NOTE:
NOTE:
For pre-existing components already installed in sunroof.
 NOTE:
NOTE:
Both glass and shade must be in close postion before re-initialization takes place.
 NOTE:
NOTE:
Vehicle speed must be less than 2 MPH (3 km/h) throughout entire process.
 NOTE:
NOTE:
Ignition switch must be ON.
-
Press GLASS CLOSE/TILT DOWN on moonroof switch assembly and operate glass towards full close position.
-
Press SHADE CLOSE switch and operate the shade towards full close position.
-
After glass and shade both stop at full close position, press and hold CLOSE/TILT DOWN on moonroof switch assembly for at least 10 seconds.
-
Glass shall detect hard stop and rest at full tilt up position, shade will detect hard stop and rest at full close position.
-
Release GLASS CLOSE/TILT DOWN on moonroof switch assembly.
-
Within 6 seconds after step 5 is completed, press and hold GLASS CLOSE/TILT DOWN on moonroof switch assembly.
-
Shade shall start to move within 4 seconds from close position to open position.
-
Glass shall move from tilt up to close to full open postion.
-
Glass shall move from open position to close position.
-
Shade shall move from open position to close position.
-
After motor stop, release GLASS CLOSE/TILT DOWN on the moonroof switch assembly.
-
Ignition switch OFF. Teach process is complete.
ANTI-PINCH FUNCTION
Moonroof
-
Fully open the moonroof to the full open position.
-
Place a piece of wood at the fully closed position.
-
Close the moonroof completely with auto-slide close function.
-
Moonroof should make contact and then tilt up or travel in reverse for 4.92 in. (125 mm).
Sunshade
-
Open the sunshade to the full open position.
-
Place a piece of wood at the fully closed position.
-
Close the sunshade completely with auto-slide close function.
-
Sunshade should make contact and then travel in reverse for 3.94 in. (100 mm).
CAUTION:
-
Do not test the anti-pinch function with your hands or other body parts because they may be pinched.
-
Depending on the environment and driving conditions, if a similar impact or load is applied to the moonroof it may lower.
-
Test the auto-slide operation before inspection when the initialization procedure is performed.
-
Perform the initialization procedure when the auto-slide operation or anti-pinch function does not operate normally.

Nissan Pathfinder (R53) 2022-2026 Service Manual
Basic Inspection
- Diagnosis and Repair Work Flow
- Inspection and Adjustment. Additional Service When Replacing Control Unit
Contact Us
Nissan Pathfinder Info Center
Email: info@nipathfinder.com
Phone: +1 (800) 123-4567
Address: 123 Pathfinder Blvd, Nashville, TN 37214, USA
Working Hours: Mon–Fri, 9:00 AM – 5:00 PM (EST)
