Nissan Pathfinder: Power Outlet - Removal and Installation
Wireless Charger Unit Nissan Pathfinder 5th Gen
Removal and Installation
REMOVAL
Remove electric shift selector. Refer to Removal and Installation.
Remove the front console tray. Refer to Exploded View.
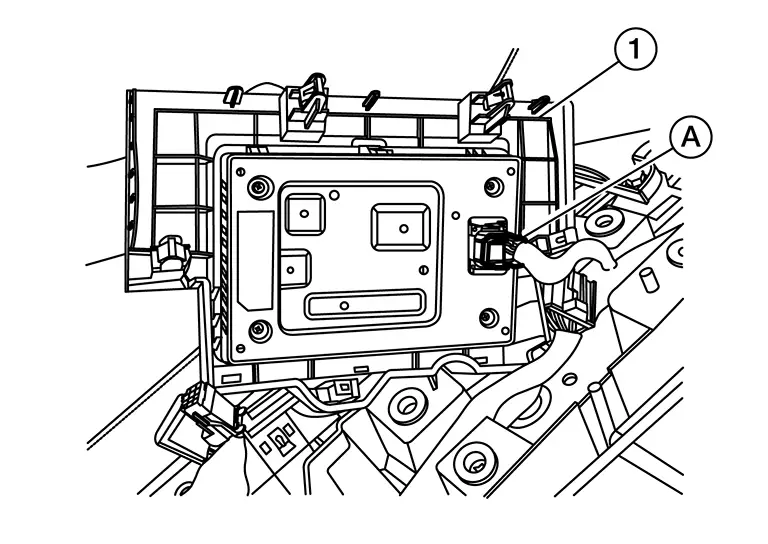
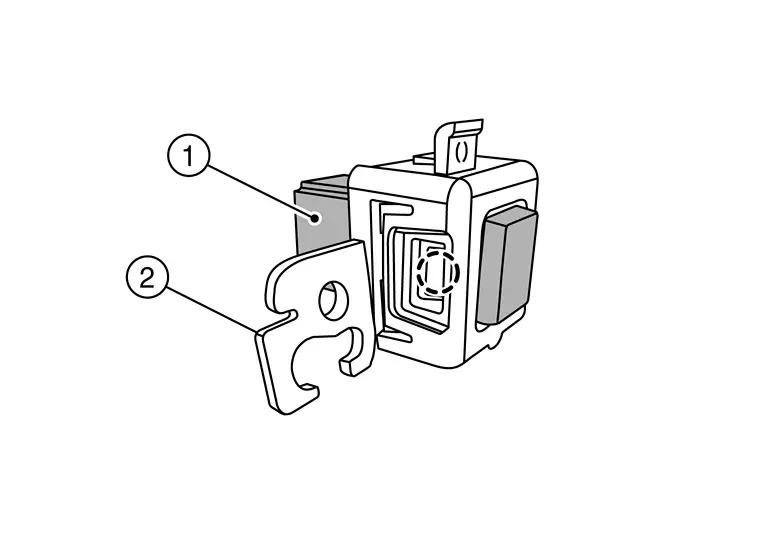
Disconnect the harness connector (A) from the wireless charger unit (1).
Using a suitable tool, release pawls and remove the wireless charger unit (1) from the front console tray (2).
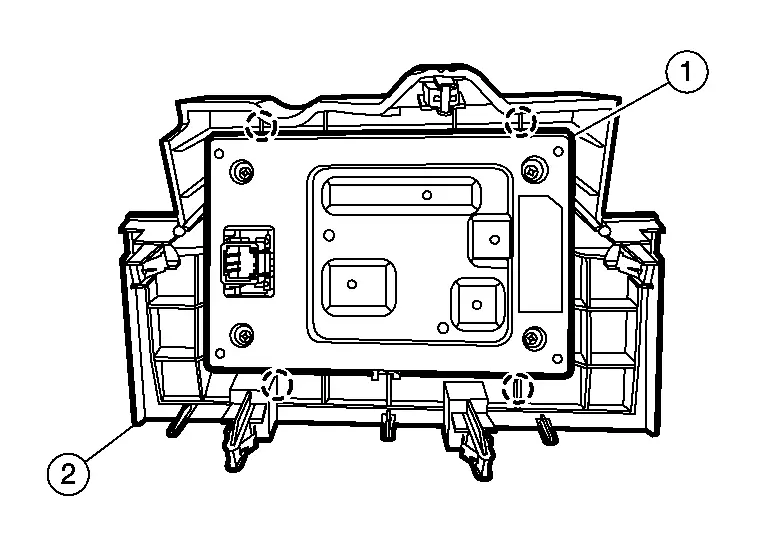
 |
: Pawl |
INSTALLATION
Note the following, and install in the reverse order of removal.
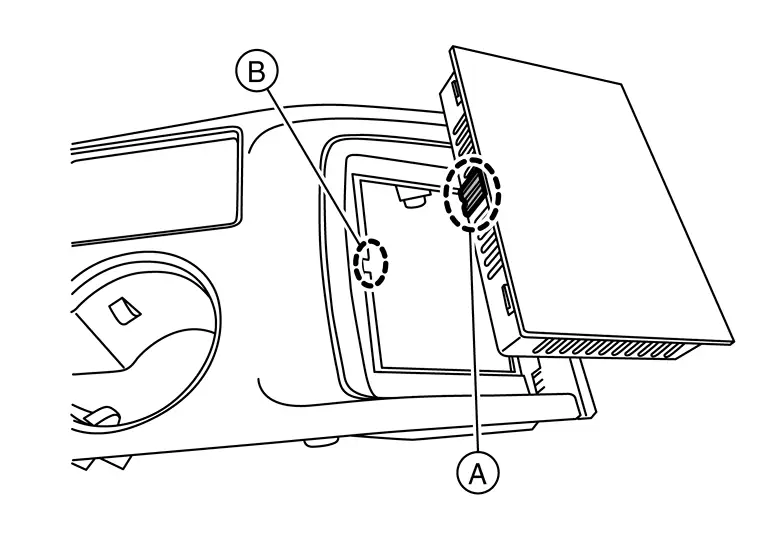
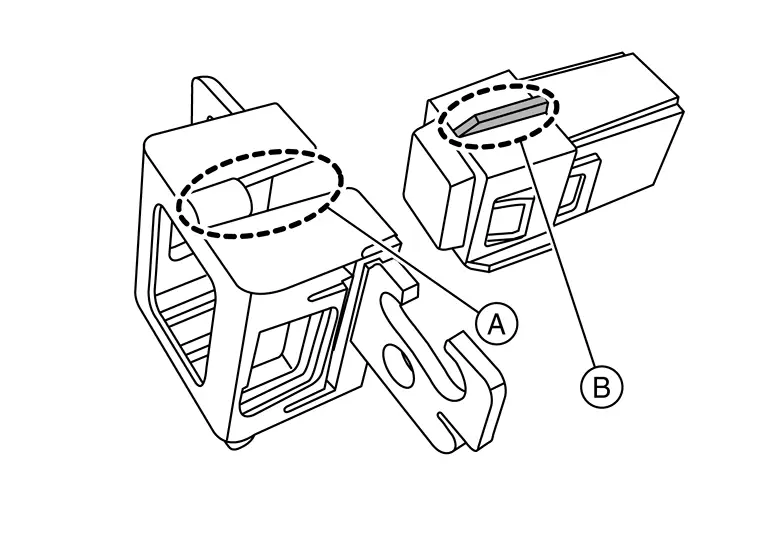
Align tab (A) with cut out (B) when installing wireless charger unit.
CAUTION:
If replacing wireless charger unit, perform "ADDITIONAL SERVICE WHEN REPLACING WIRELESS CHARGER UNIT”. Refer to Description.
Wireless Charger Indicator Nissan Pathfinder SUV
Removal and Installation
REMOVAL
Remove cluster lid C lower. Refer to Removal and Installation.
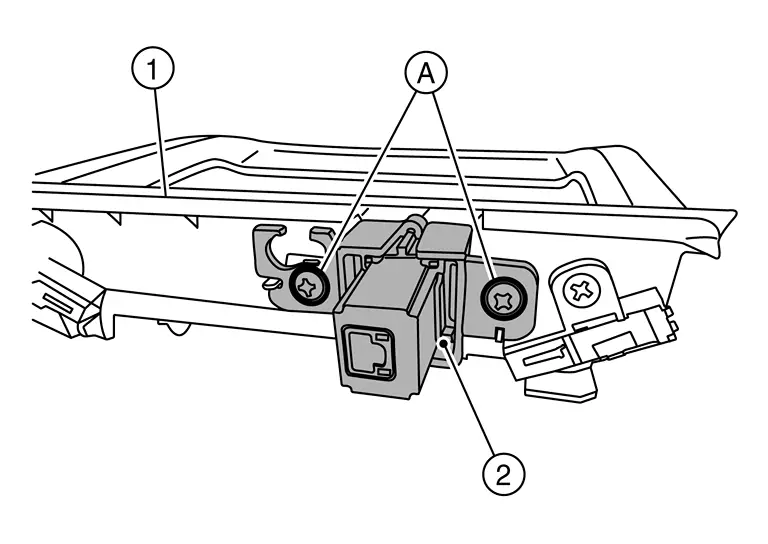
Remove screws (A) and remove wireless charger indicator (2) from cluster lid C lower (1).
Using a suitable tool, release pawls and separate wireless charger indicator (1) from bracket (2).
 |
: Pawl |
INSTALLATION
Installation is in the reverse order of removal.
Align tab (B) with cut out (A) when installing wireless charger indicator and bracket.
 |
: Pawl |

Nissan Pathfinder (R53) 2022-2026 Service Manual
Removal and Installation
Contact Us
Nissan Pathfinder Info Center
Email: info@nipathfinder.com
Phone: +1 (800) 123-4567
Address: 123 Pathfinder Blvd, Nashville, TN 37214, USA
Working Hours: Mon–Fri, 9:00 AM – 5:00 PM (EST)
