Nissan Pathfinder: Audio, Visual & Navigation System - Removal and Installation
Av Control Unit Nissan Pathfinder 2022
Exploded View
WITH NAVIGATION
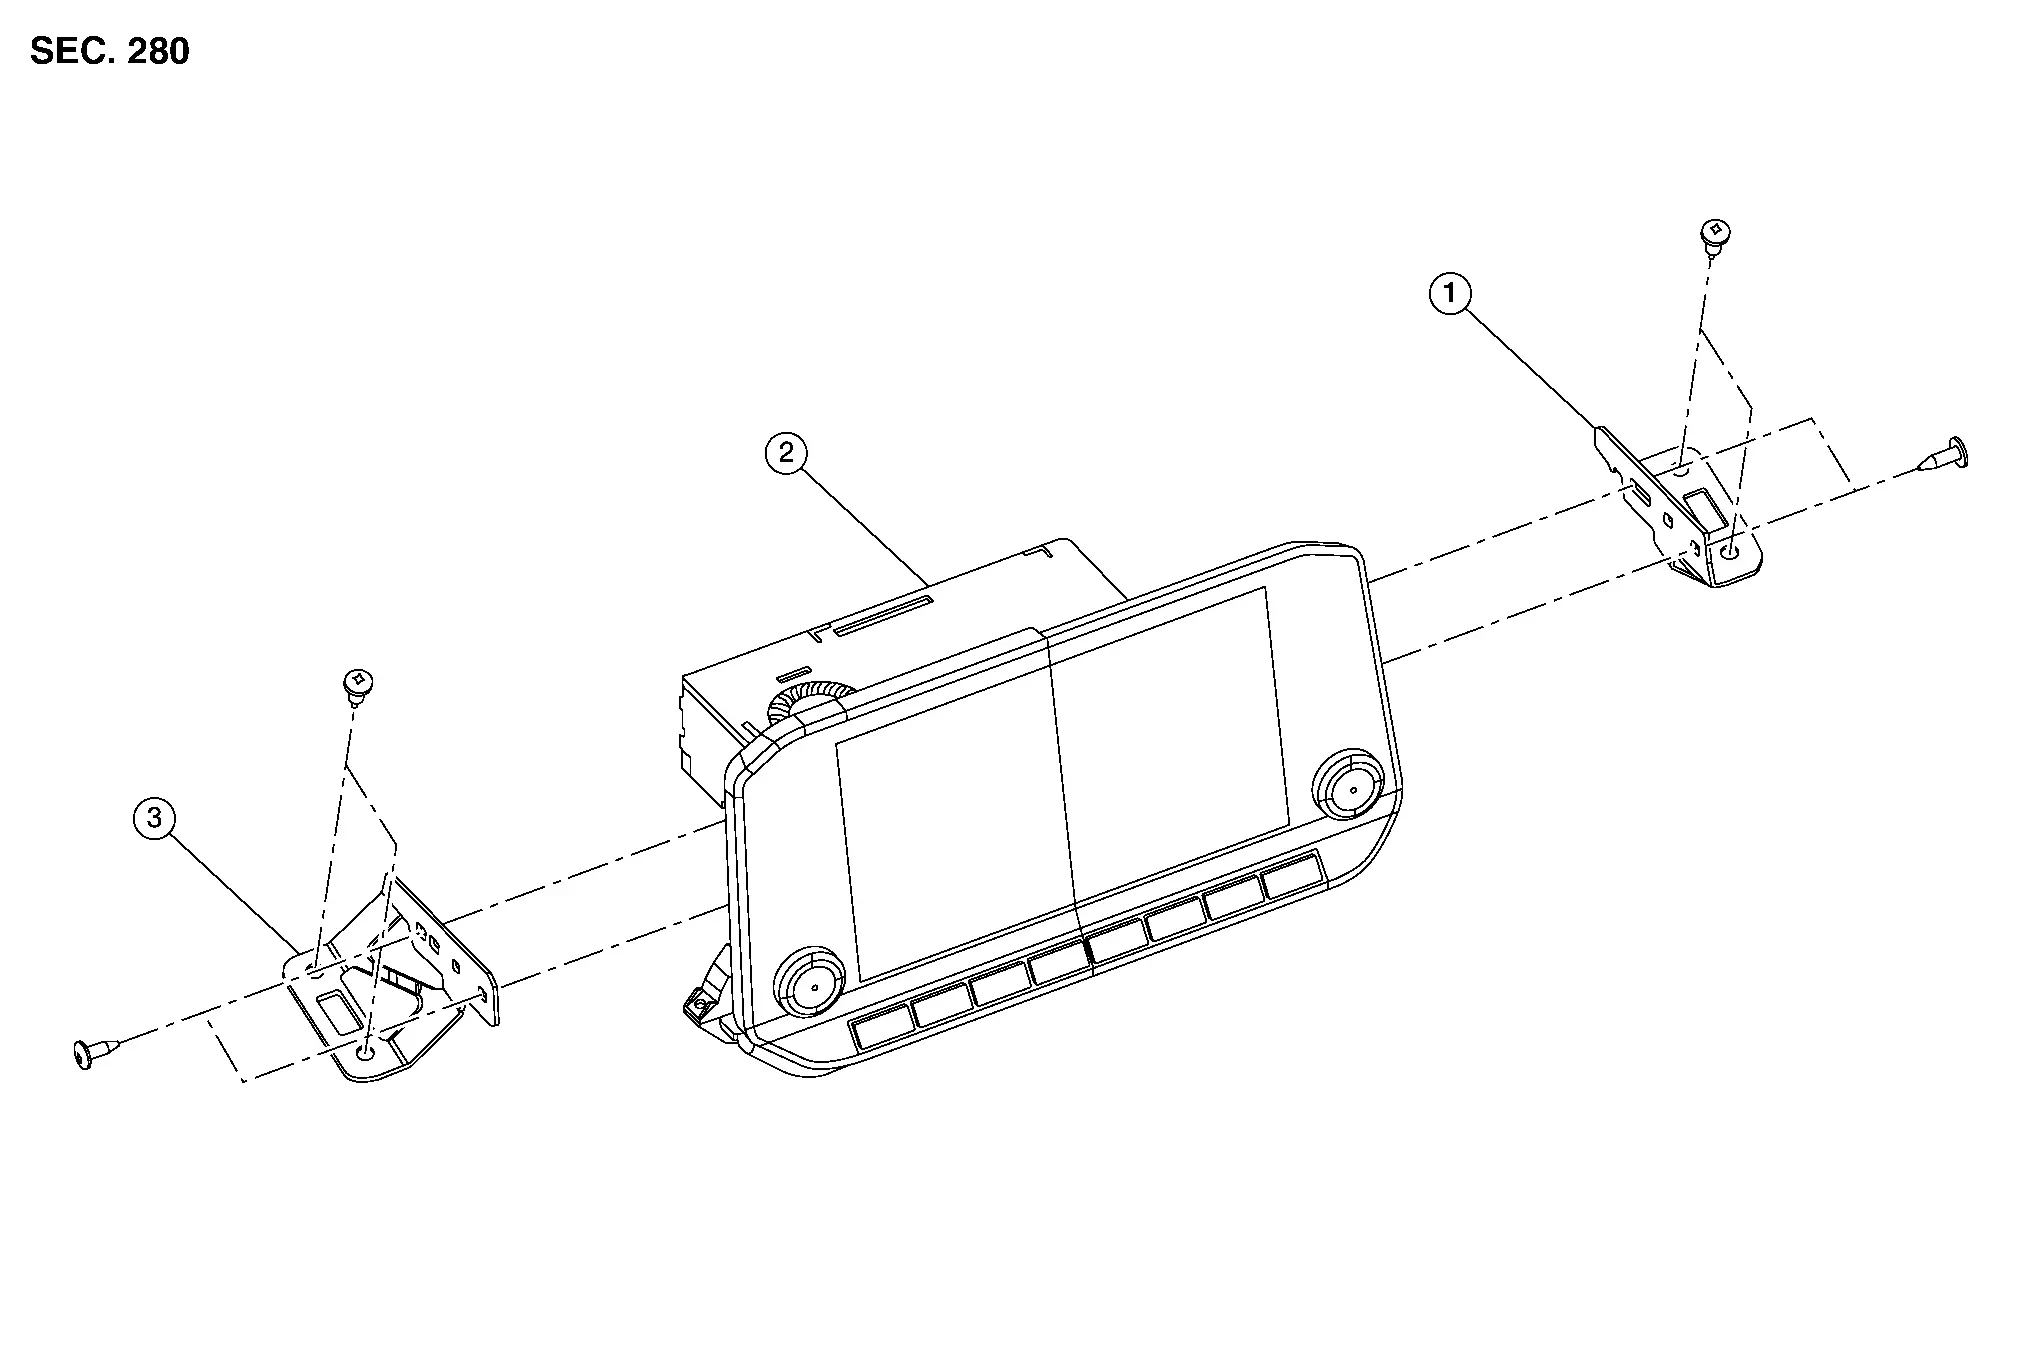
| 1. | AV control unit bracket (RH) | 2. | AV control unit | 3. | AV control unit bracket (LH) |
WITHOUT NAVIGATION
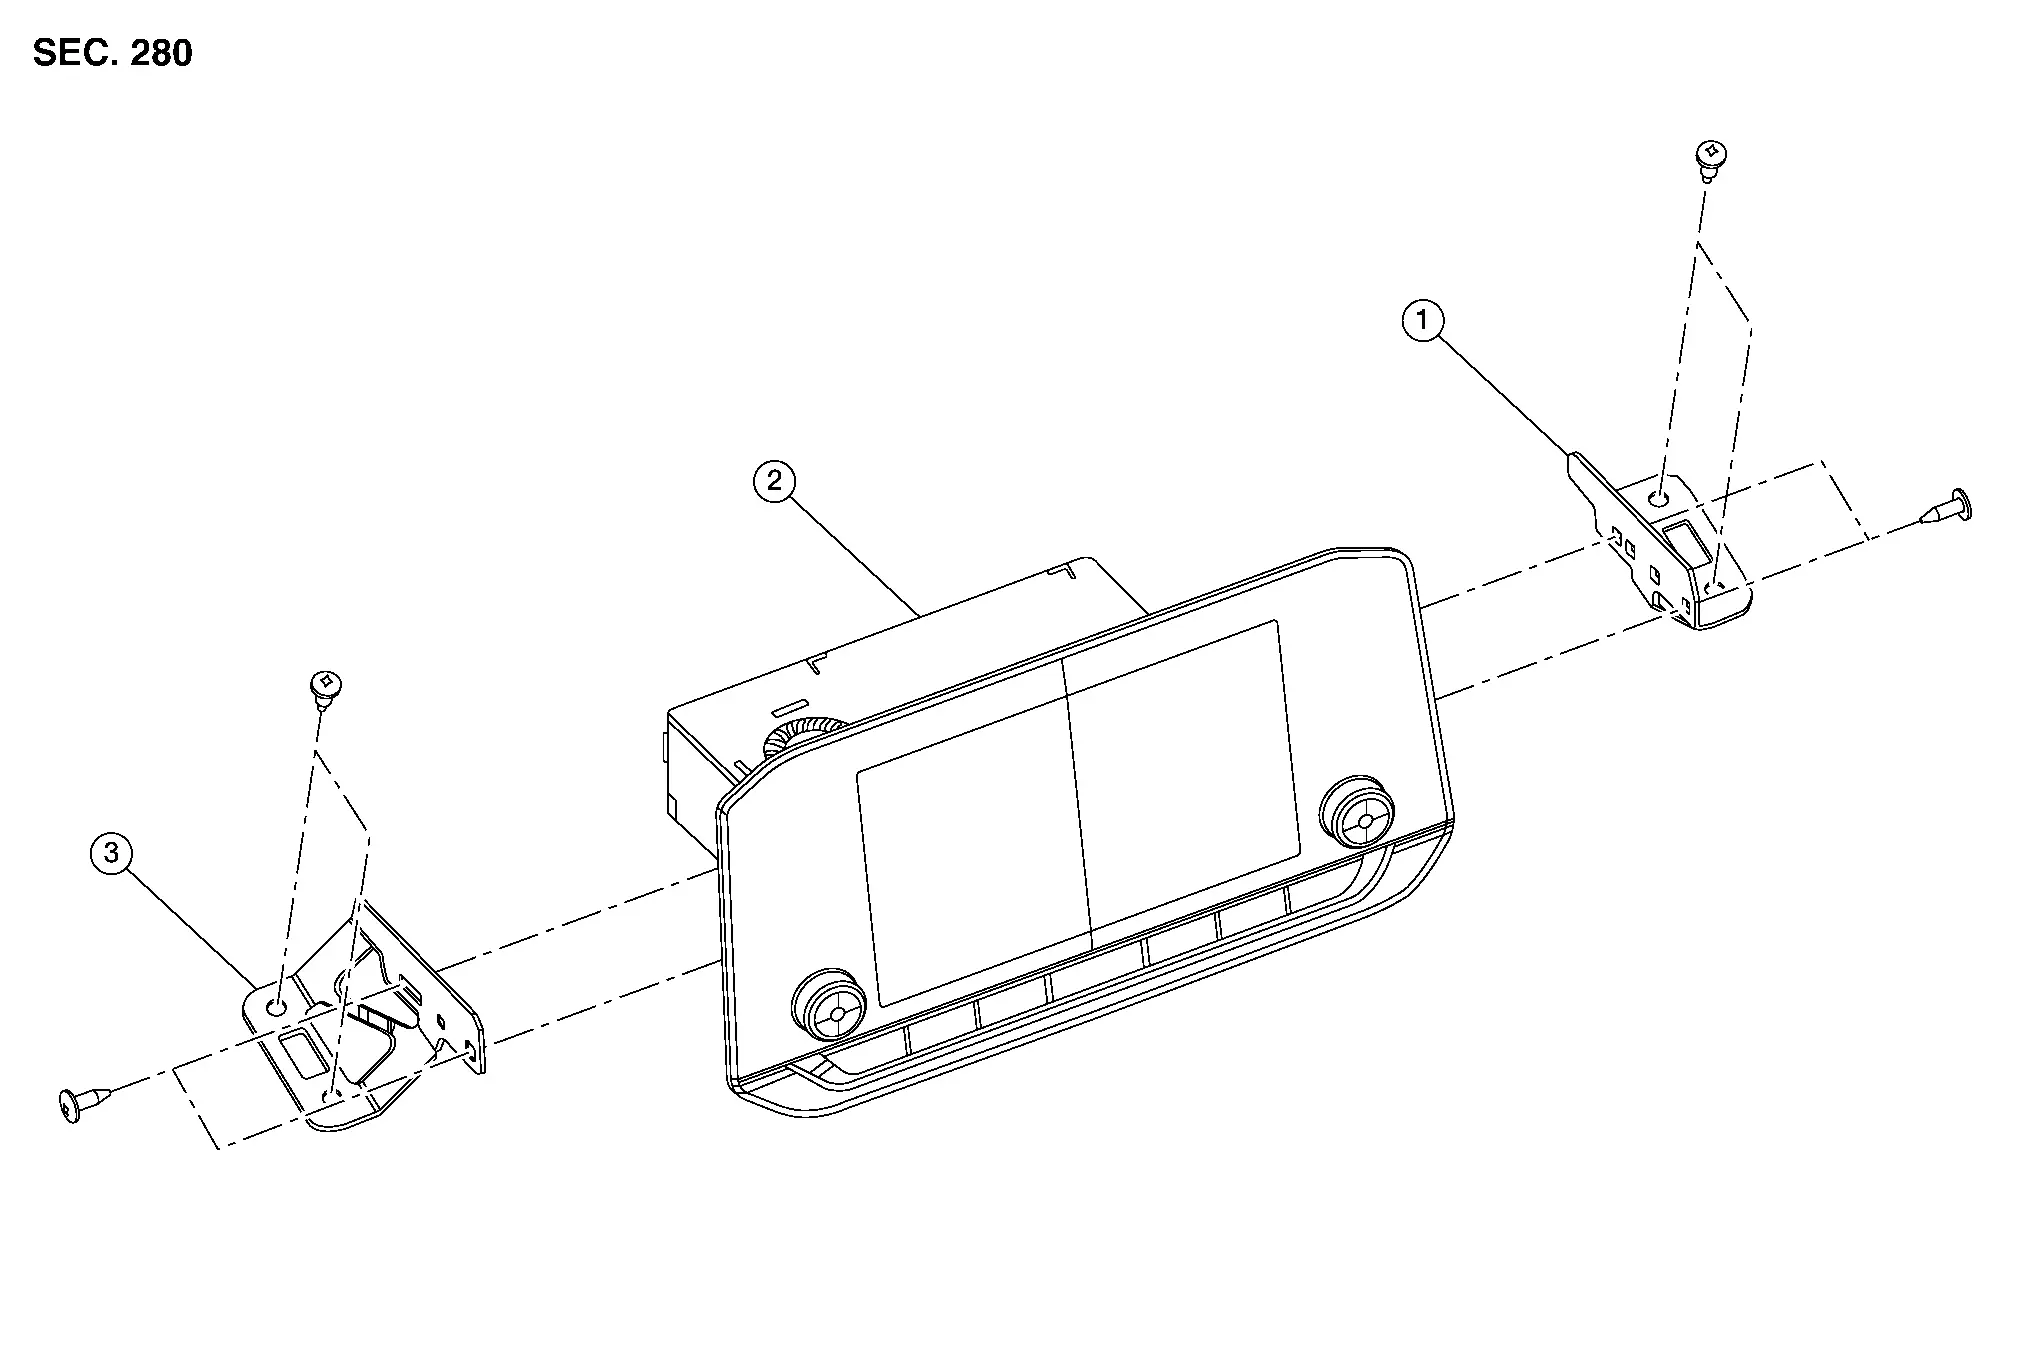
| 1. | AV control unit bracket (RH) | 2. | AV control unit | 3. | AV control unit bracket (LH) |
Removal and Installation
REMOVAL
CAUTION:
-
Remove battery terminal and AV control unit after a lapse of 30 seconds or more after placing ignition switch OFF.
-
If replacing AV control unit, perform "ADDITIONAL SERVICE WHEN REPLACING AV CONTROL UNIT". Refer toDescription.
 NOTE:
NOTE:
After the ignition switch is placed in the OFF position, the AV control unit continues operating for approximately 30 seconds.
Therefore, data corruption may occur if battery voltage is cut off within 30 seconds.
Disconnect the negative battery terminal. Refer to Removal and Installation.
Remove cluster lid D. Refer to Removal and Installation.
Remove the screws, then pull out the AV control unit.
Disconnect the harness connectors from the AV control unit.
Remove AV control unit.
INSTALLATION
Installation is in the reverse order of removal.
CAUTION:
If replacing AV control unit, perform "ADDITIONAL SERVICE WHEN REPLACING AV CONTROL UNIT". Refer toDescription.
Tcu Nissan Pathfinder SUV
Removal and Installation
REMOVAL
CAUTION:
-
If replacing TCU, perform "ADDITIONAL SERVICE WHEN REPLACING TCU". Refer to Description.
-
When replacing the TCU, a new TCU must be used. The functions controlled by the TCU do not operate properly if a TCU from another Nissan Pathfinder vehicle is used.
Remove the front console finisher (LH). Refer to Exploded View.
Remove nuts (A).
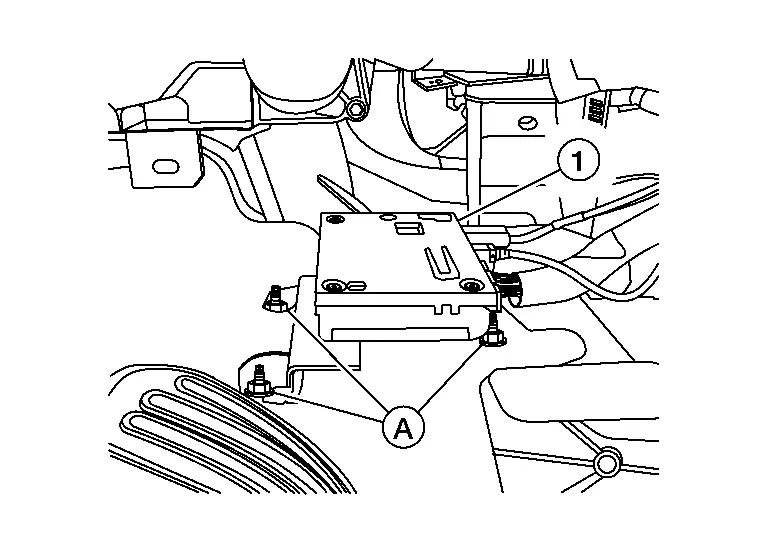
Disconnect the harness connectors from the TCU (1) and remove the TCU.
Remove the bracket screw and the bracket from TCU.
 NOTE:
NOTE:
If it is difficult to remove the harness clip and the antenna feeder clip, remove the screw first and pull TCU forward together with the bracket. Be careful not to apply a load to the harness.
INSTALLATION
Installation is in the reverse order of removal.
CAUTION:
If replacing TCU, perform "ADDITIONAL SERVICE WHEN REPLACING TCU". Refer to Description.
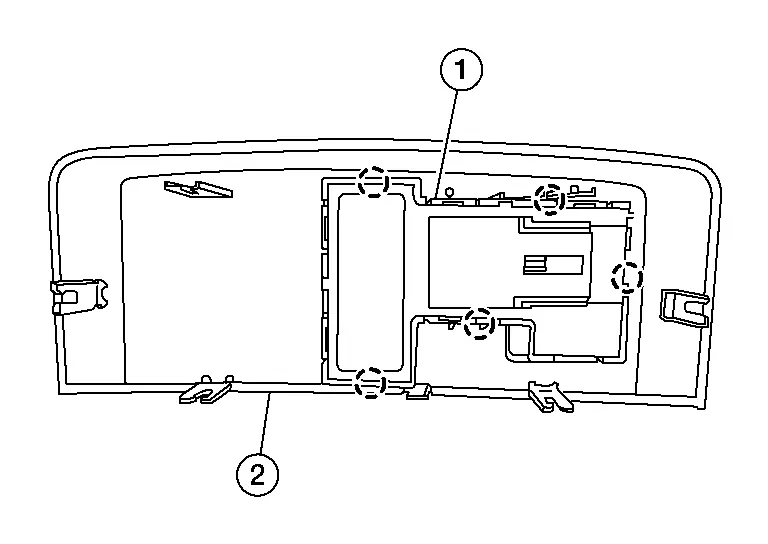
Microphone Nissan Pathfinder 2022
Removal and Installation
REMOVAL
Remove the front room/map lamp assembly. Refer to Removal and Installation.
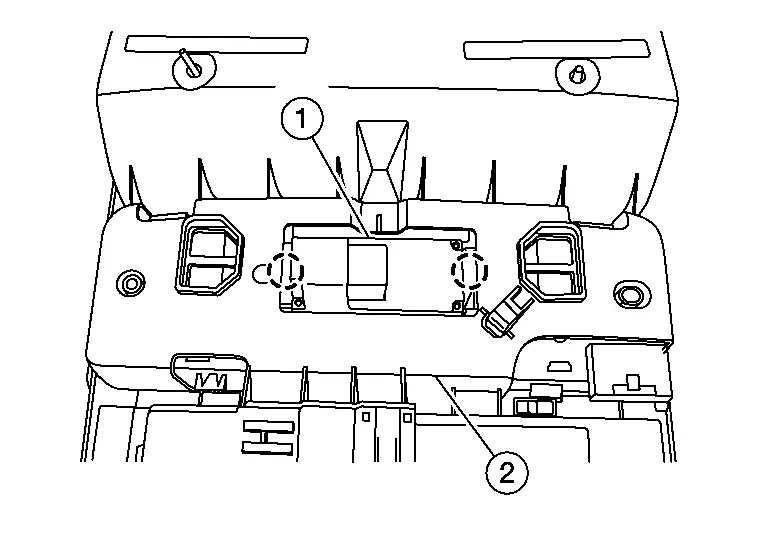
Release the pawls, then remove the microphone (1) from the front room/map lamp assembly (2).
INSTALLATION
Installation is in the reverse order of removal.
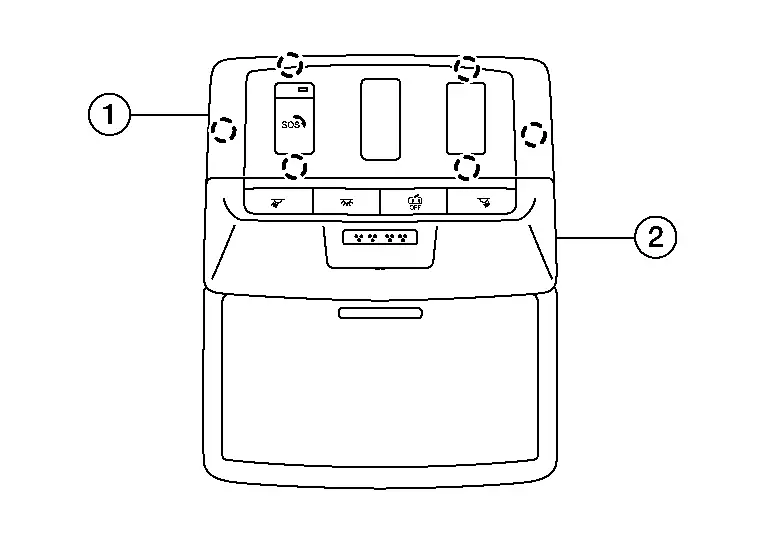
Telematics Switch Nissan Pathfinder 2022
Removal and Installation
REMOVAL
Remove front room/map lamp assembly. Refer to Removal and Installation.
Using a suitable tool, release pawls and separate switch panel finisher (1) from front room/map lamp assembly (2).
Using a suitable tool, release pawls and remove telematics switch (1) from switch panel finisher (2).
INSTALLATION
Installation is the reverse order of removal.
Telematics Antenna Nissan Pathfinder R53
Removal and Installation
REMOVAL
Remove the instrument panel assembly. Refer to Removal and Installation.
Remove screw and remove telematics antenna.
INSTALLATION
Installation is in the reverse order of removal.

Nissan Pathfinder (R53) 2022-2026 Service Manual
Removal and Installation
Contact Us
Nissan Pathfinder Info Center
Email: info@nipathfinder.com
Phone: +1 (800) 123-4567
Address: 123 Pathfinder Blvd, Nashville, TN 37214, USA
Working Hours: Mon–Fri, 9:00 AM – 5:00 PM (EST)
