Nissan Pathfinder: Door & Lock - Hood Lock
Exploded View
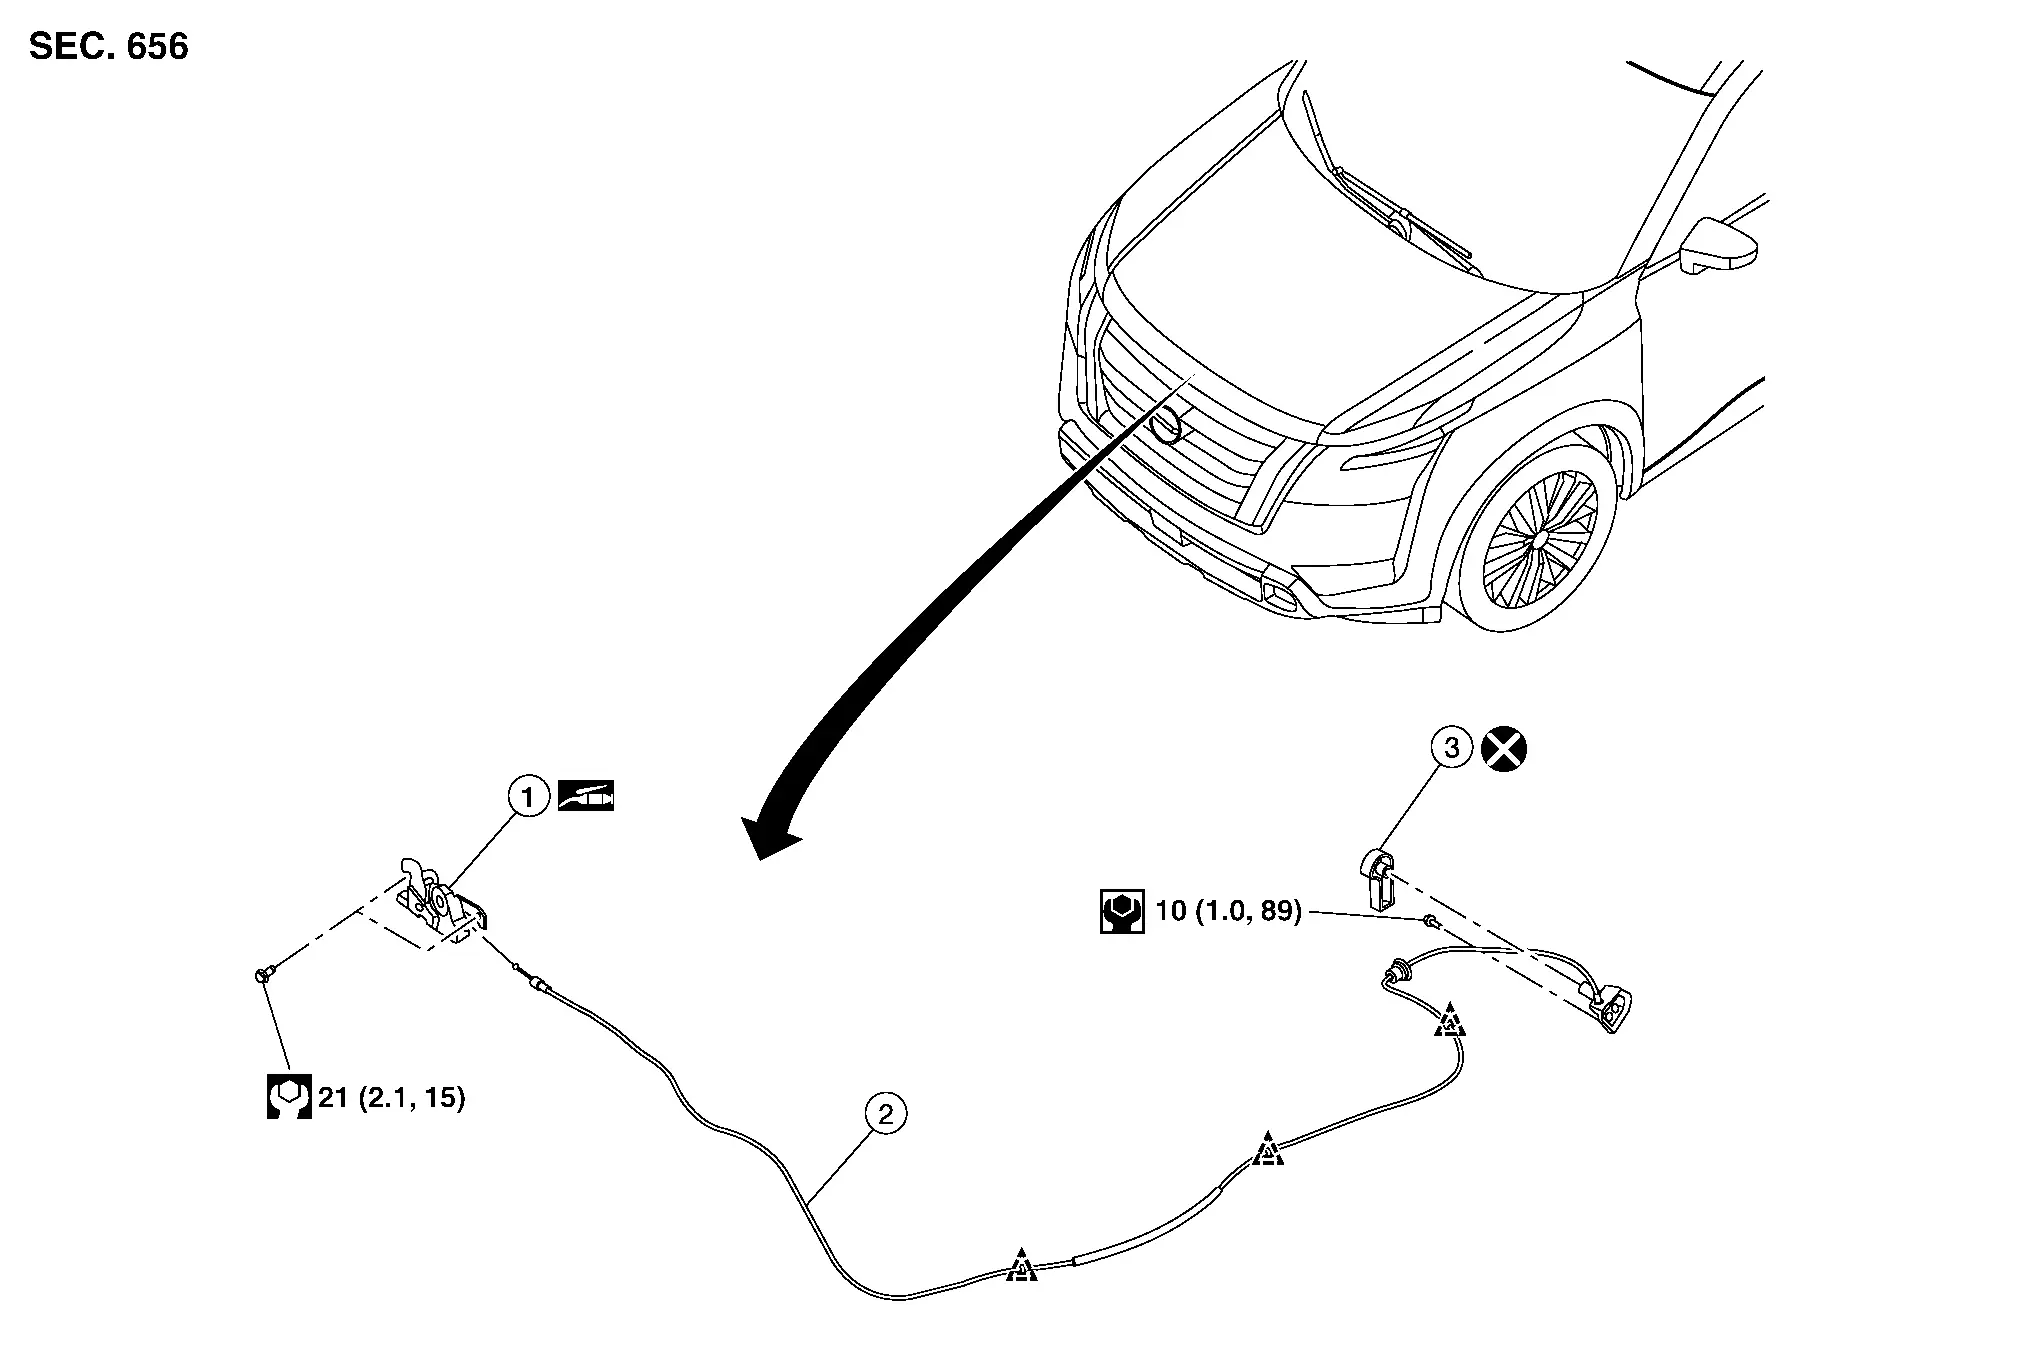
| 1. | Hood lock | 2. | Hood lock release cable assembly | 3. | Hood lock release handle |
 |
: Clip |
Hood Lock Nissan Pathfinder SUV
Removal and Installation
REMOVAL
Remove front grill cover. Refer to Removal and Installation.
Disconnect hood lock release cable and secondary latch cable from hood lock.
Remove bolts, disconnect the harness connector and remove hood lock.
INSTALLATION
Installation is in the reverse order of removal.
CAUTION:
-
Tighten bolts to specified torque. Refer to Exploded View.
-
Check that hood lock release cable and secondary latch cable are properly engaged with hood lock.
-
After installation, perform hood assembly adjustment procedure. Refer to Adjustment.
-
After adjusting, perform hood lock inspection. Refer to Inspection.
Inspection
 NOTE:
NOTE:
If hood lock cable is bent or deformed, replace it.
Check that secondary latch is properly engaged with secondary striker with hood’s own weight.
While operating hood lock release handle, carefully check that front end of hood assembly is raised by approximately 20.0 mm (0.79 in). Also check that hood lock release handle returns to original position.
Check that hood lock release handle operates at 49 N (5.0 kg-m, 11.0 ft-lb) or below.
Install so that static closing force of hood is 240-490 N (24.5-50.0 kg–m, 54-110.2 ft–lb).
 NOTE:
NOTE:
-
Do not exert vertical force on right side and left side of hood lock.
-
Do not press simultaneously on both sides.
Check hood lock lubrication condition. If necessary, apply a suitable multi-purpose grease to hood lock assembly.
Hood Lock Release Handle Nissan Pathfinder
Removal and Installation
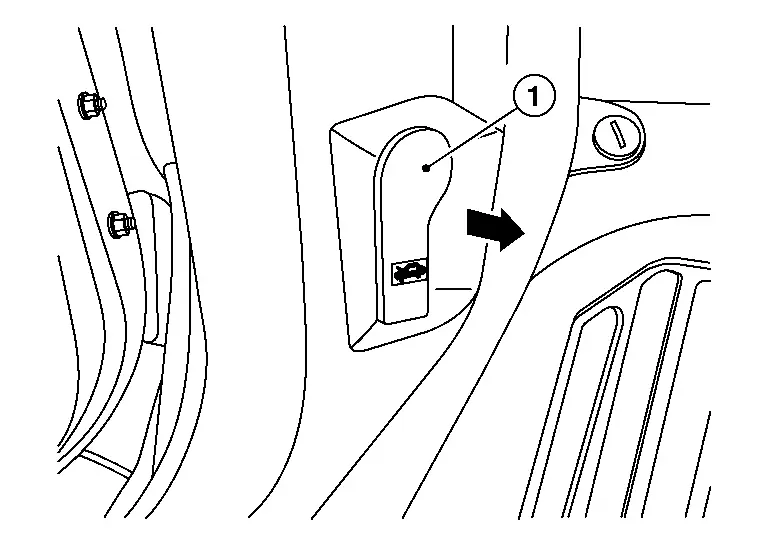
REMOVAL
Using a suitable tool, release hood lock release handle (1) in direction shown.
INSTALLATION
Installation is in the reverse order of removal.
Hood Lock Release Cable Assembly Nissan Pathfinder R53
Removal and Installation
REMOVAL
Remove hood lock. Refer to Removal and Installation.
Remove front fender protector (LH). Refer to Removal and Installation.
Using a suitable tool, release hood lock cable assembly clips.
Remove dash side finisher (LH). Refer to Exploded View.
Remove hood lock release cable assembly mounting bolt.
Remove grommet on lower dash, and pull the hood lock release cable assembly toward the passenger compartment.
CAUTION:
While pulling, be careful not to damage (peel) outside of hood lock release cable.
INSTALLATION
Note the following items, and then install in the reverse order of removal.
CAUTION:
-
Be careful not to bend cable too much; keep radius of 100 mm (3.94 in) or more.
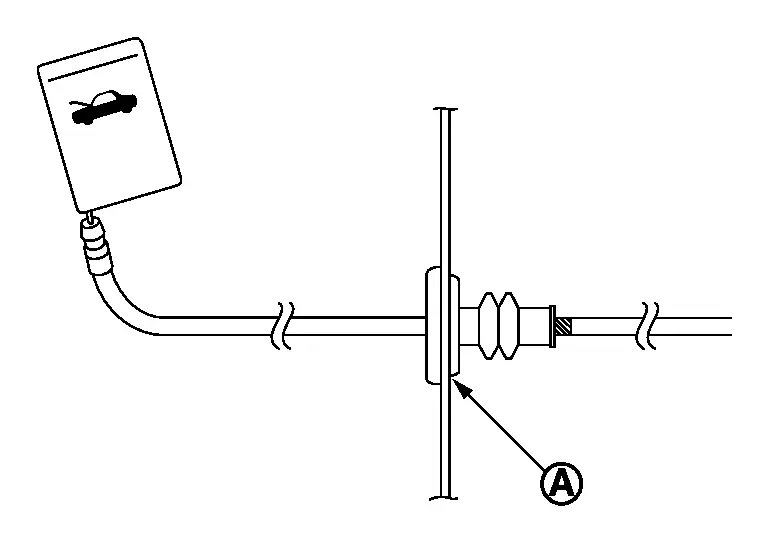
-
Check that cable is not offset from positioning grommet, and apply sealant to grommet (A) properly.
-
Check that hood lock release cable is properly engaged with hood lock.
-
After installation, perform hood adjustment procedure. Refer to Adjustment.
-
After installation, perform hood lock inspection. Refer to Inspection.

Nissan Pathfinder (R53) 2022-2026 Service Manual
Hood Lock
Contact Us
Nissan Pathfinder Info Center
Email: info@nipathfinder.com
Phone: +1 (800) 123-4567
Address: 123 Pathfinder Blvd, Nashville, TN 37214, USA
Working Hours: Mon–Fri, 9:00 AM – 5:00 PM (EST)
