Nissan Pathfinder: Door & Lock - Front Door Lock
Exploded View
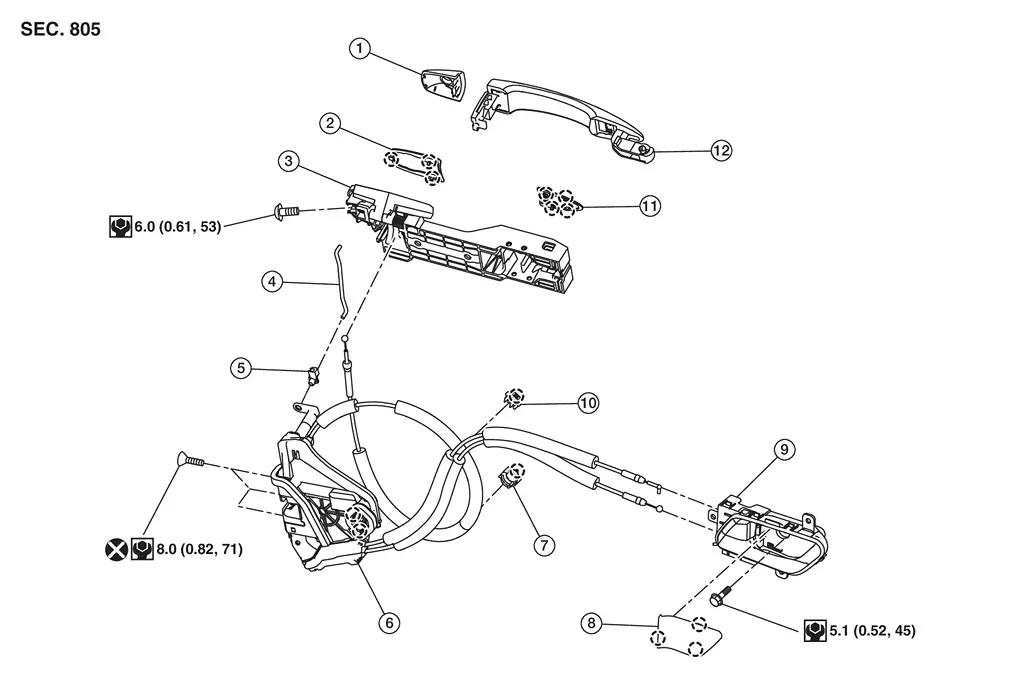
| 1. | Front door outside handle escutcheon | 2. | Rear gasket | 3. | Front door outside handle bracket |
| 4. |
Key rod (If equipped) |
5. |
Key rod holder (If equipped) |
6. | Front door lock assembly |
| 7. | Front door outside handle cable clip | 8. | Front door inside handle cap | 9. | Front door inside handle |
| 10. | Front door inside handle cable clip | 11. | Front gasket | 12. | Front door outside handle grip |
 |
: Pawl |
Front Door Lock Nissan Pathfinder 2026
Removal and Installation
REMOVAL
Remove front door finisher. Refer to Removal and Installation.
Remove vapor barrier.
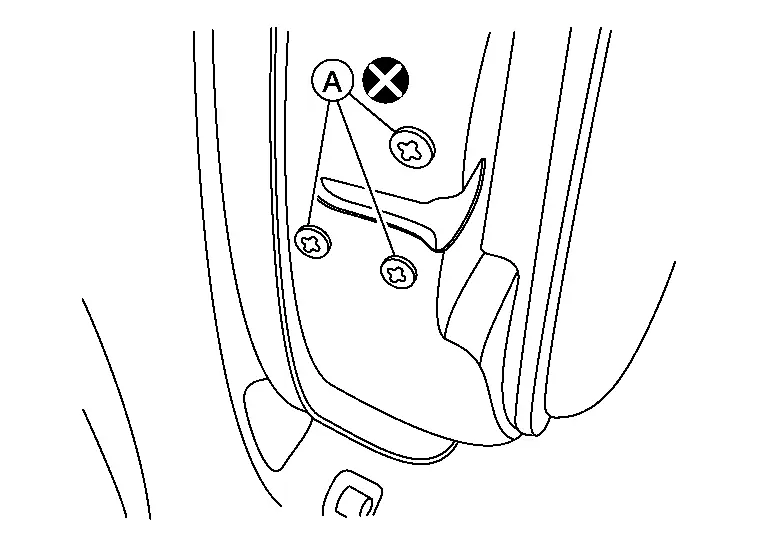
Remove front door lock bolts (A).
CAUTION:
Do not reuse front door lock bolts.
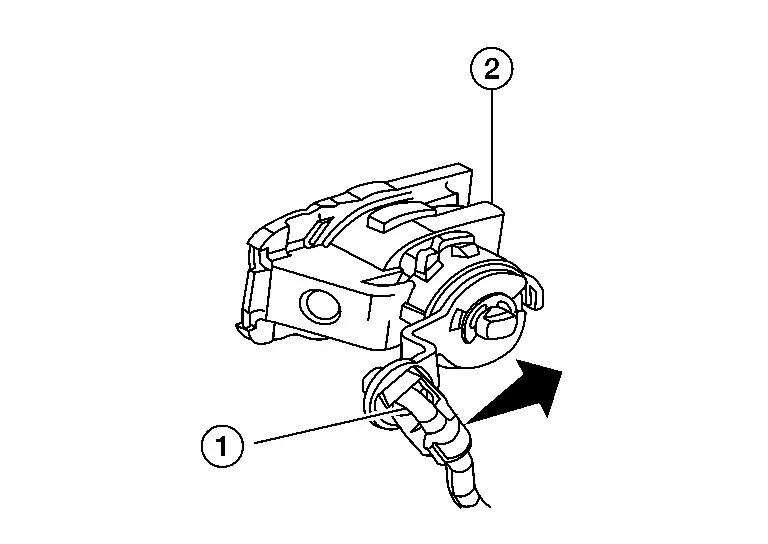
Disconnect door key cylinder rod (LH only) (1) from front door lock (2) (LH only).

Disconnect door lock cables from inside handle and outside handle.
Disconnect the harness connector from the front door lock and remove.
INSTALLATION
Installation is in the reverse order of removal.
CAUTION:
-
Do not reuse front door lock bolts.
-
Tighten bolts to specification. Refer to Exploded View.
-
After installation, check that door lock cables are properly engaged to inside handle and outside handle bracket.
-
When installing door key cylinder rod (LH only), be sure to rotate door key cylinder rod holder until a click is felt.
-
After installation, check door open/close and lock/unlock operation.
Inspection
After opening and closing the door, check that door is fixed to the vehicle body normally.
Check the lock/unlock operation of door lock.
Front Inside Handle Nissan Pathfinder Fifth generation
Removal and Installation
REMOVAL
Remove front door finisher. Refer to Removal and Installation.
Remove inside handle bolt.
Disconnect the door lock cables and remove the inside handle.
INSTALLATION
Note the following items, and then install in the reverse order of removal.
CAUTION:
-
After installation, check that door lock cables are properly engaged to inside handle.
-
After installation, check door open/close and lock/unlock operations.
Front Outside Handle Nissan Pathfinder 5th Gen
Removal and Installation
REMOVAL
Fully close front door glass.
Remove front door finisher. Refer to Removal and Installation.
Remove front door vapor barrier.
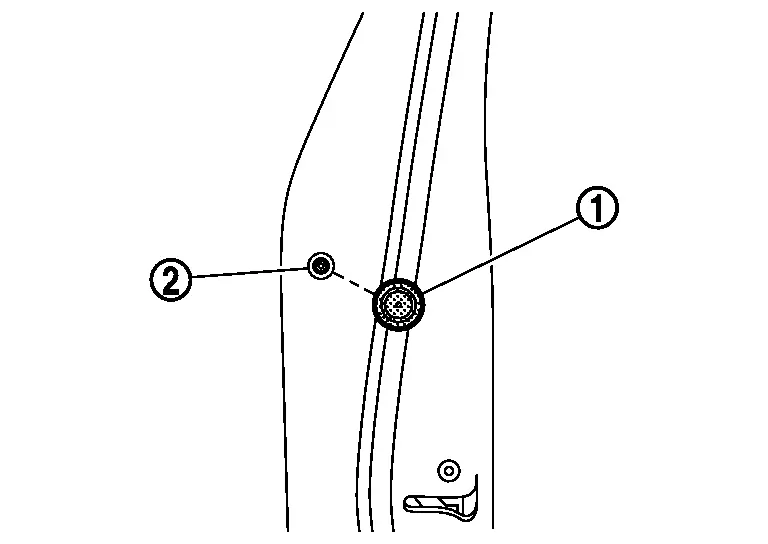
Remove door side grommet (1), and remove bolt from grommet hole (2).
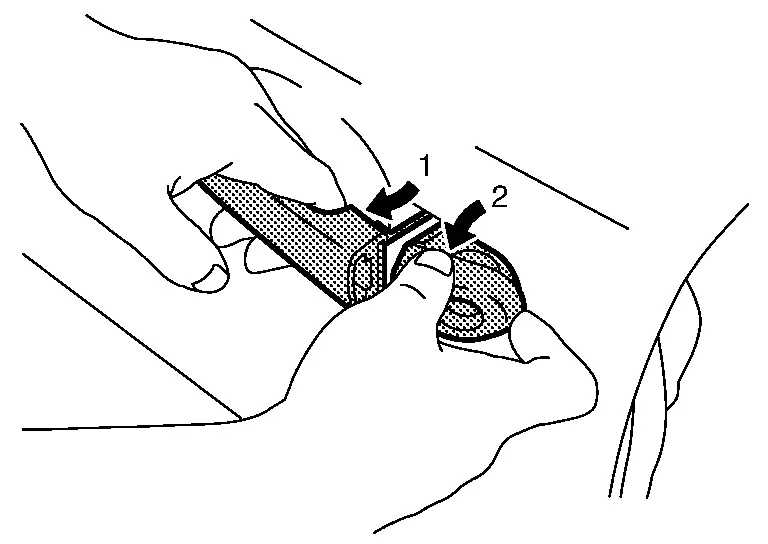
Separate door key cylinder rod (LH only) (1) from door key cylinder assembly (LH only) (2).
While pulling (1) outside handle, remove (2) door key cylinder assembly (LH side) or outside handle escutcheon (RH side).
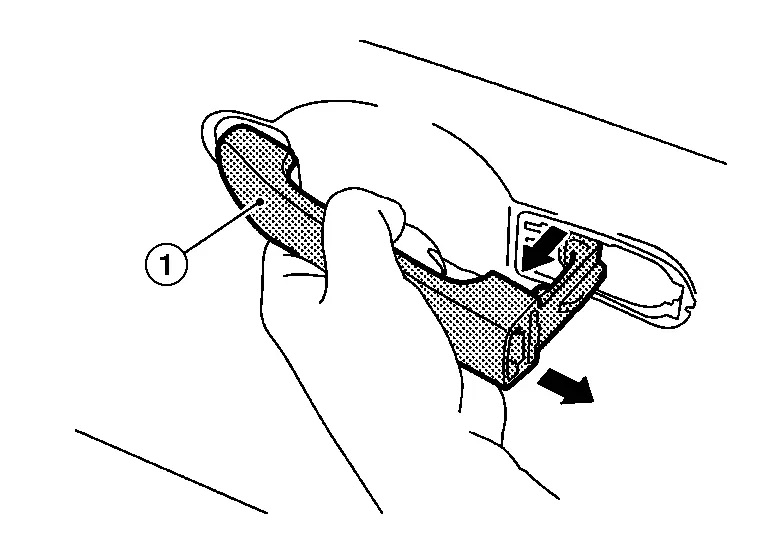
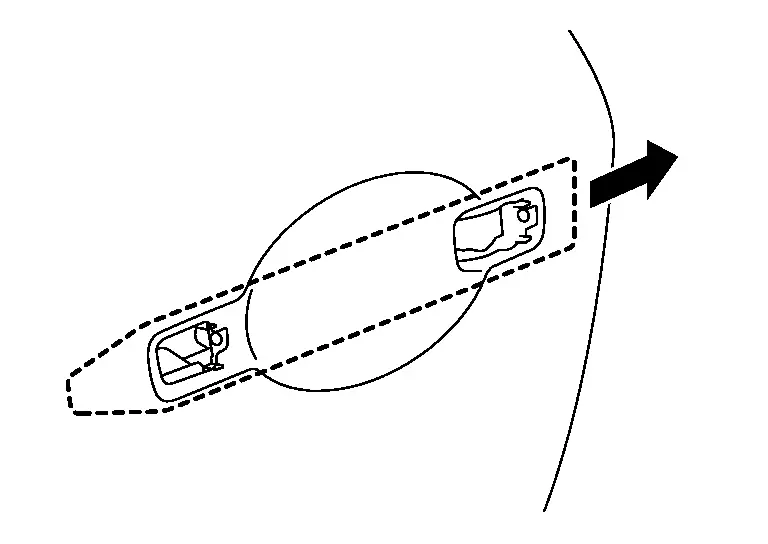
While pulling outside handle (1), slide toward rear of Nissan Pathfinder vehicle to remove outside handle.
Remove front gasket and rear gasket.
Slide outside handle bracket toward rear of Nissan Pathfinder vehicle to remove.
Disconnect outside handle cable from outside handle bracket.
Disconnect harness connector from outside handle bracket and remove outside handle bracket.
INSTALLATION
Installation is in the reverse order of removal.
CAUTION:
-
When installing door key cylinder rod (LH only), be sure to rotate door key cylinder rod holder until a click is felt.
-
After installation, check that door lock cable is properly engaged to outside handle bracket.
-
After installation, check door open/close and lock/unlock operation. Refer to Inspection.

Nissan Pathfinder (R53) 2022-2026 Service Manual
Front Door Lock
Contact Us
Nissan Pathfinder Info Center
Email: info@nipathfinder.com
Phone: +1 (800) 123-4567
Address: 123 Pathfinder Blvd, Nashville, TN 37214, USA
Working Hours: Mon–Fri, 9:00 AM – 5:00 PM (EST)
