Nissan Pathfinder: Engine Lubrication System - Removal and Installation
Oil Pump Nissan Pathfinder SUV
Exploded View
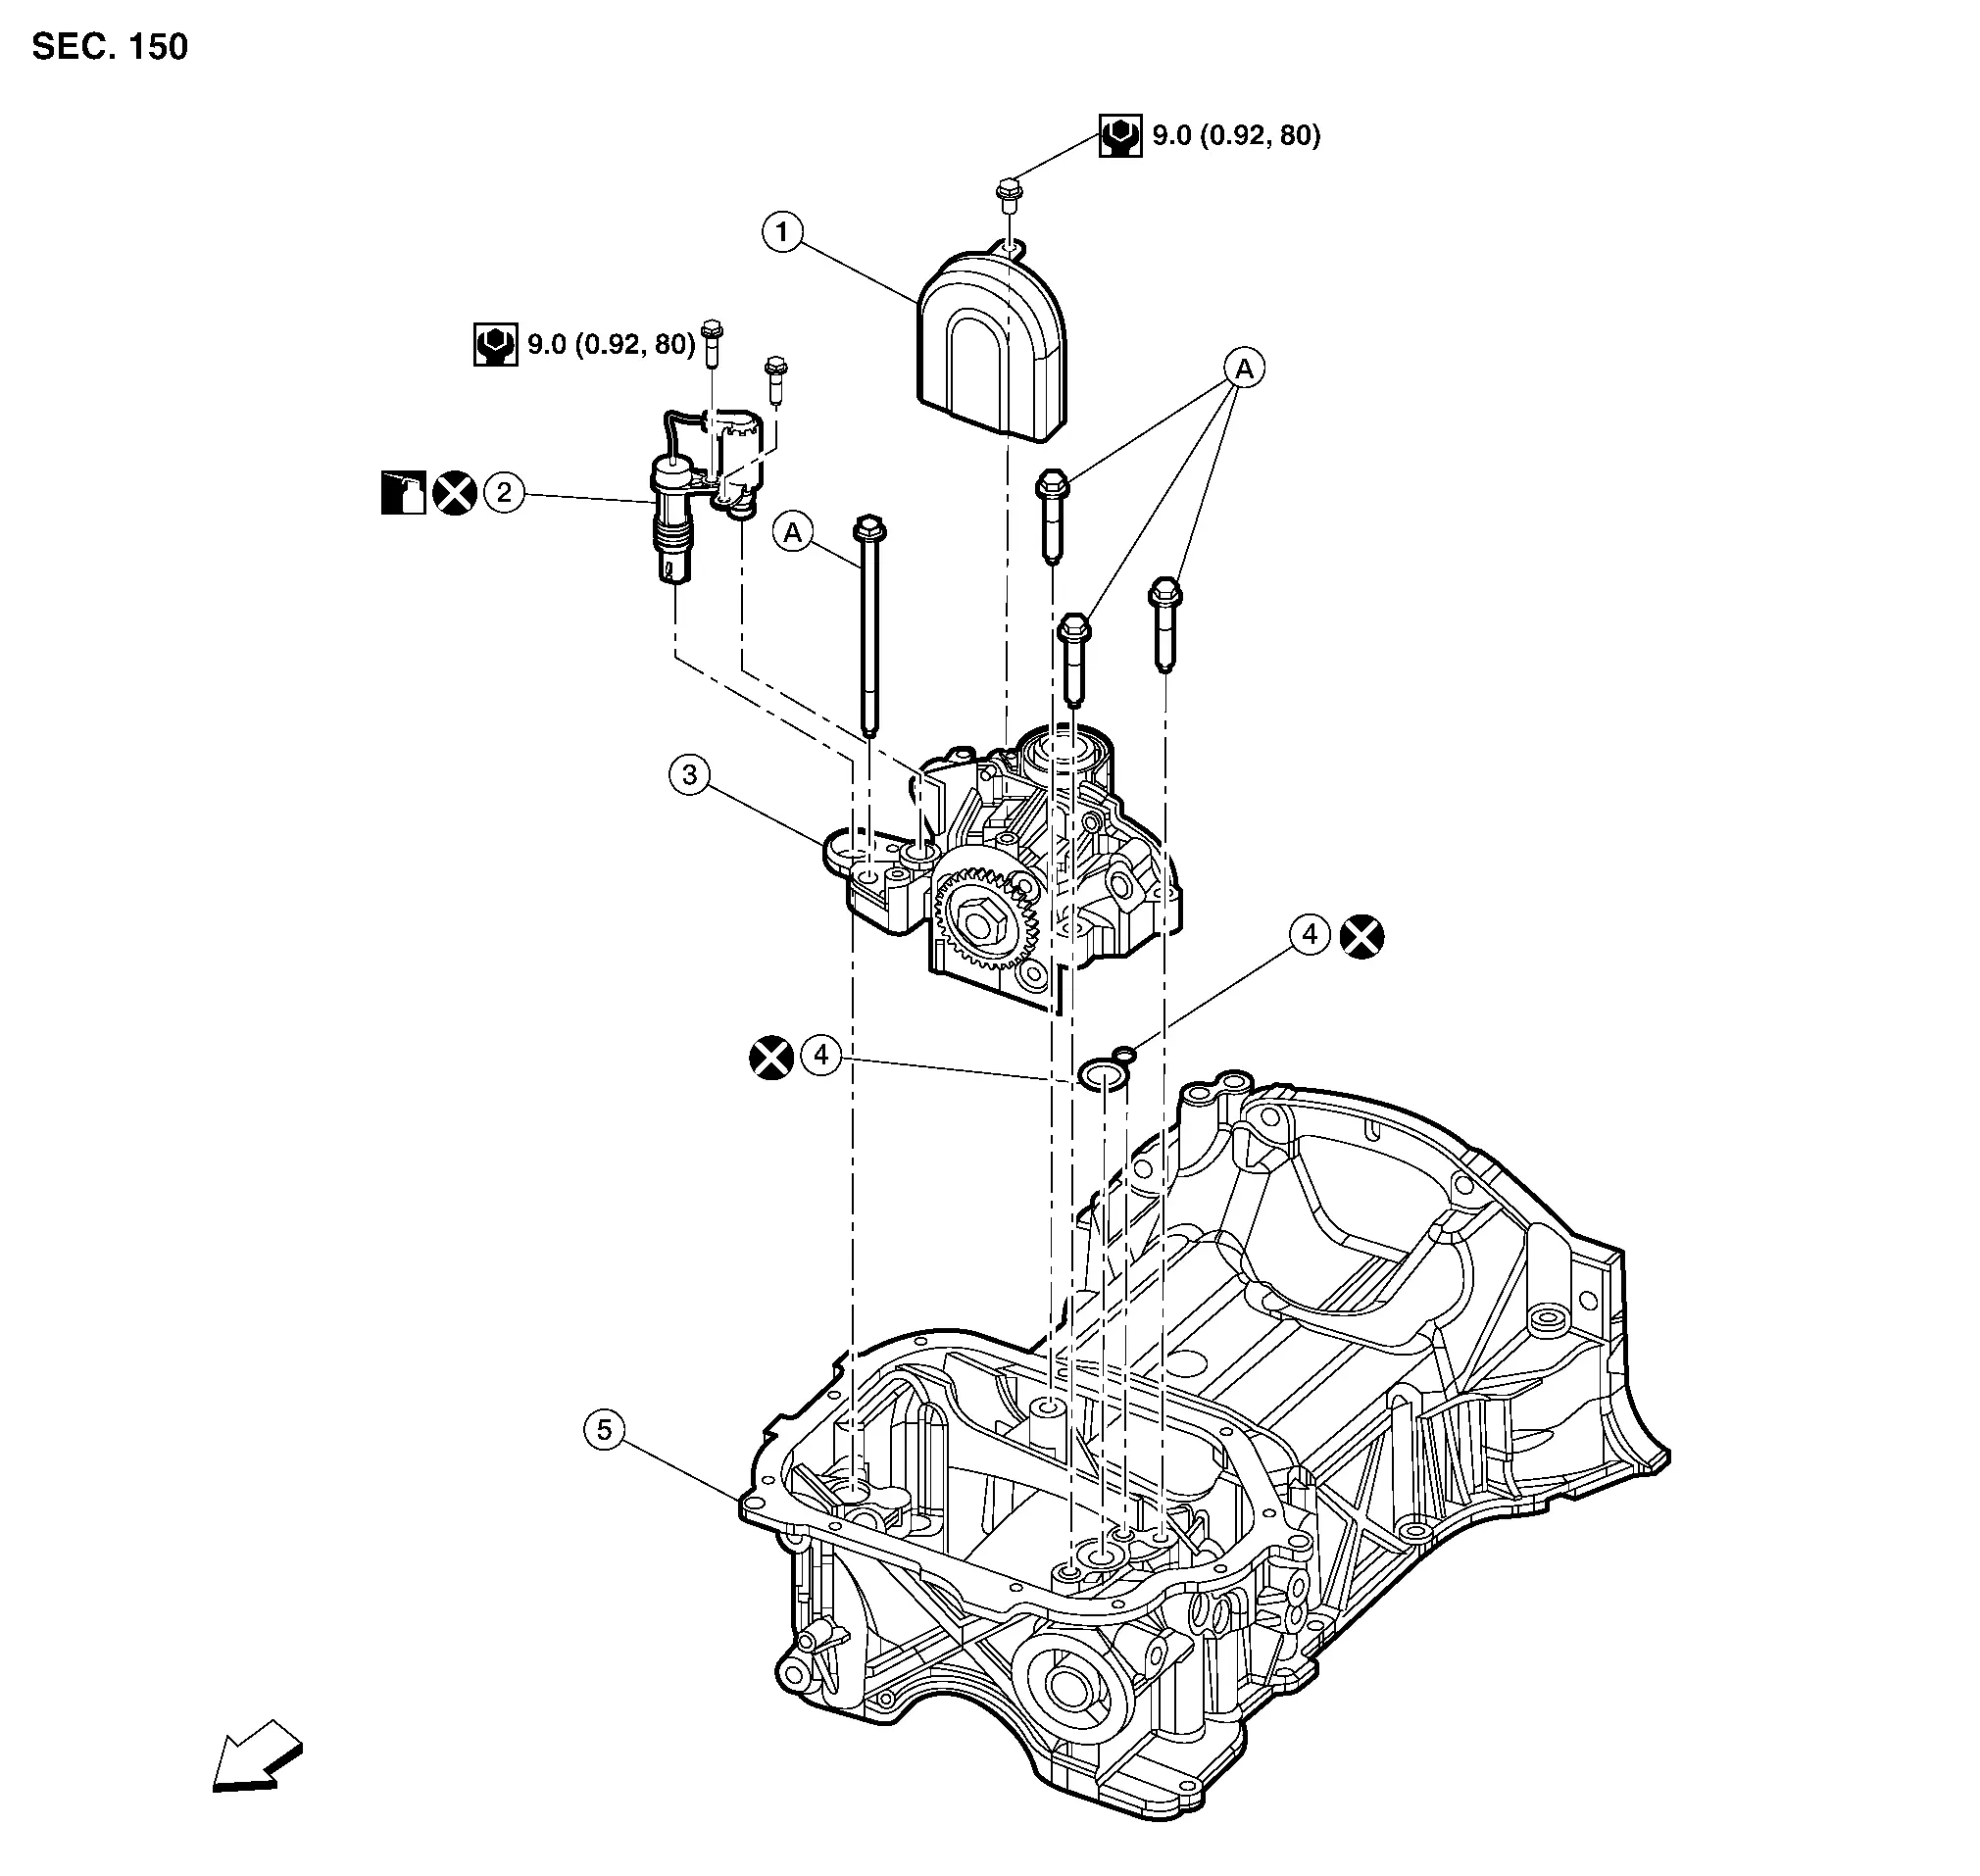
| 1. | Oil pump cover | 2. | Engine oil pressure control solenoid valve | 3. | Oil pump assembly |
| 4. | O ring | 5. | Oil pan (upper) | A. | Refer to Removal and Installation. |
 |
Front |
Removal and Installation
REMOVAL
Remove the oil pan (lower). Refer to Removal and Installation (Lower Oil Pan).
Remove the drive belt auto tensioner. Refer to Removal and Installation of Drive Belt Auto-tensioner.
Remove bolts and reposition the water pipe. Refer to Exploded View.
Remove compressor bolts and reposition compressor. Refer to Exploded View.
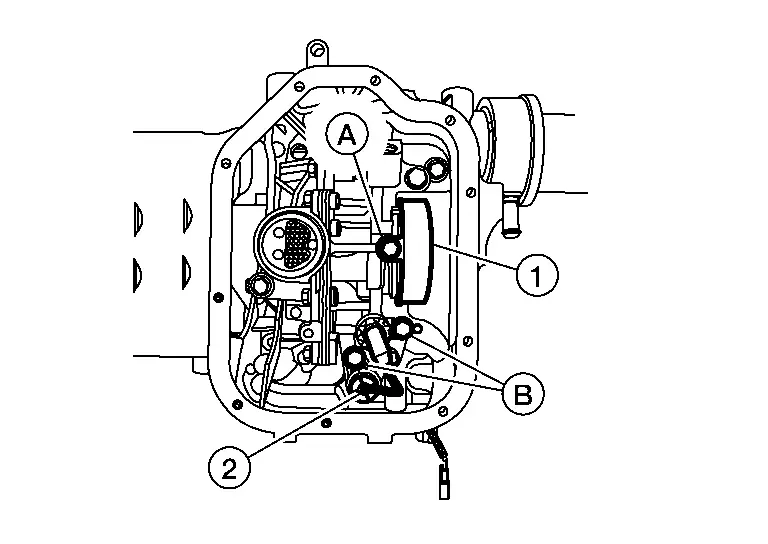
Disconnect the harness connector from the engine oil pressure control solenoid valve.
Loosen bolts (B) and remove engine oil pressure control solenoid valve (2).

CAUTION:
Do not reuse engine oil pressure control solenoid valve.
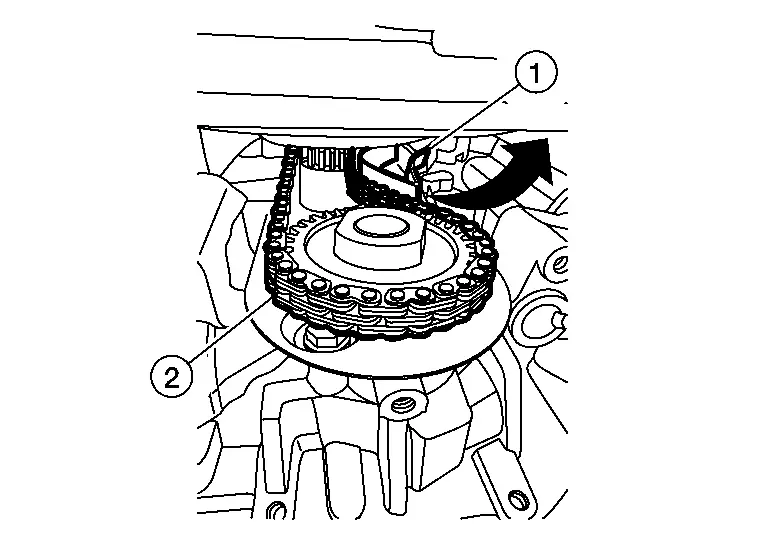
Remove bolt (A) and remove oil pump drive chain cover (1).
Rotate oil pump drive chain tensioner (1) counterclockwise with a suitable tool and remove oil pump drive chain (2) from oil pump gear.
Loosen the oil pump bolts (A) in reverse of the sequence shown and remove.
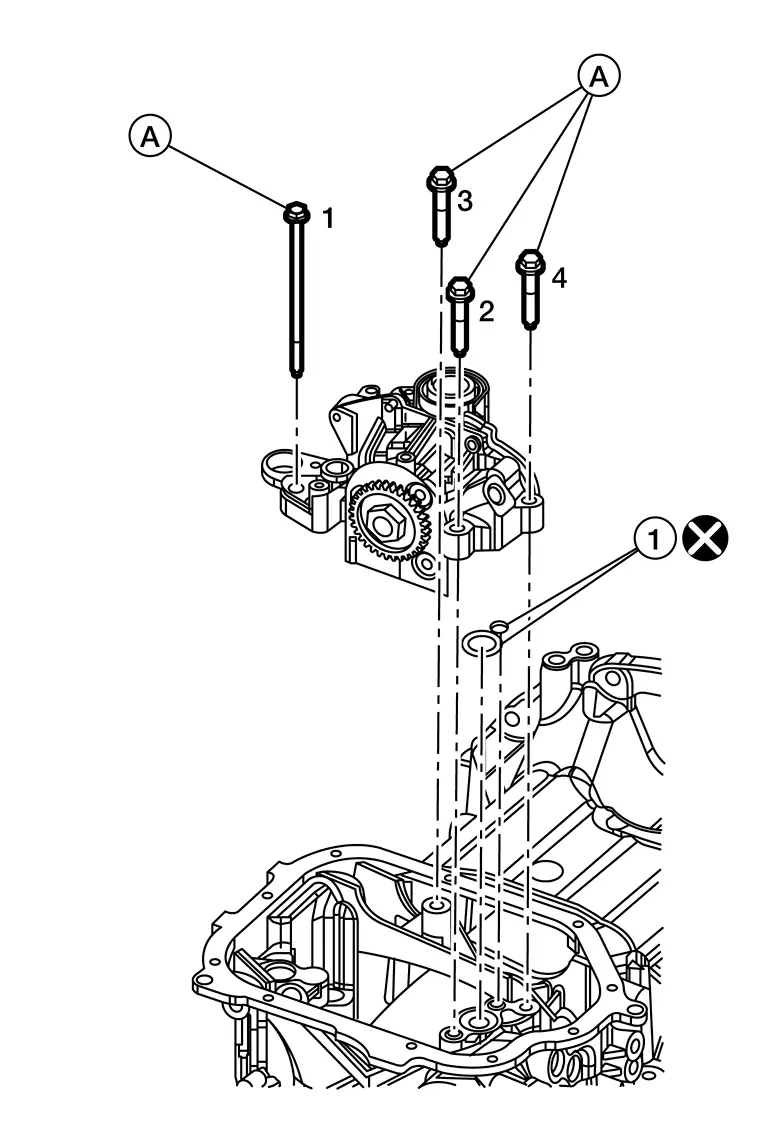
Remove the O-rings (1) from the bottom of the cylinder block and oil pump housing.
CAUTION:
Do not reuse O-ring.
INSTALLATION
Install the oil pump and new O-rings (1) and tighten oil pump bolts (A) to the specified torque in the sequence shown.

CAUTION:
Do not reuse O-rings.
| Oil pump bolts | : 22.0 N·m (2.2 kg-m, 16 ft-lb) |
Lubricate O-rings with clean engine oil and install engine oil pressure control solenoid valve (2) and tighten bolts (B).
CAUTION:
Do not reuse engine oil pressure control solenoid valve.
Install oil pump drive chain cover (1) and bolt (A).
Install the oil pan (lower). Refer to Removal and Installation.
Oil Cooler Nissan Pathfinder 2026
Exploded View
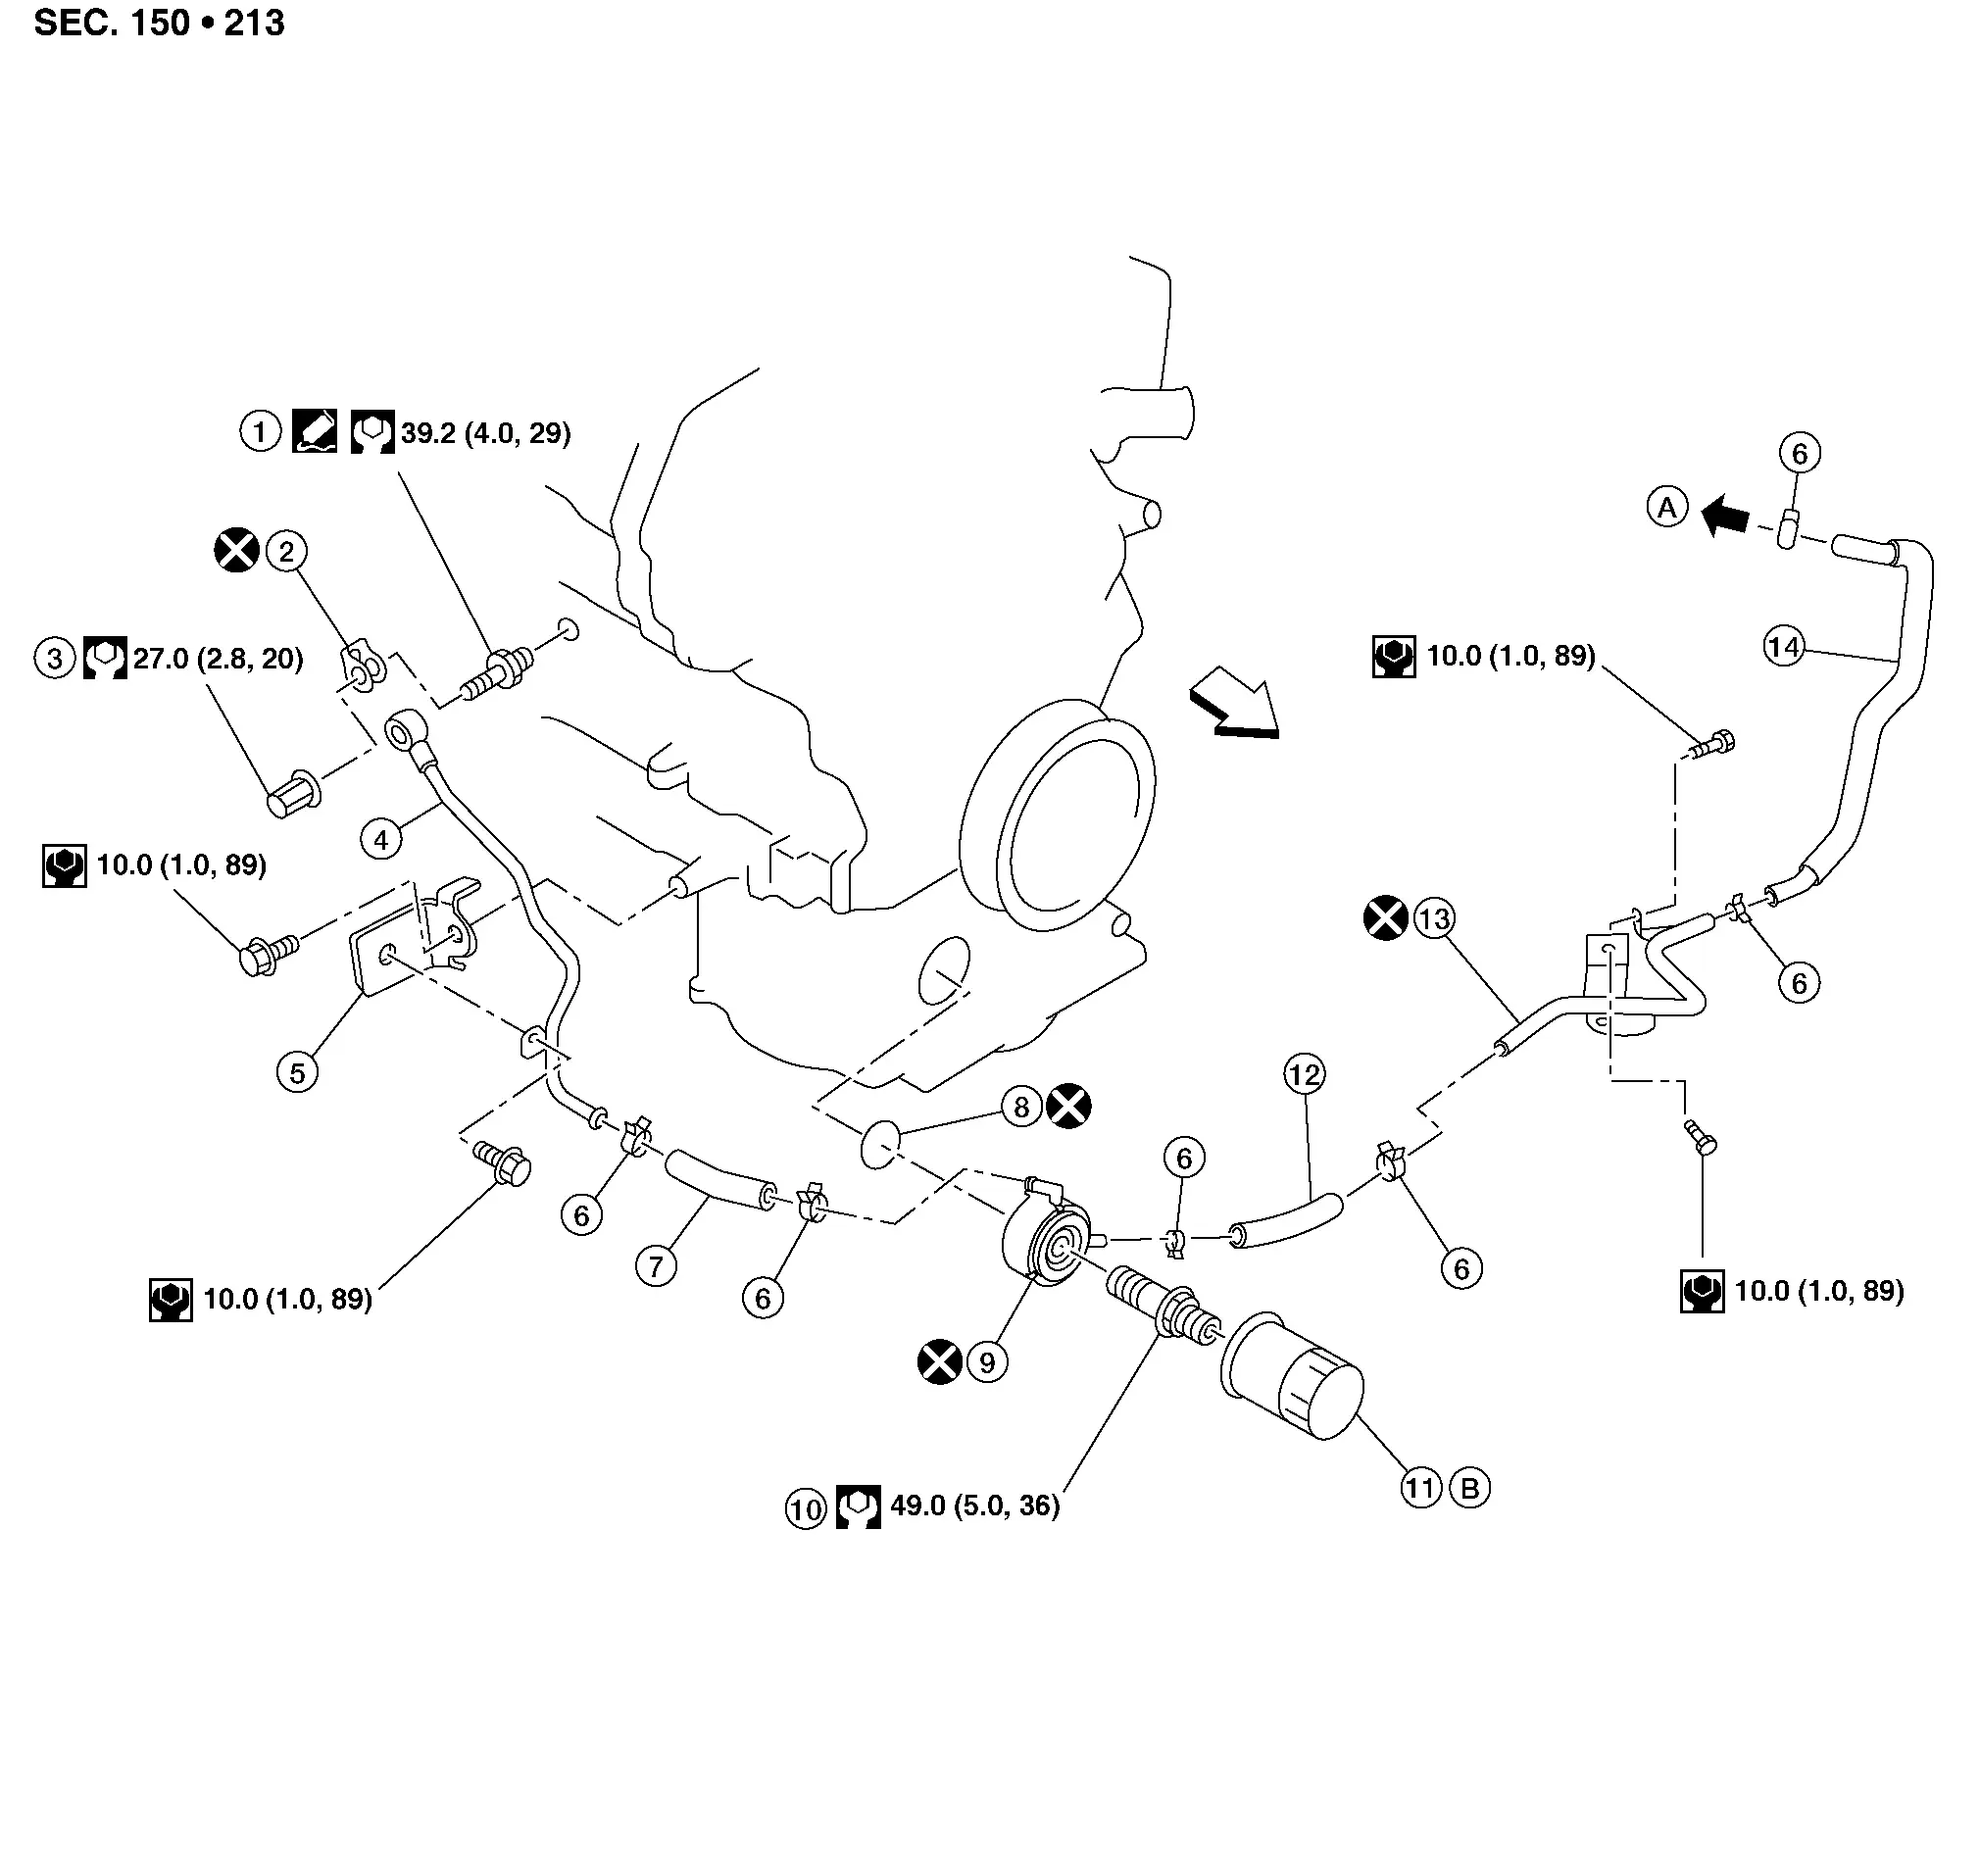
| 1. | Connector bolt | 2. | Copper gasket | 3. | Water drain plug |
| 4. | Water pipe | 5. | Bracket | 6. | Clamp |
| 7. | Water hose | 8. | O-ring | 9. | Oil cooler |
| 10. | Connector bolt | 11. | Oil filter | 12. | Water hose |
| 13. | Water pipe | 14. | Water hose | A. | To water connector. Refer to Exploded View. |
| B. | Refer to Removal and Installation |
 |
Engine front |
Removal and Installation
WARNING:
Be careful not to burn yourself, as the engine oil may be hot.
CAUTION:
-
When removing oil cooler, prepare a shop cloth to absorb any engine oil leaks or spillage.
-
Completely wipe off any engine oil that adheres to the engine and the Nissan Pathfinder vehicle.
 NOTE:
NOTE:
When removing components such as hoses, tubes/lines, etc., cap or plug openings to prevent fluid from spilling.
REMOVAL
Remove the front wheel and tire (RH) using power tool. Refer to Removal and Installation.
Remove the front fender protector side cover (RH). Refer to Exploded View.
Drain engine coolant. Refer to Draining.
CAUTION:
Do not spill engine coolant on the drive belt.
Remove water hoses from oil cooler.
Remove the oil filter. Refer to Removal and Installation.
Remove the connector bolt and remove the oil cooler.
CAUTION:
-
Do not reuse O-ring.
-
Do not reuse oil cooler.
Oil Pressure Relief Valve
Inspect oil pressure relief valve for movement, cracks and breaks by pushing the ball. If replacement is necessary, replace oil pan (upper) and relief valve as an assembly. Refer to Removal and Installation (Upper Oil Pan).
INSTALLATION
Installation is in the reverse order of removal.
CAUTION:
-
Do not reuse O-ring.
-
Do not reuse oil cooler.
-
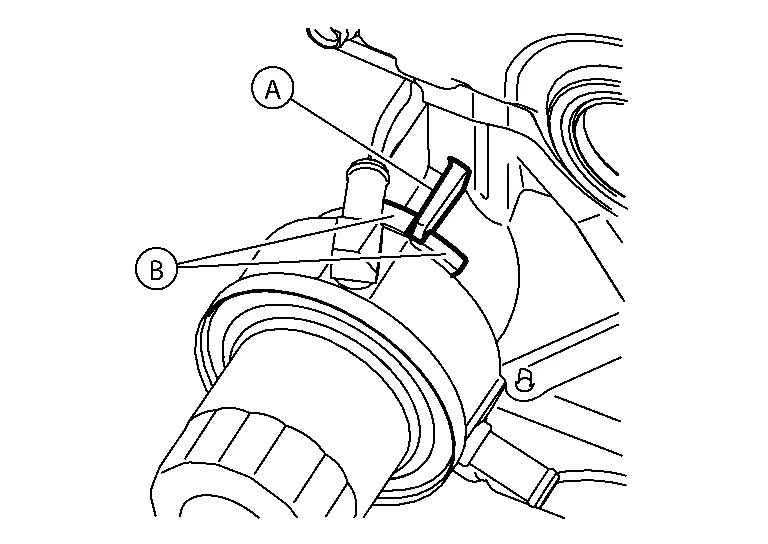
When installing the oil cooler, align the tab (A) on the oil pan (upper) with the tabs (B) on the oil cooler as shown.
INSPECTION AFTER INSTALLATION
Start engine and check for engine oil and engine coolant leaks. Repair as necessary.
Engine Oil Pressure Control Solenoid Valve Nissan Pathfinder 2026
Removal and Installation
 NOTE:
NOTE:
For exploded view, refer to Exploded View.
REMOVAL
Remove the oil pan (lower). Refer to Removal and Installation (Lower Oil Pan).
Remove the drive belt auto tensioner. Refer to Removal and Installation of Drive Belt Auto-tensioner.
Remove the bolts that retain the water pipe to the engine block and reposition the water pipe. Refer to Exploded View.
Remove the compressor bolts and reposition the compressor. Refer to Exploded View.
Disconnect the harness connector from the engine oil pressure control solenoid valve.
Remove bolts and remove the engine oil pressure control solenoid valve.
CAUTION:
Do not reuse engine oil pressure control solenoid valve.
INSTALLATION
Installation is in the reverse order of removal.
CAUTION:
Do not reuse engine oil pressure control solenoid valve.
 NOTE:
NOTE:
Apply clean engine oil to O-rings before installing engine oil pressure control solenoid valve.

Nissan Pathfinder (R53) 2022-2026 Service Manual
Removal and Installation
Contact Us
Nissan Pathfinder Info Center
Email: info@nipathfinder.com
Phone: +1 (800) 123-4567
Address: 123 Pathfinder Blvd, Nashville, TN 37214, USA
Working Hours: Mon–Fri, 9:00 AM – 5:00 PM (EST)
