Nissan Pathfinder: Exterior Lighting System - Removal and Installation
- Front Combination Lamp
- Front Fog Lamp
- Optical Sensor
- Lighting Turn Signal Switch
- Hazard Switch
- High-Mounted Stop Lamp
- Rear Combination Lamp (body Side)
- Rear Combination Lamp (back Door Side)
- License Plate Lamp
- Door Mirror Turn Signal
Front Combination Lamp Nissan Pathfinder 2022
Exploded View
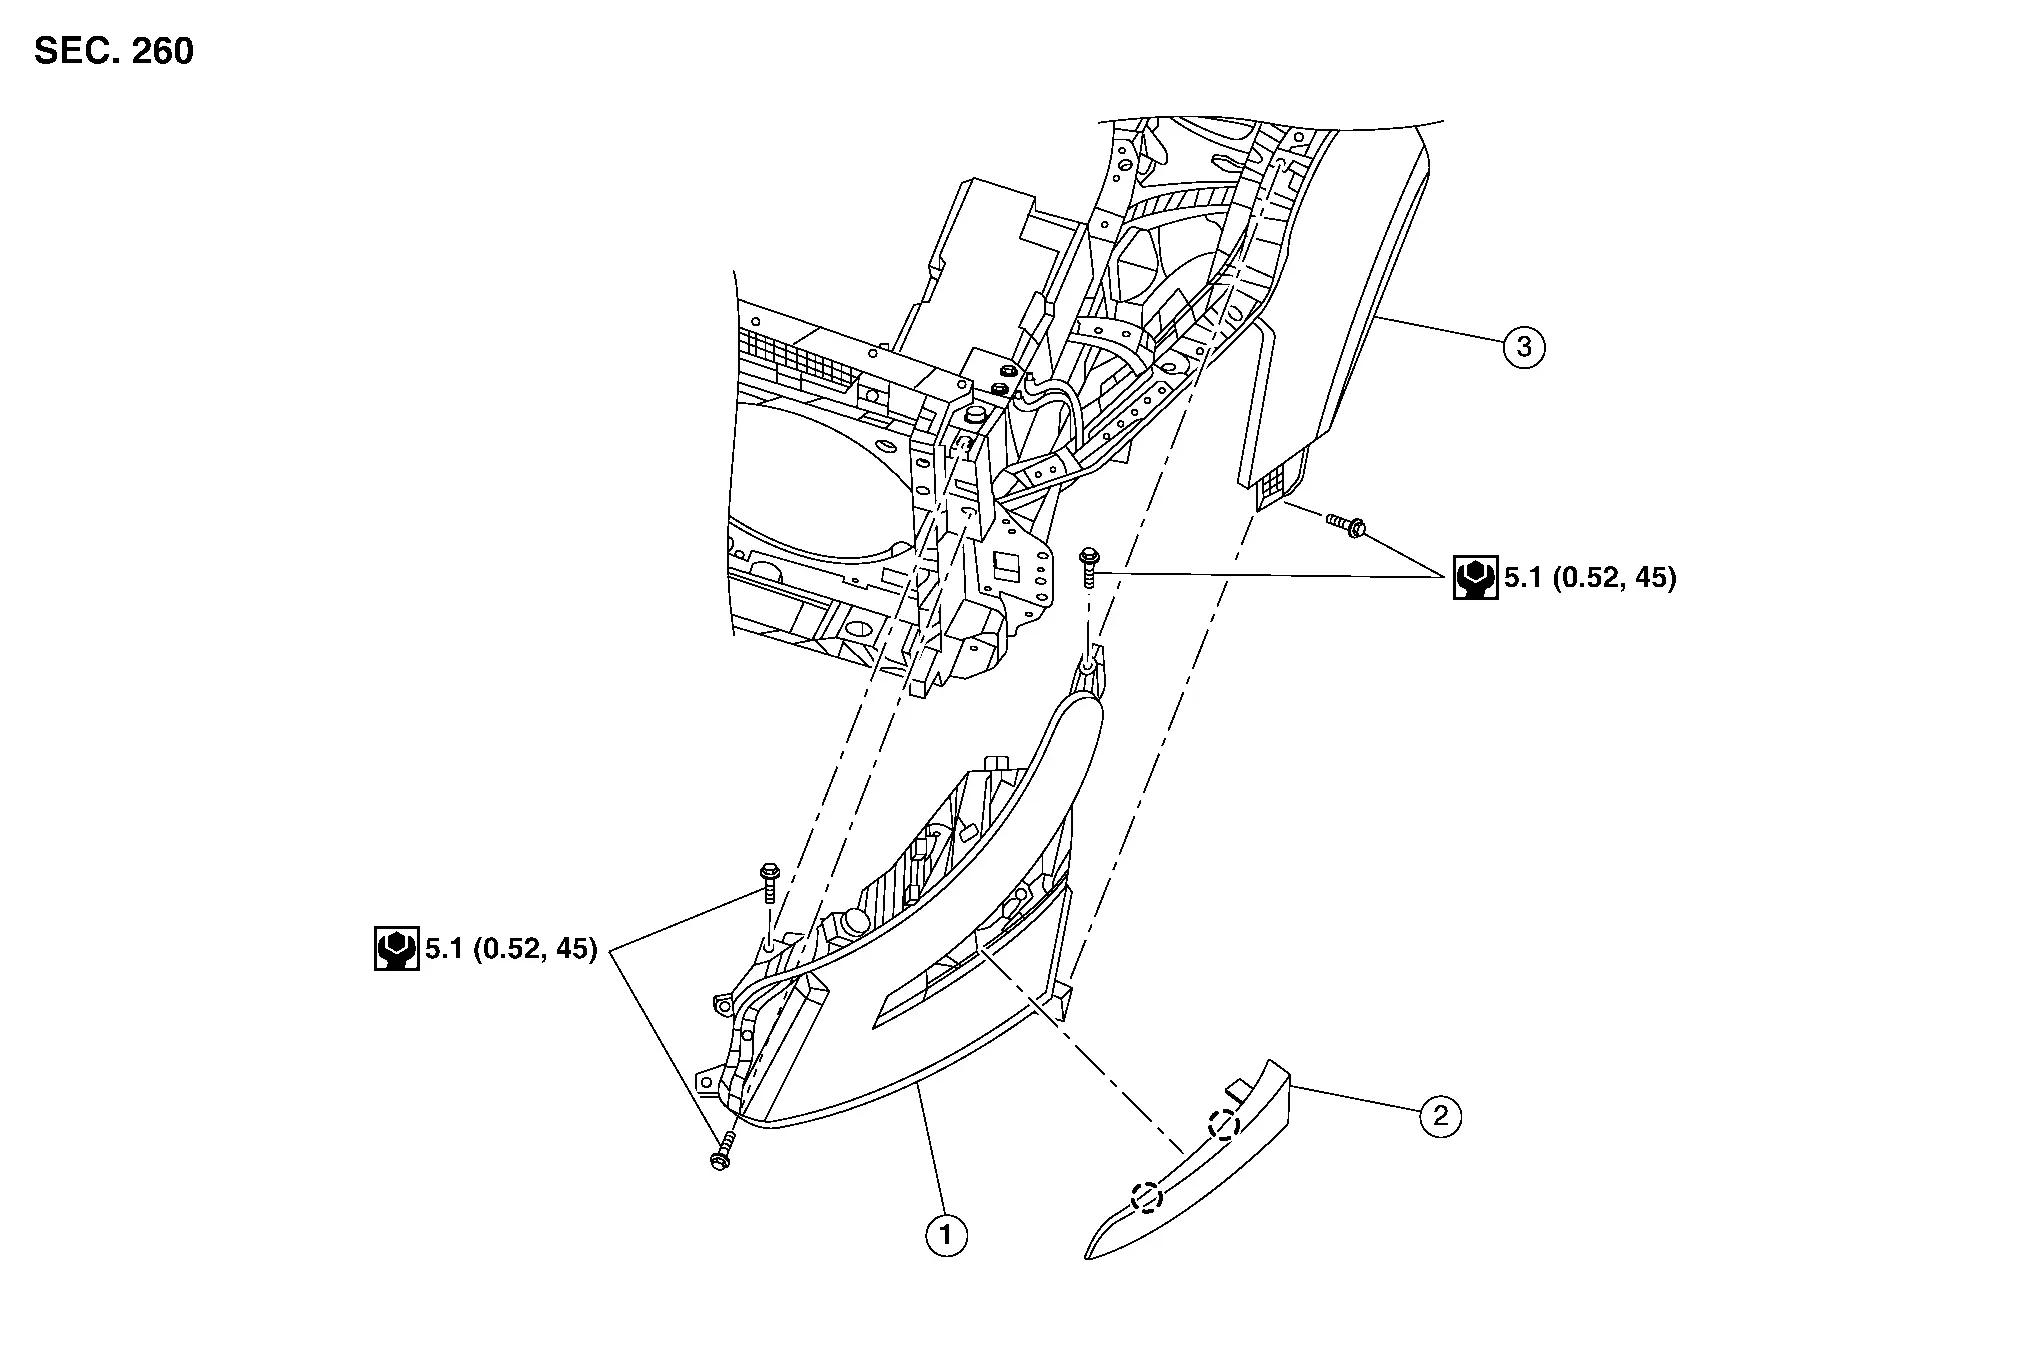
| 1. | Front combination lamp | 2. | Grill molding (LH/RH) | 3. | Fender (LH/RH) |
 |
Pawl |
 NOTE:
NOTE:
LH shown, RH similar.
Removal and Installation
REMOVAL
Disconnect the battery negative terminal. Refer to Removal and Installation.
Remove front fender hood ledge finisher. Refer to Exploded View.
Remove front bumper fascia. Refer to Removal and Installation.
Remove front combination lamp bolts. Refer to Exploded View.
Pull front combination lamp forward.
Disconnect the harness connectors from the front combination lamp.
INSTALLATION
Installation is in the reverse order of removal.
CAUTION:
After installation, perform headlamp aiming adjustment. Refer to Aiming Adjustment Procedure.
Bulb Replacement
HEADLAMP (LOW BEAM) BULB
The headlamp (low beam) bulb is LED and is serviced as an assembly of the front combination lamp. Refer to Removal and Installation.
HEADLAMP (HIGH BEAM) BULB
The headlamp (high beam) bulb is LED and is serviced as an assembly of the front combination lamp. Refer to Removal and Installation.
PARKING/DAYTIME RUNNING LAMP BULB
The parking/daytime running lamp bulb is LED and is serviced as an assembly of the front combination lamp. Refer to Removal and Installation.
FRONT SIDE MARKER LAMP BULB
The front side marker lamp bulb is LED and is serviced as an assembly of the front combination lamp. Refer to Removal and Installation.
FRONT TURN SIGNAL LAMP BULB
WARNING:
Do not touch bulb by hand while it is lit or right after being turned off. Burning may result.
CAUTION:
-
Do not touch glass surface of the bulb with bare hands or allow oil or grease to get on it to prevent damage to bulb.
-
Do not leave the bulb out of the lamp reflector for a long time because dust, moisture, smoke, etc. may affect the performance of the lamp.
Removal
Rotate front turn signal lamp socket counterclockwise and remove.
Remove front turn signal lamp bulb from the bulb socket.
Installation
Installation is in the reverse order of removal.
CAUTION:
After installing, be sure to install the bulb socket securely to ensure watertightness.
Front Fog Lamp Nissan Pathfinder SUV
Exploded View
FOR ROCK CREEK®
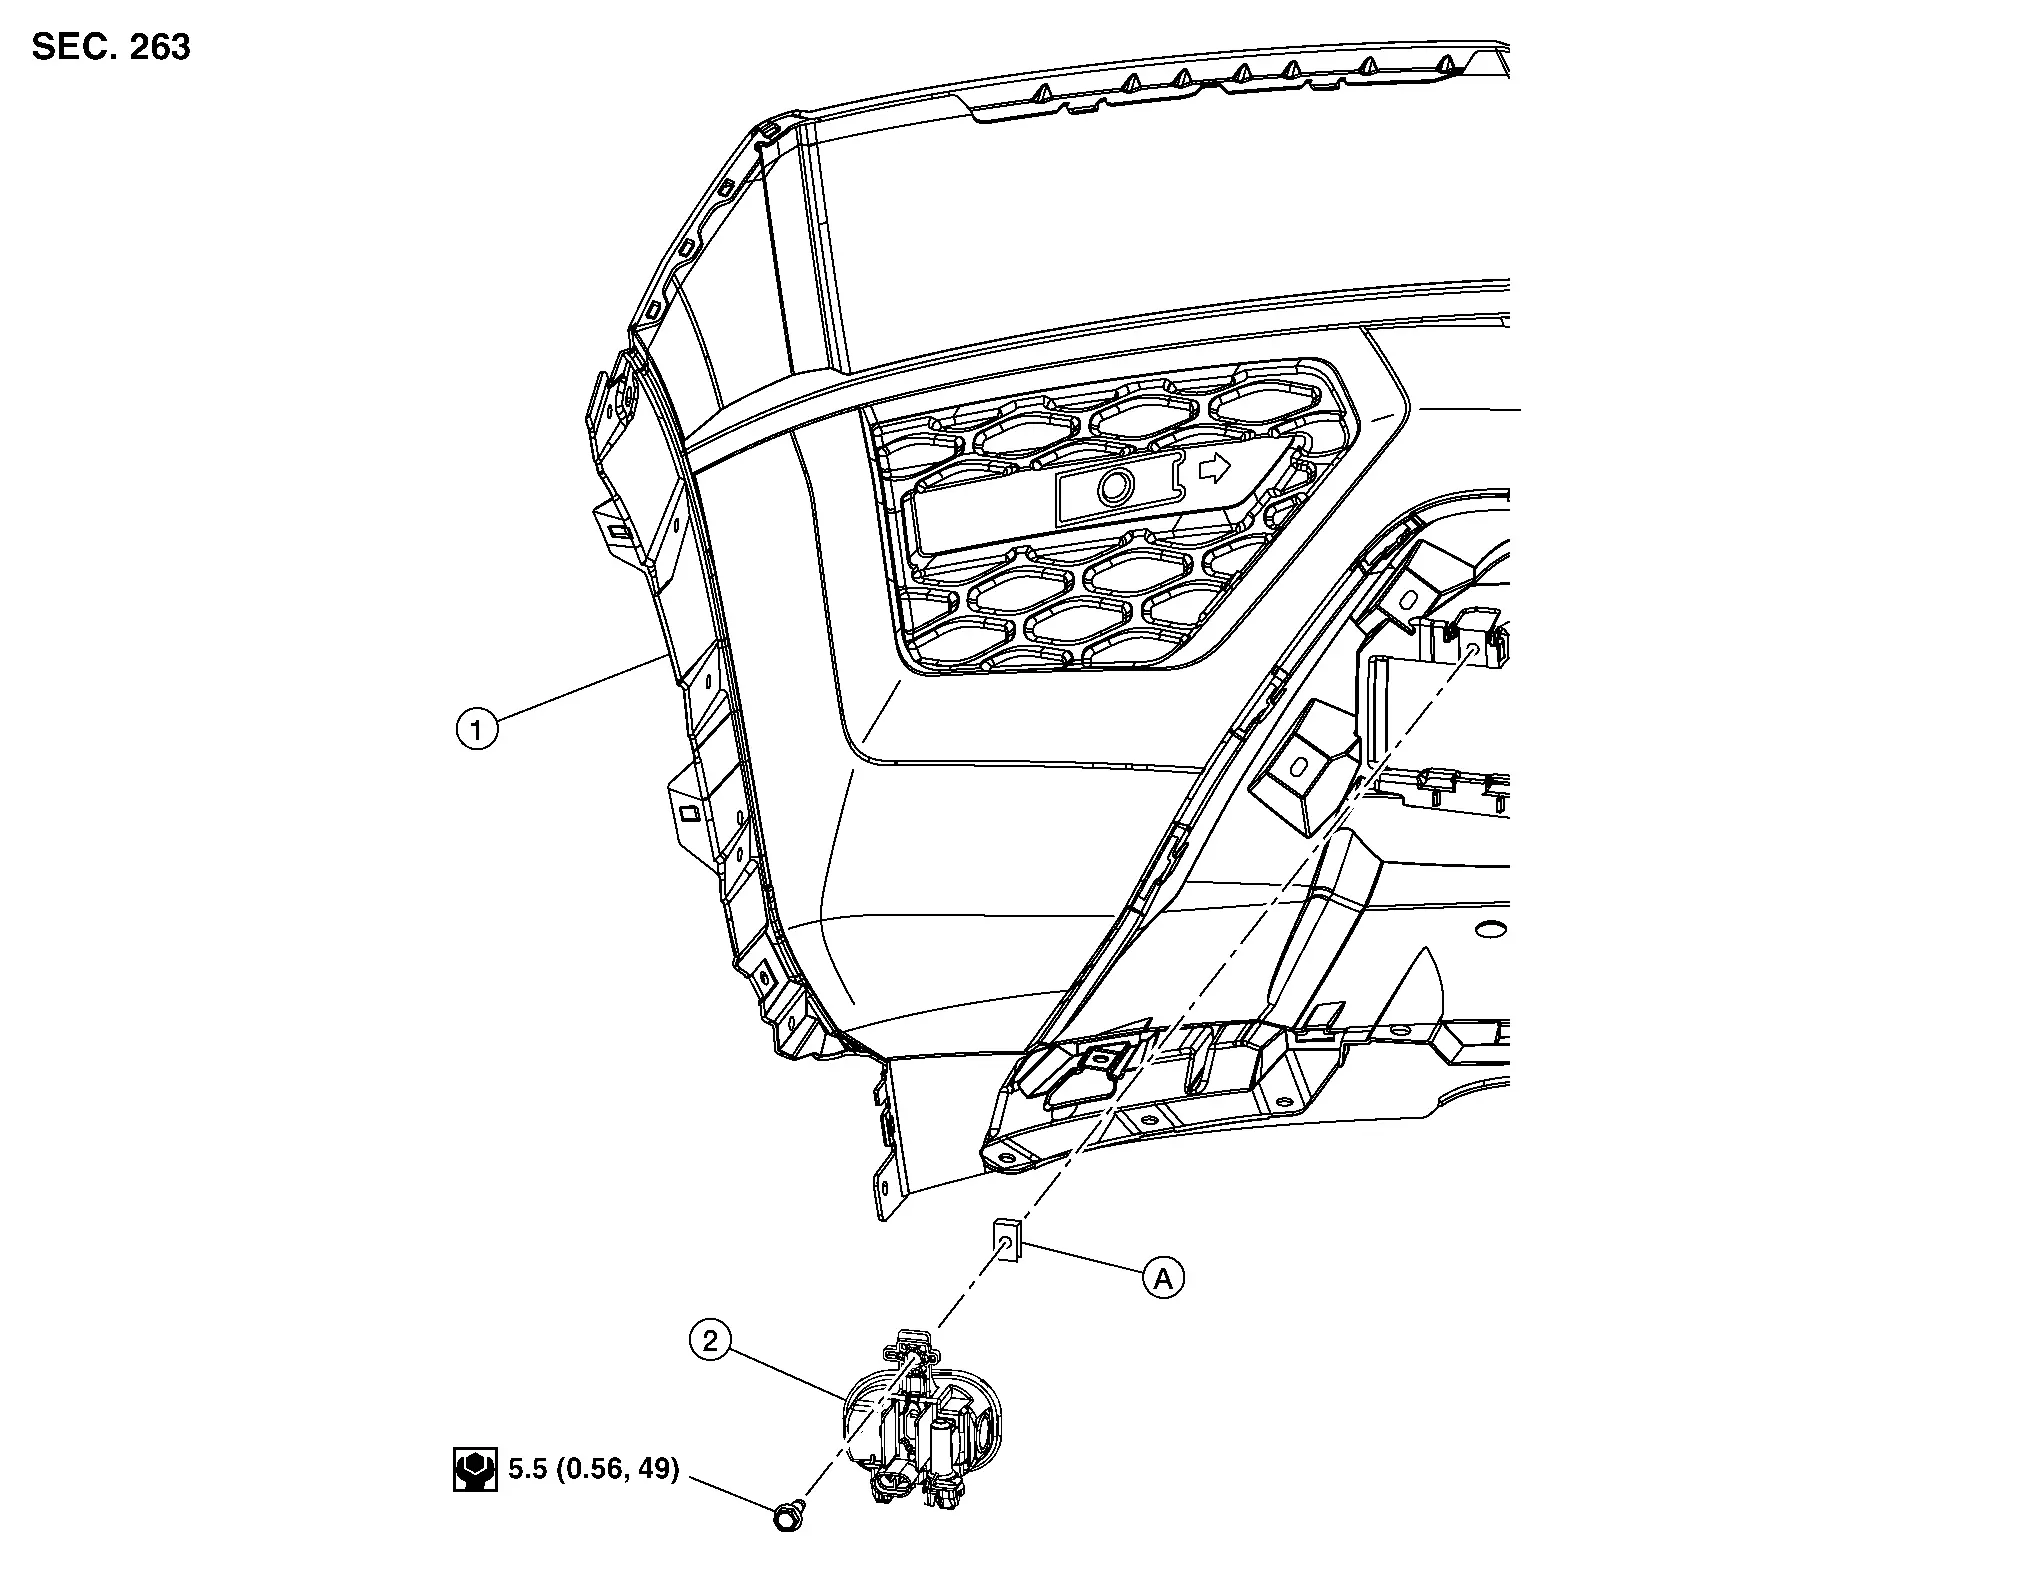
| 1. | Front bumper fascia | 2. | Front fog lamp | A. | Metal clip |
EXCEPT FOR ROCK CREEK®
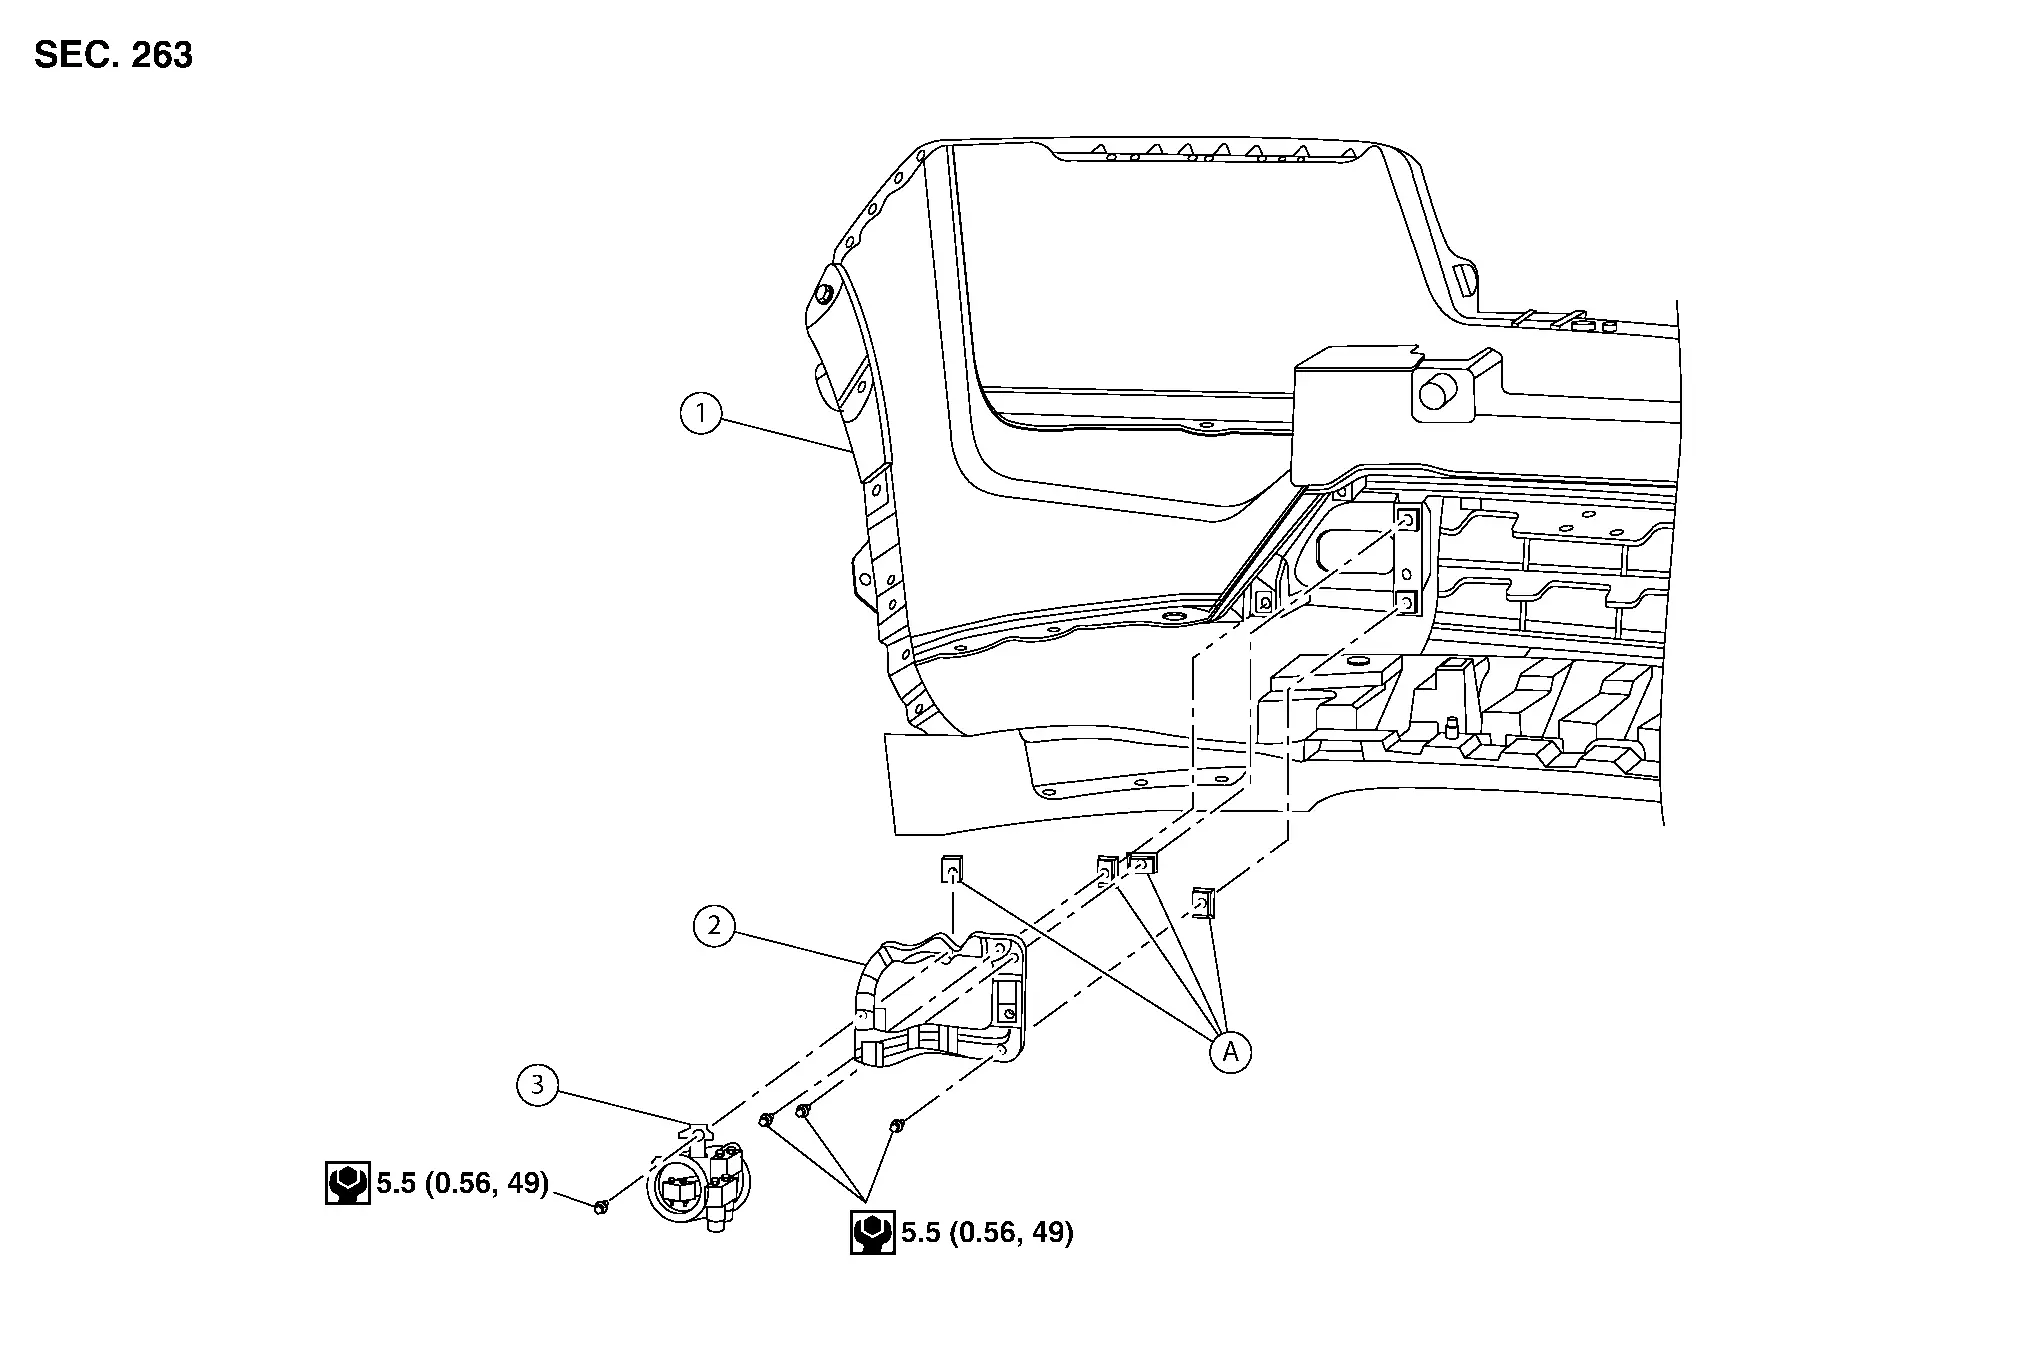
| 1. | Front bumper fascia | 2. | Front fog lamp bracket | 3. | Front fog lamp |
| A. | Metal clips |
Removal and Installation
REMOVAL
Partially remove front fender protector. Refer to Removal and Installation.
Disconnect the harness connector from the front fog lamp.
Remove front fog lamp bolt and front fog lamp.
INSTALLATION
Installation in the reverse order of removal.
Bulb Replacement
The front fog lamp bulb is LED and is serviced as an assembly of the front fog lamp. Refer to Removal and Installation.
Optical Sensor Nissan Pathfinder
Exploded View
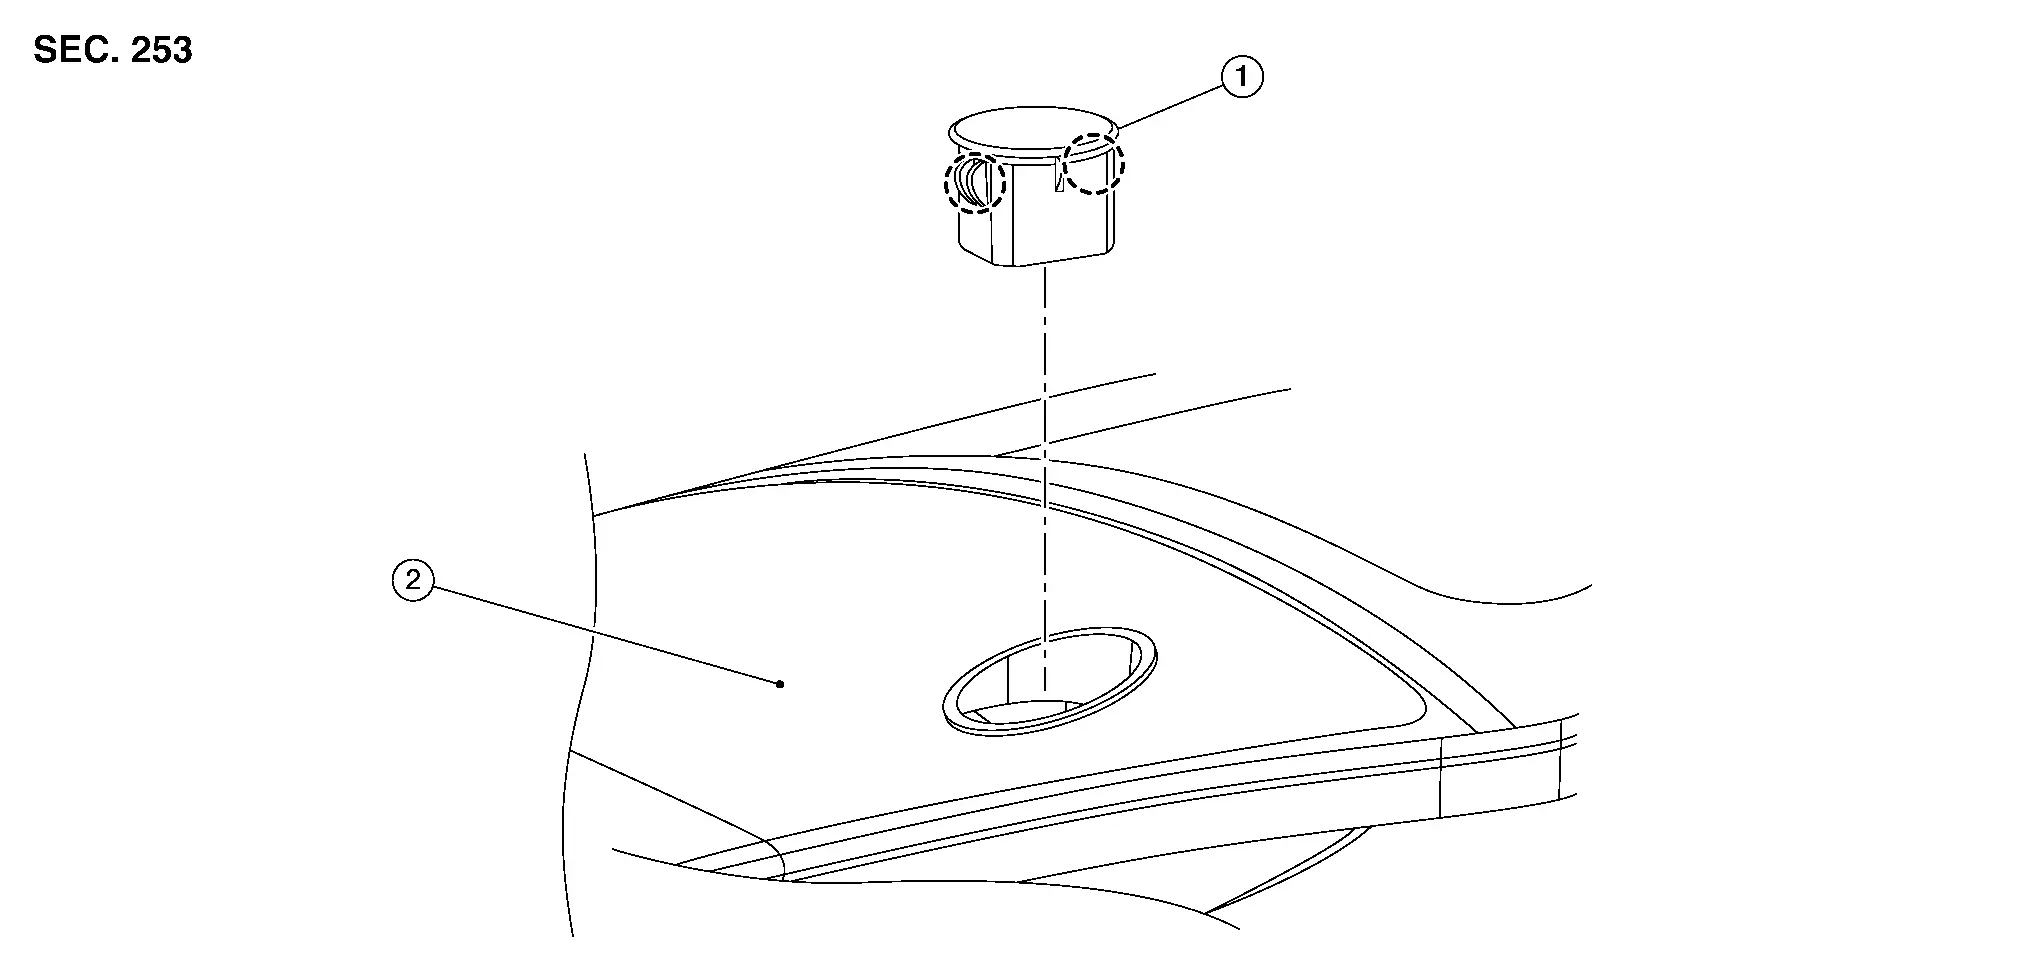
| 1. | Optical sensor | 2. | Defroster grille |
 |
Pawl |
Removal and Installation
REMOVAL
Remove the defroster grille. Refer to Removal and Installation.
Disconnect the harness connector from the sunload sensor.
Disconnect the harness connector from the optical sensor.
Using a suitable tool, release pawls and remove the optical sensor from the defroster grille.
INSTALLATION
Installation is in the reverse order of removal.
Lighting Turn Signal Switch Nissan Pathfinder SUV
Removal and Installation
The lighting and turn signal switch is integrated into the combination switch and is replaced as an assembly. Refer to Removal and Installation.
Hazard Switch Nissan Pathfinder 2022
Removal and Installation
REMOVAL
Remove cluster lid C. Refer to Removal and Installation.
Using suitable tool, release the pawls and remove the hazard switch (1) from cluster lid C (2).
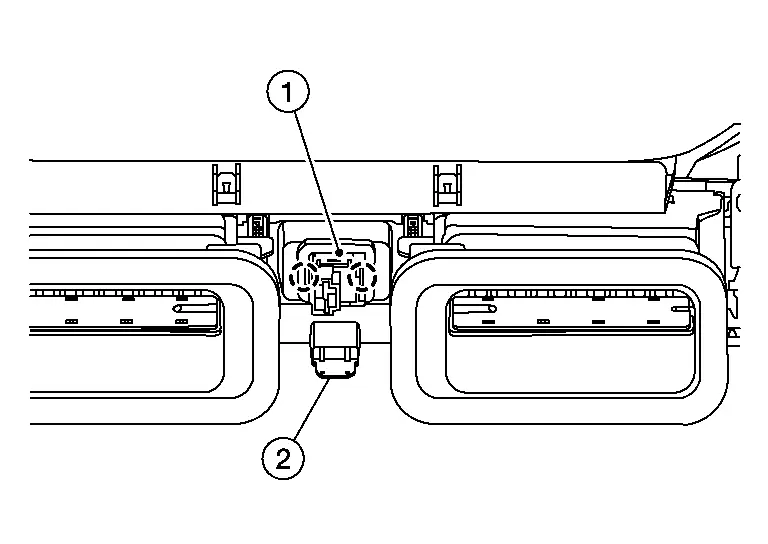
 |
: Pawl |
INSTALLATION
Installation is in the reverse order of removal.
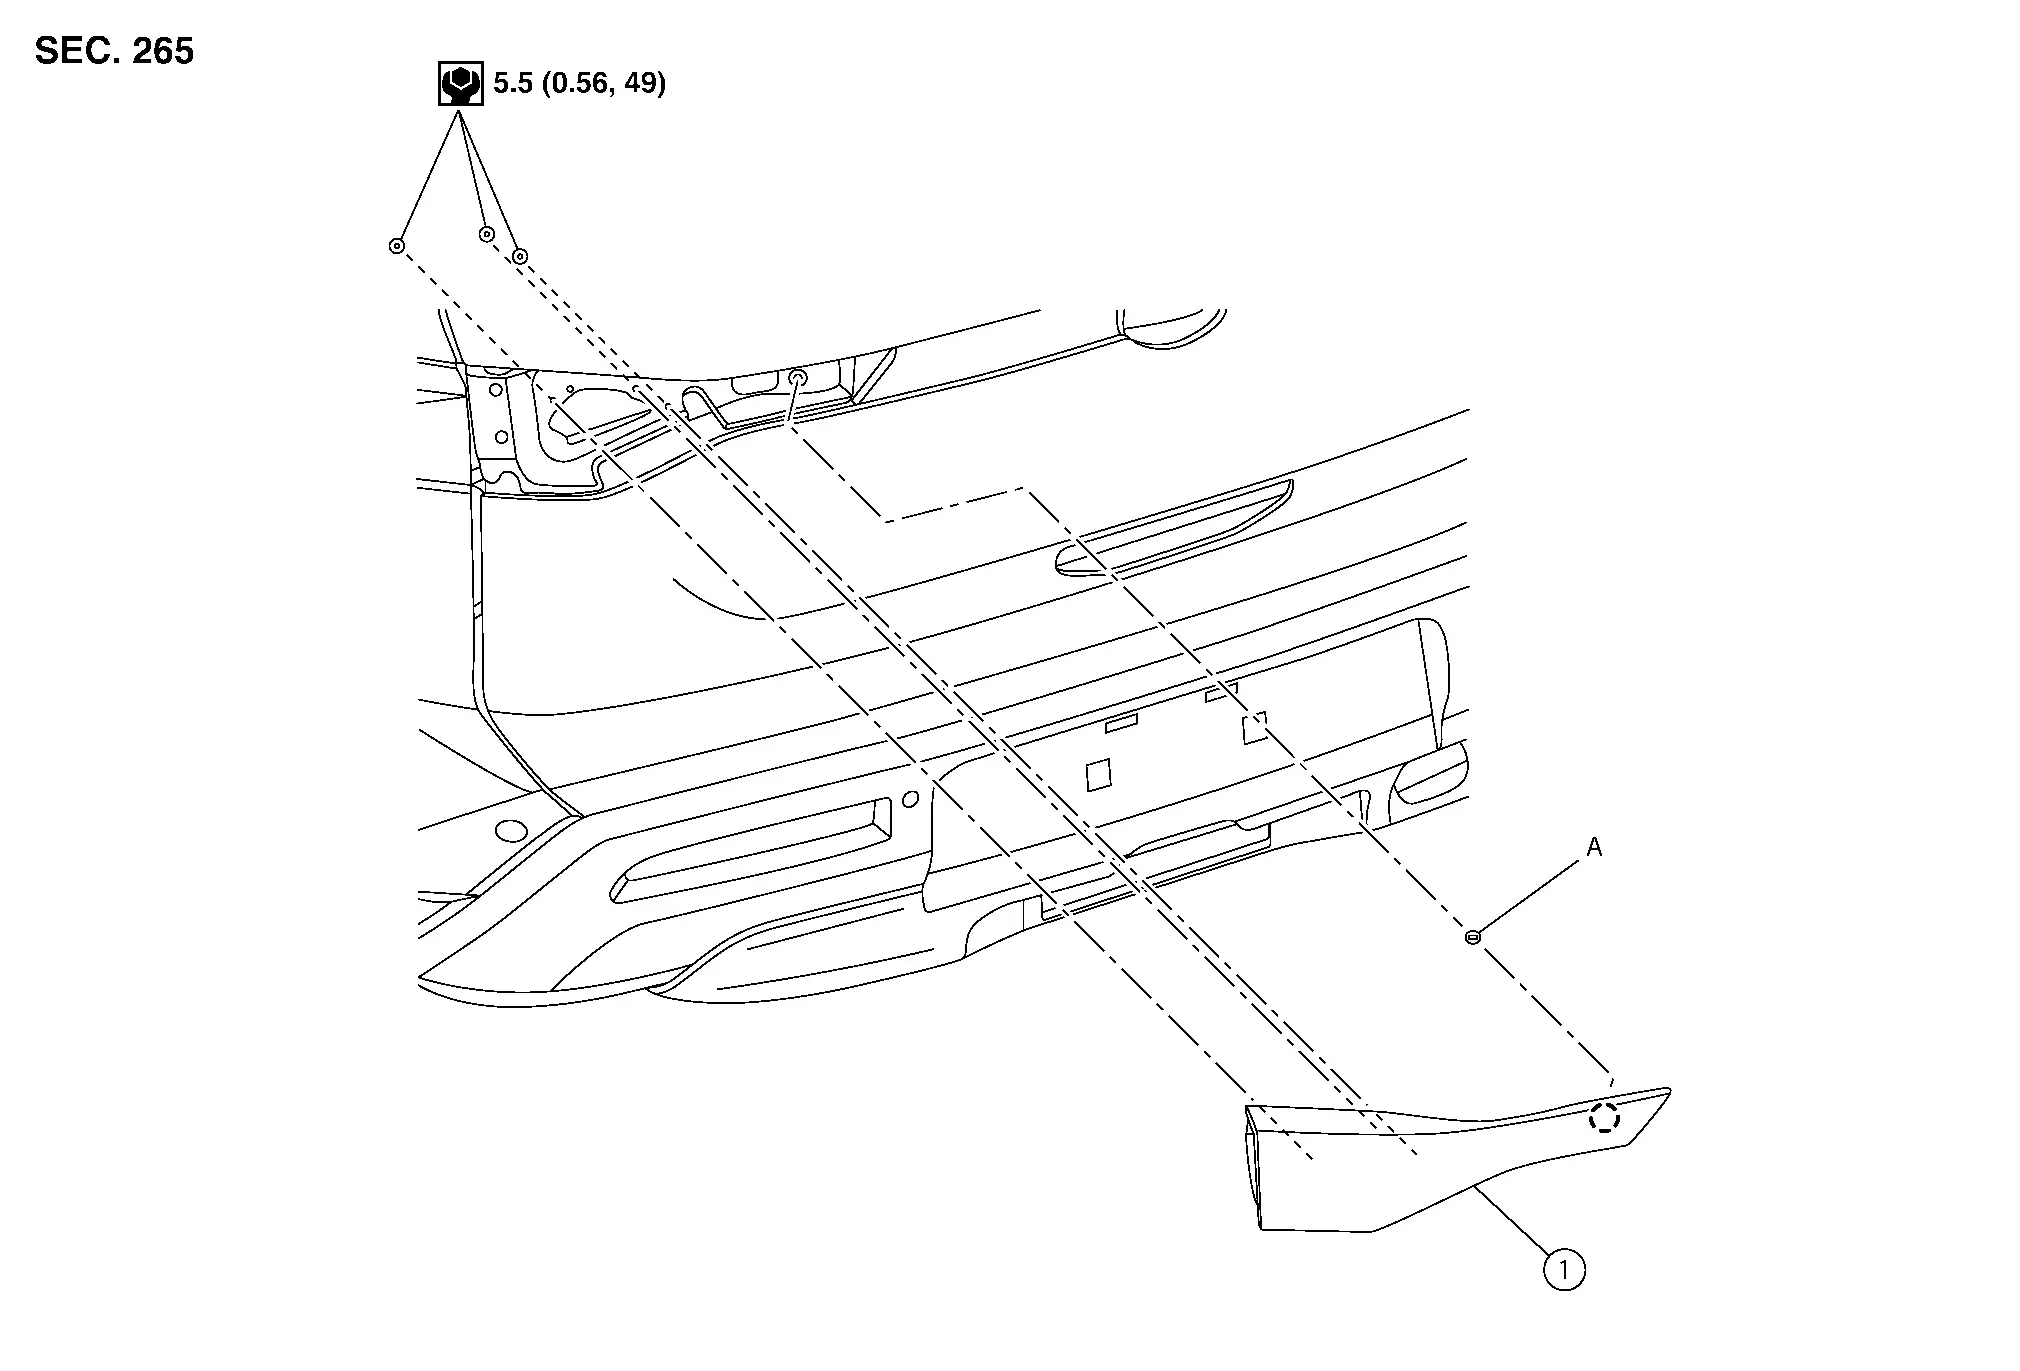
High-Mounted Stop Lamp Nissan Pathfinder 2022
Exploded View

| 1. | Rear spoiler | 2. | High-Mounted stop lamp |
 |
Pawl |
Removal and Installation
REMOVAL
Remove rear spoiler. Refer to Removal and Installation.
Remove screws from high-mounted stop lamp. Refer to Exploded View.
Using suitable tool, release pawls and remove high-mounted stop lamp.
INSTALLATION
Installation is in the reverse order of removal.
Bulb Replacement
HIGH-MOUNTED STOP LAMP BULB
The high-mounted stop lamp bulb is serviced as part of the high-mounted stop lamp. Refer to Removal and Installation.
Rear Combination Lamp (body Side) Nissan Pathfinder 2026
Exploded View
| 1. | Rear combination lamp (body side) | 2. | Rear combination lamp (body side) bolt cover | A. | Grommet |
| B. | Clip |
 |
Pawl |
 |
Locator pin |
Removal and Installation
Removal
To release pawls, press on lower surface near bottom edge of rear combination lamp (body side) bolt cover (1), then pull top edge of rear combination lamp (body side) bolt cover towards the rear of the Nissan Pathfinder vehicle and remove rear combination lamp (body side) bolt cover.
 |
: Pawl |
Remove rear combination lamp (body side) bolts (A) from rear combination lamp (body side) (1).
Pull rear combination lamp (body side) (1) in direction shown to release locator pins and clip. Remove clip from body and replace, attach the replacement clip to the lamp before lamp installing.
CAUTION:
-
Do not reuse clip.
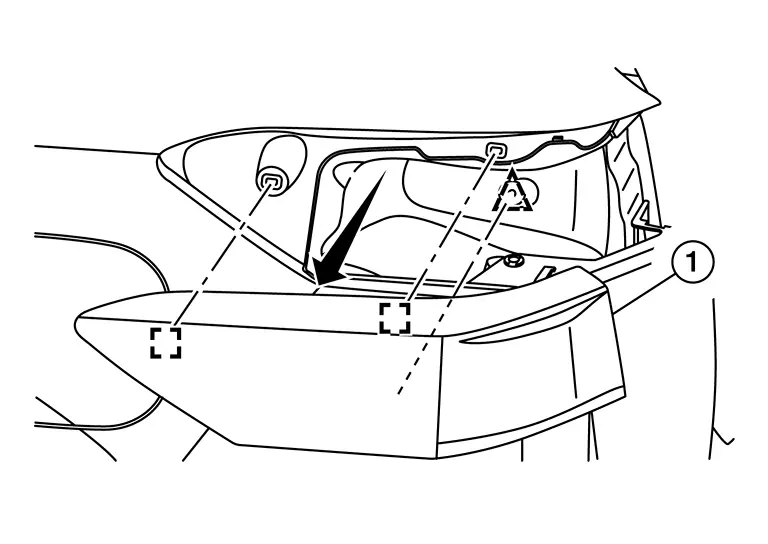
 |
: Locator pin |
 |
: Clip |
Disconnect the harness connectors from the rear combination lamp (body side) and remove.
Installation
Installation is in the reverse order of removal.
Bulb Replacement
STOP/TAIL LAMP BULB
The stop/tail lamp bulb is LED and is serviced as an assembly to the rear combination lamp (body side). Refer to Removal and Installation.
SIDE MARKER LAMP BULB
WARNING:
Do not touch bulb by hand while it is lit or right after being turned OFF. Burning may result.
CAUTION:
-
Do not touch glass surface of the bulb with bare hands or allow oil or grease to get on it to prevent damage to bulb.
-
Do not leave the bulb out of the lamp reflector for a long time because dust, moisture, smoke, etc. may affect the performance of the lamp.
Removal
Remove the rear combination lamp. Refer to Removal and Installation.
Rotate the side marker lamp socket counterclockwise and remove.
Remove the bulb from side marker lamp bulb socket.
Installation
Installation is in the reverse order of removal.
CAUTION:
After installing, be sure to install the bulb sockets securely to ensure watertightness.
REAR TURN SIGNAL LAMP BULB
WARNING:
Do not touch bulb by hand while it is lit or right after being turned OFF. Burning may result.
CAUTION:
-
Do not touch glass surface of the bulb with bare hands or allow oil or grease to get on it to prevent damage to bulb.
-
Do not leave the bulb out of the lamp reflector for a long time because dust, moisture, smoke, etc. may affect the performance of the lamp.
Removal
Remove the rear combination lamp. Refer to Removal and Installation.
Rotate the rear turn signal lamp socket counterclockwise and remove.
Remove the bulb from rear turn signal bulb socket.
Installation
Installation is in the reverse order of removal.
CAUTION:
After installing, be sure to install the bulb sockets securely to ensure watertightness.
Rear Combination Lamp (back Door Side) Nissan Pathfinder 2026
Exploded View
| 1. | Rear combination lamp (back door side) | A. | Grommet |
 |
Locating pin |
Removal and Installation
REMOVAL
Remove the back door lower finisher. Refer to Removal and Installation.
Disconnect the harness connectors from the rear combination lamp (back door side).
Remove rear combination lamp (back door side) nuts and remove.
INSTALLATION
Installation is in the reverse order of removal.
Bulb Replacement
TAIL LAMP BULB
The tail lamp bulb is LED and is serviced as an assembly to the rear combination lamp (back door side). Refer to Removal and Installation.
BACK-UP LAMP BULB
WARNING:
Do not touch bulb by hand while it is lit or right after being turned off. Burning may result.
CAUTION:
-
Do not touch glass surface of the bulb with bare hands or allow oil or grease to get on it to prevent damage to bulb.
-
Do not leave the bulb out of the lamp reflector for a long time because dust, moisture, smoke, etc. may affect the performance of the lamp.
Removal
Remove back door trim access panel.
Rotate back-up lamp socket counterclockwise and remove.
Remove back-up lamp bulb from bulb socket.
Installation
Installation is in the reverse order of removal.
License Plate Lamp Nissan Pathfinder Fifth generation
Exploded View
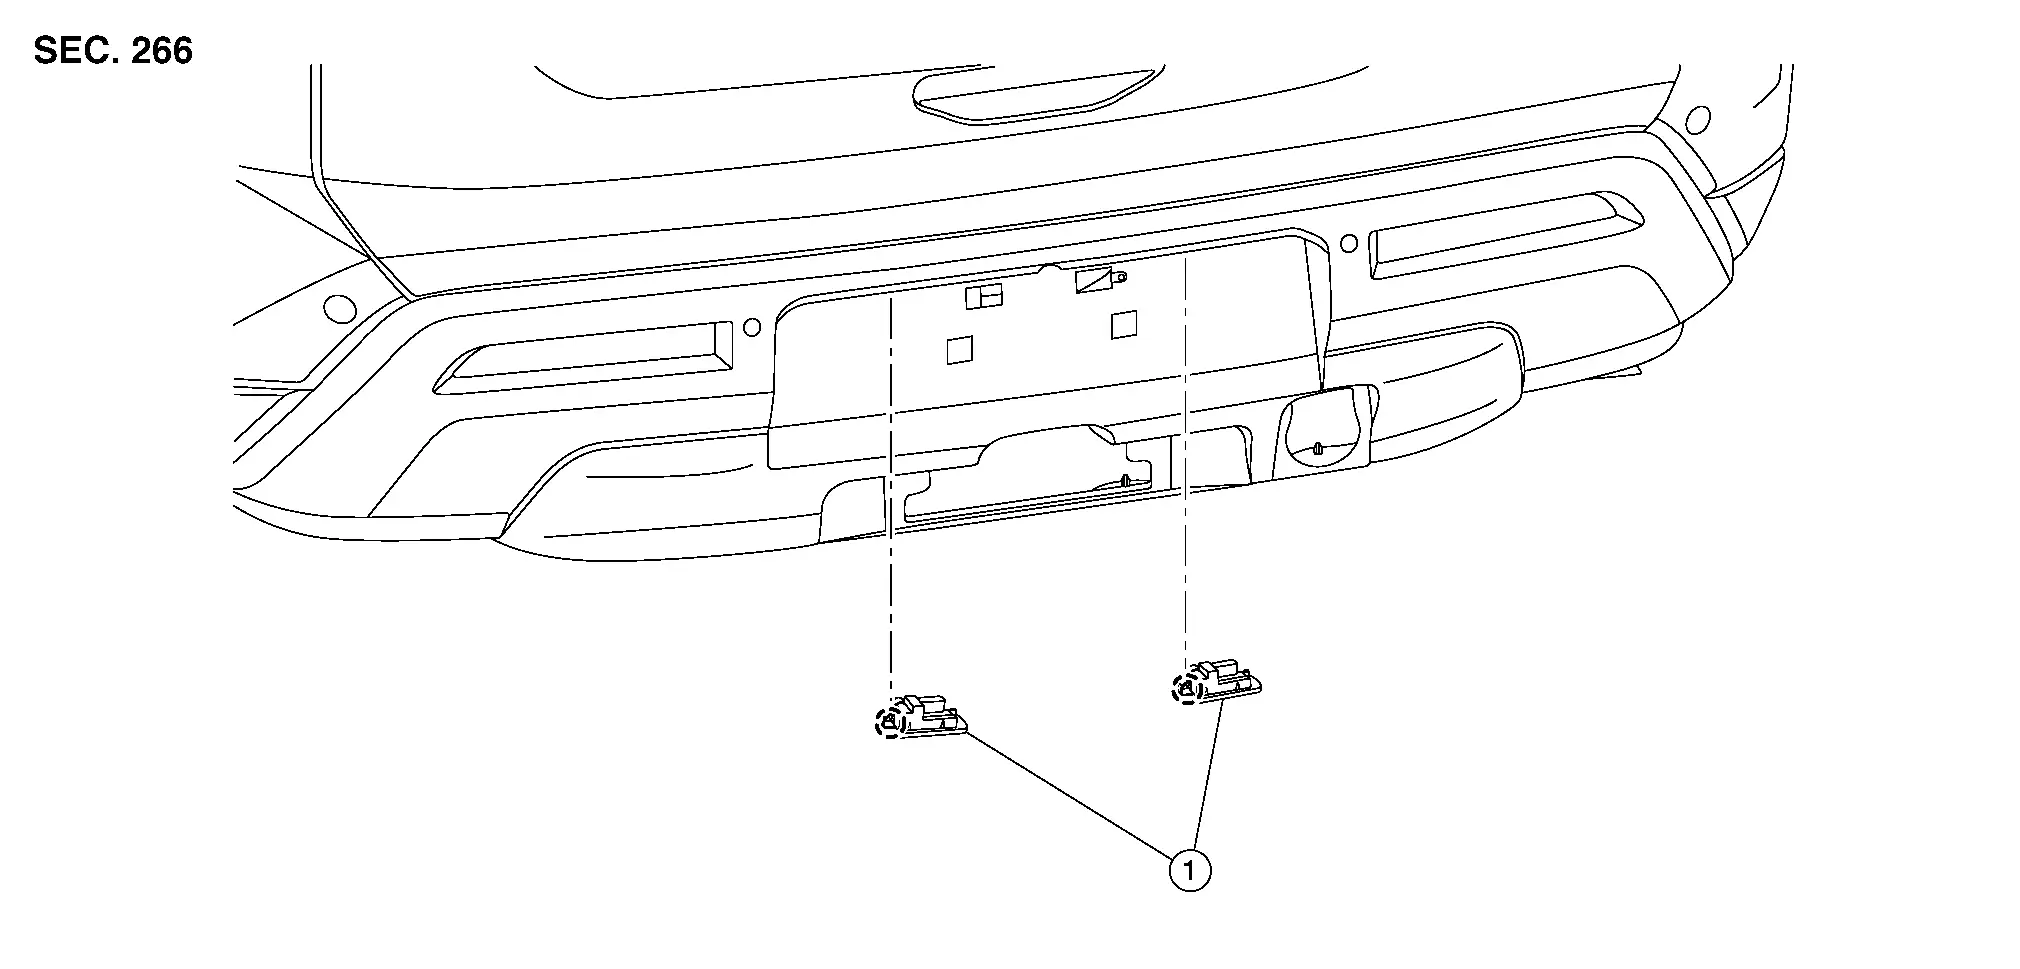
| 1. | License plate lamp |
 |
Pawl |
Removal and Installation
REMOVAL
Using suitable tool, release pawls and remove license plate lamp.
INSTALLATION
Installation is in the reverse order of removal.
Bulb Replacement
License plate lamp is serviced as an assembly. Refer to Removal and Installation.
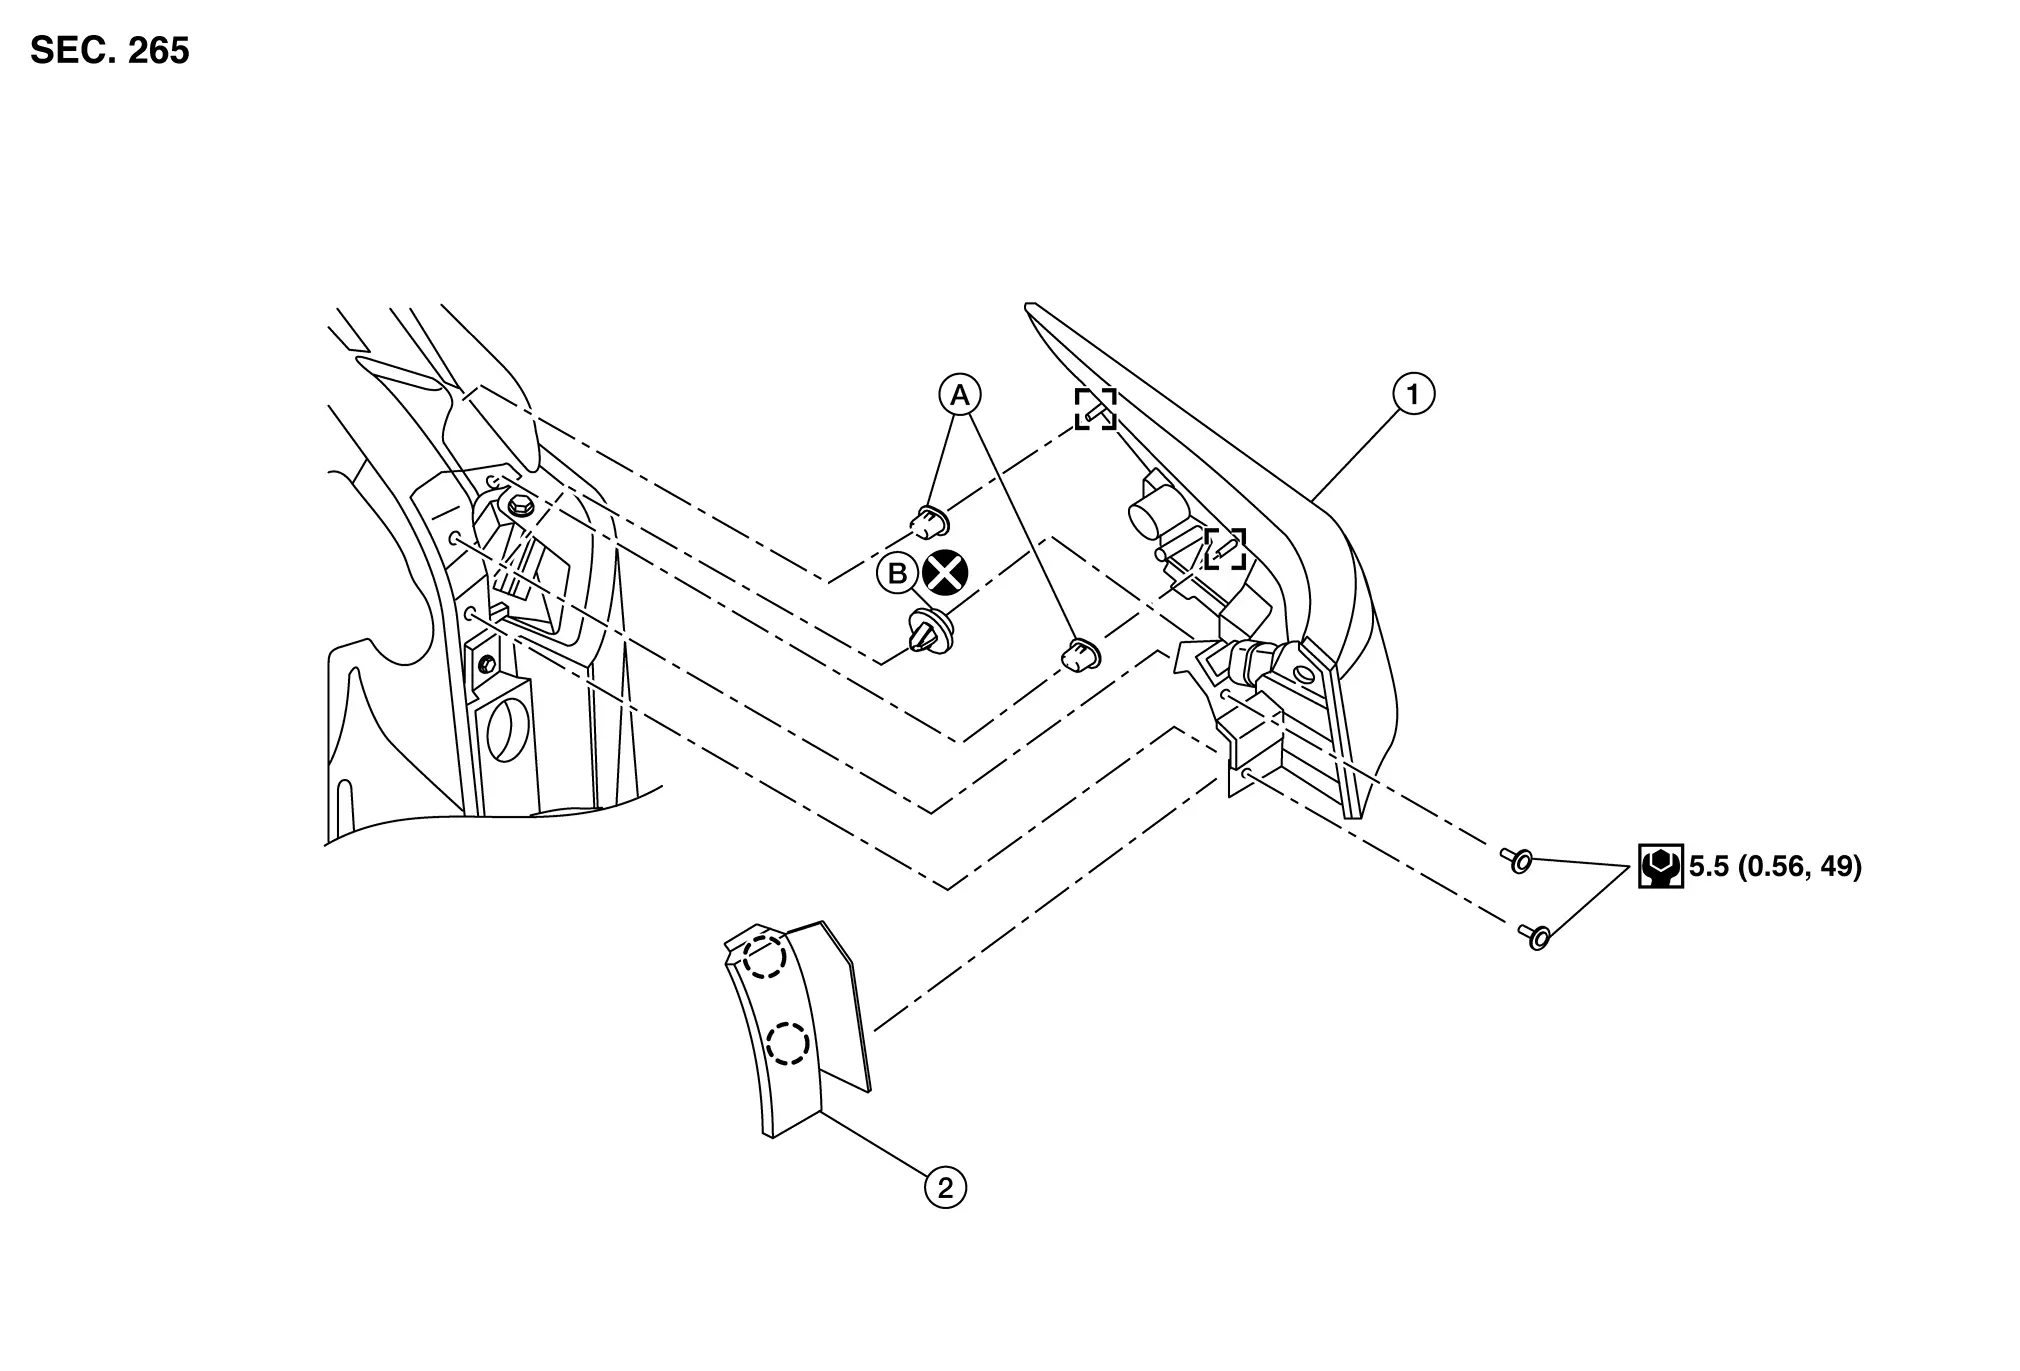
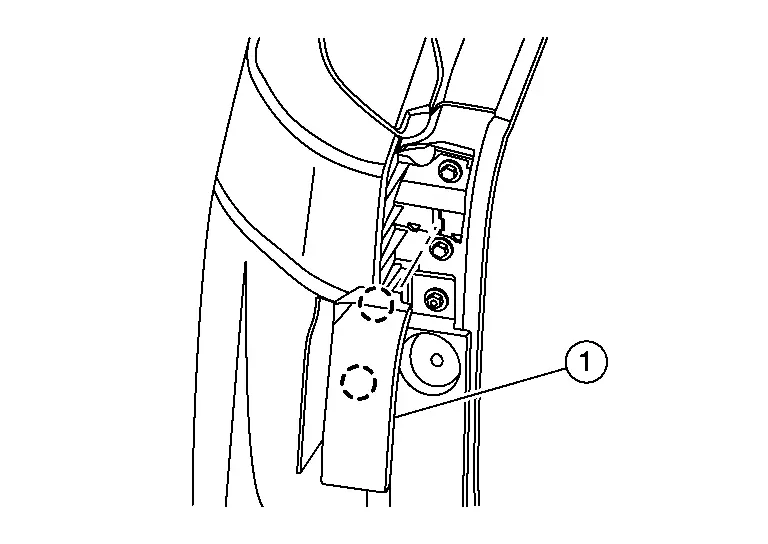
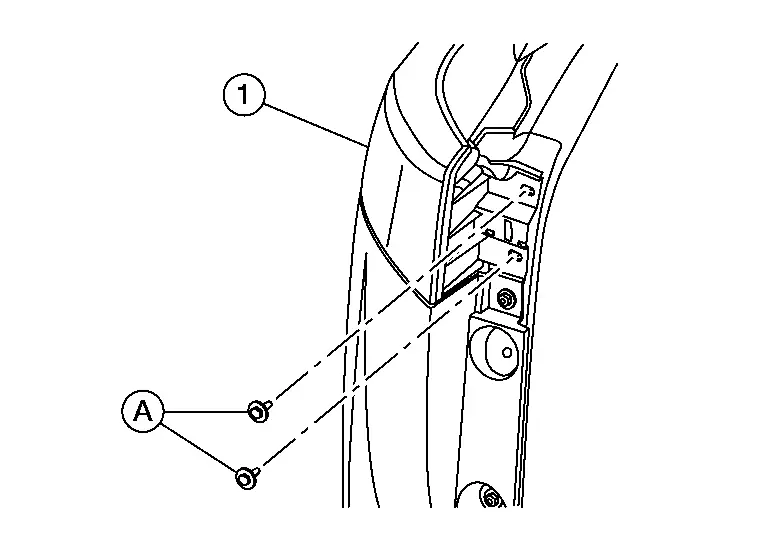
Door Mirror Turn Signal Nissan Pathfinder SUV
Removal and Installation
REMOVAL
Remove door mirror rear finisher. Refer to Removal and Installation.
Remove door mirror finisher. Refer to Exploded View.
Remove screws (A) from door mirror (1).
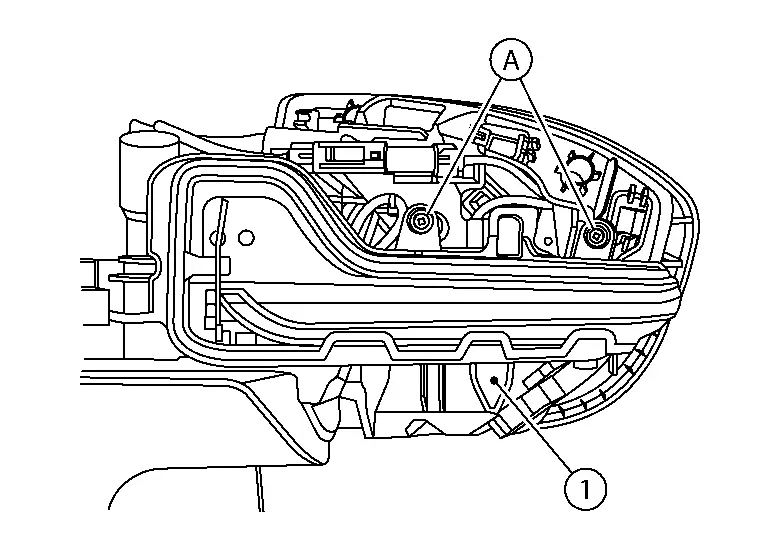
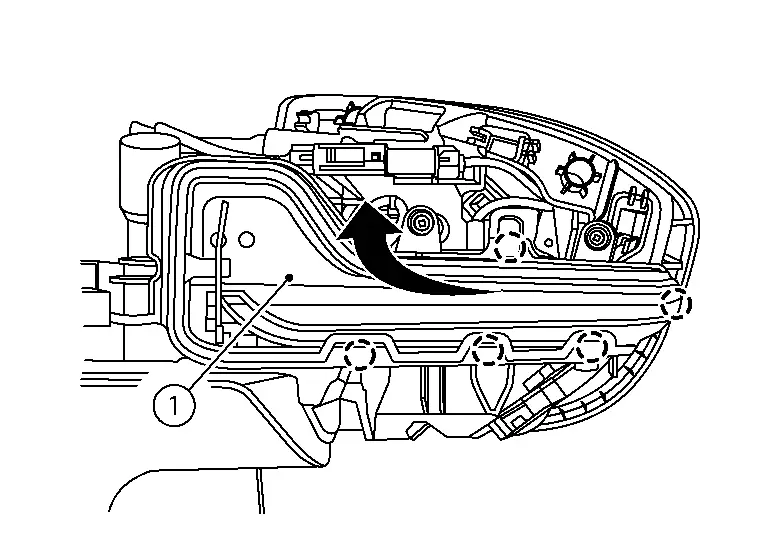
Use suitable tool, release pawls from door mirror turn signal (1) and remove in direction shown.
Disconnect the harness connector from door mirror turn signal.
INSTALLATION
Installation is in the reverse order of removal.
Bulb Replacement
The door mirror turn signal bulb is LED and is serviced as an assembly of the door mirror turn signal. Refer to Removal and Installation.

Nissan Pathfinder (R53) 2022-2026 Service Manual
Removal and Installation
- Front Combination Lamp
- Front Fog Lamp
- Optical Sensor
- Lighting Turn Signal Switch
- Hazard Switch
- High-Mounted Stop Lamp
- Rear Combination Lamp (body Side)
- Rear Combination Lamp (back Door Side)
- License Plate Lamp
- Door Mirror Turn Signal
Contact Us
Nissan Pathfinder Info Center
Email: info@nipathfinder.com
Phone: +1 (800) 123-4567
Address: 123 Pathfinder Blvd, Nashville, TN 37214, USA
Working Hours: Mon–Fri, 9:00 AM – 5:00 PM (EST)
