Nissan Pathfinder: Interior - Rear Door Finisher
Exploded View
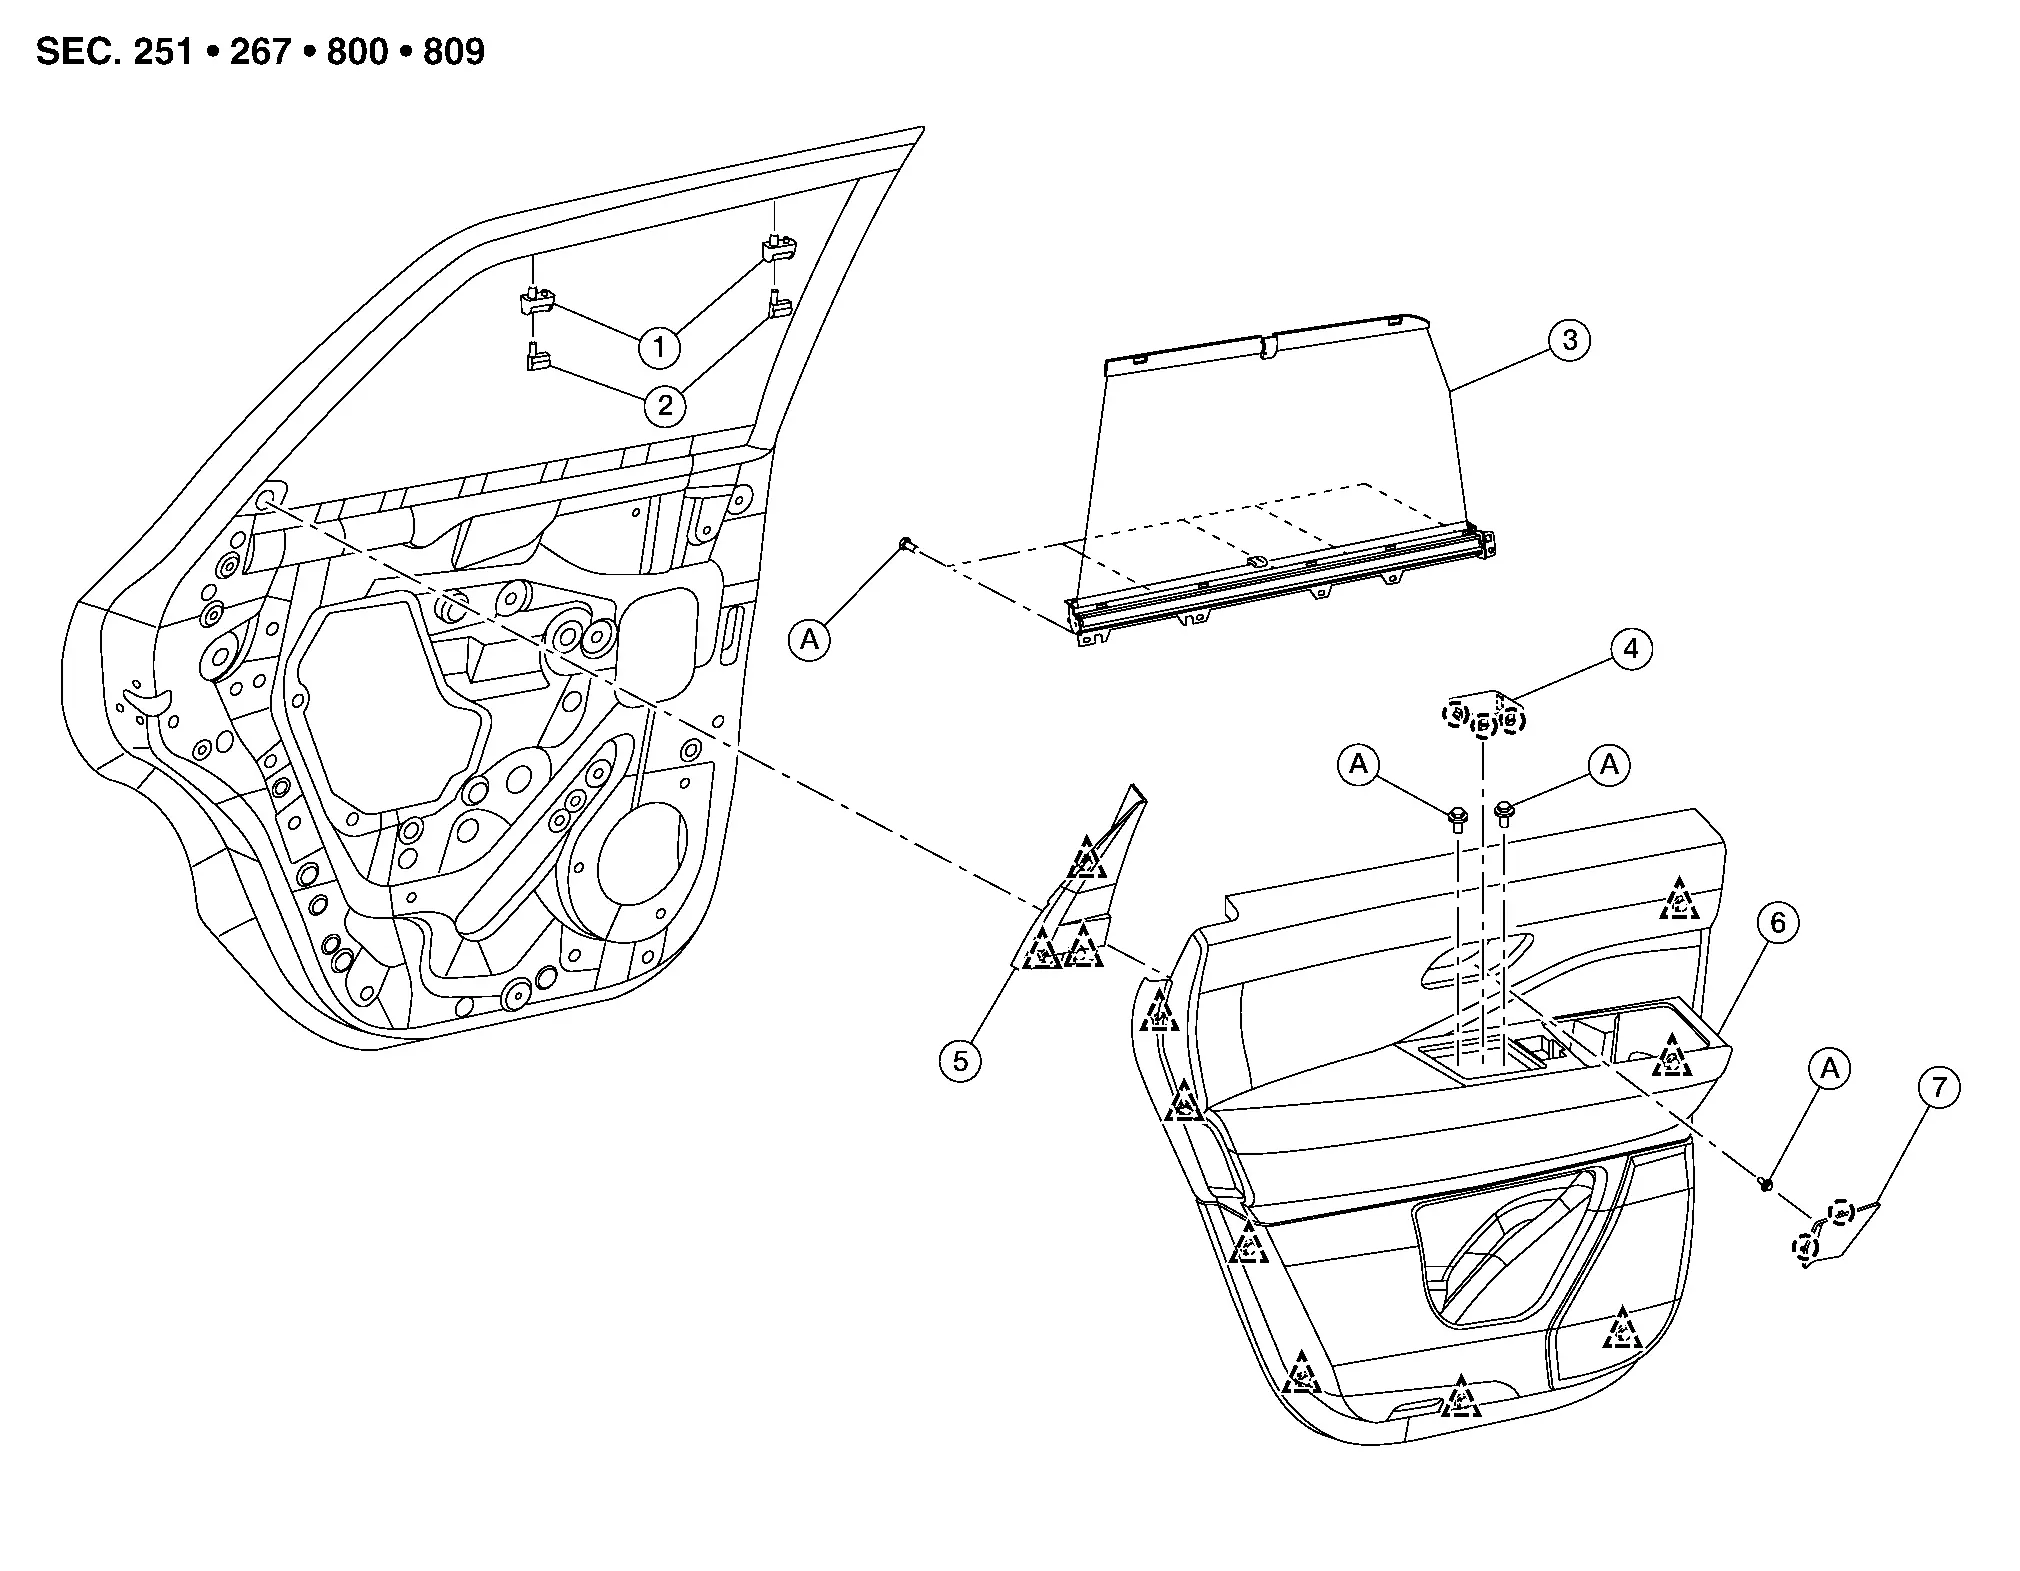
| 1. | Rear door shade hook | 2. | Rear door shade hook clip | 3. | Rear door shade assembly |
| 4. | Rear door pull handle finisher | 5. | Corner finisher | 6. | Rear door finisher |
| 7. | Rear door handle escutcheon | A. | Bolt |
 |
Clip |
 |
Pawl |
Removal and Installation
REMOVAL
Using a suitable tool, release pawls and remove door pull handle finisher (1).
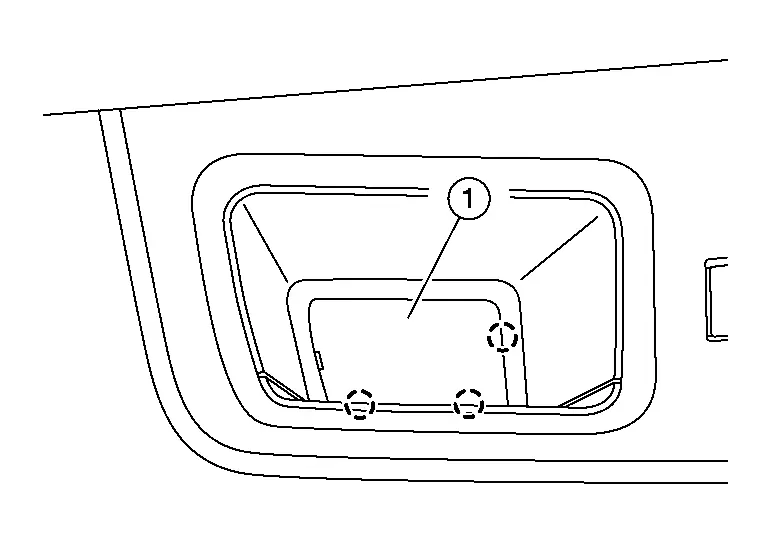
 |
: Pawl |
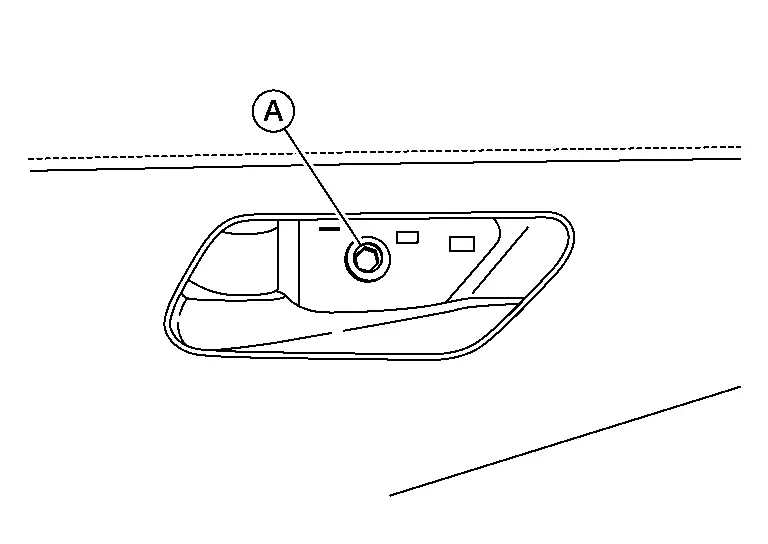
Remove the rear door finisher bolts (A).
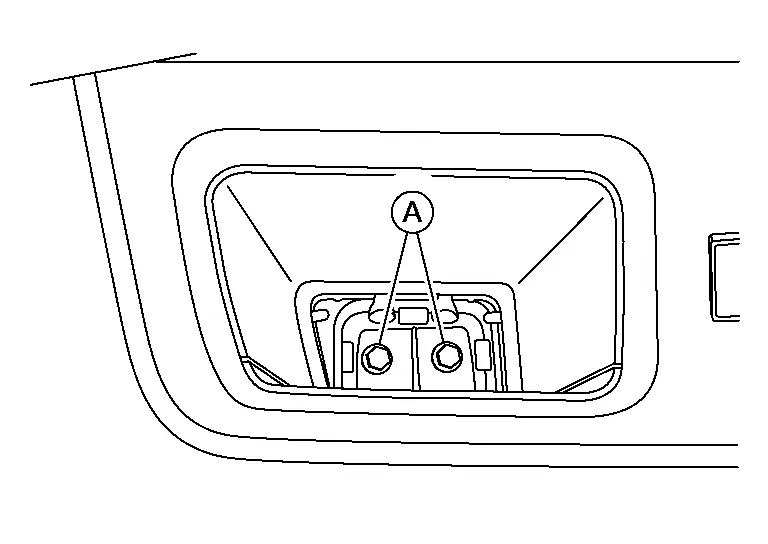
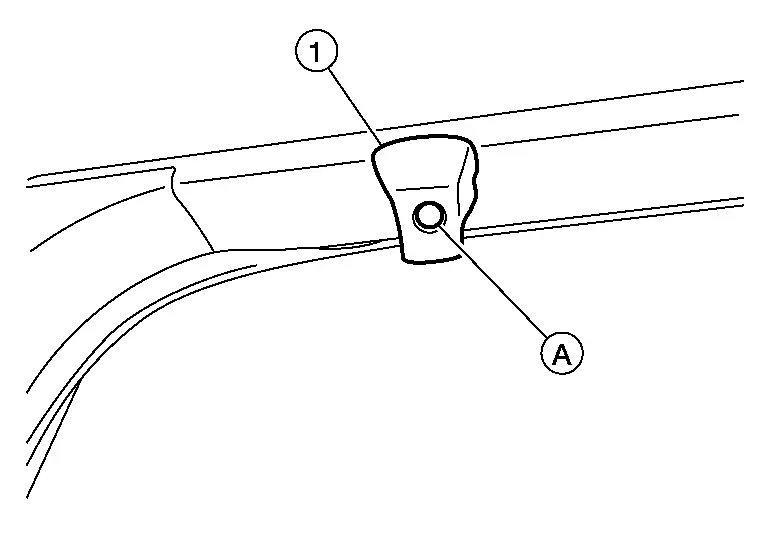
Using a suitable tool, release pawls and remove rear door handle escutcheon (1).
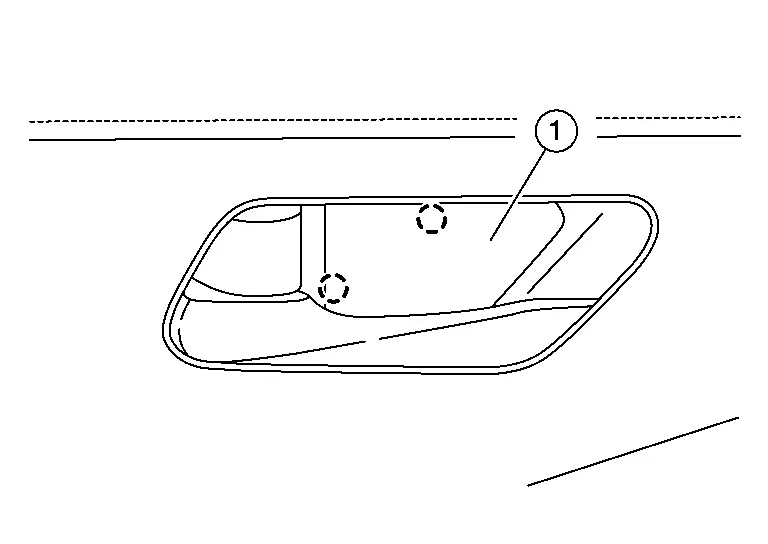
 |
: Pawl |
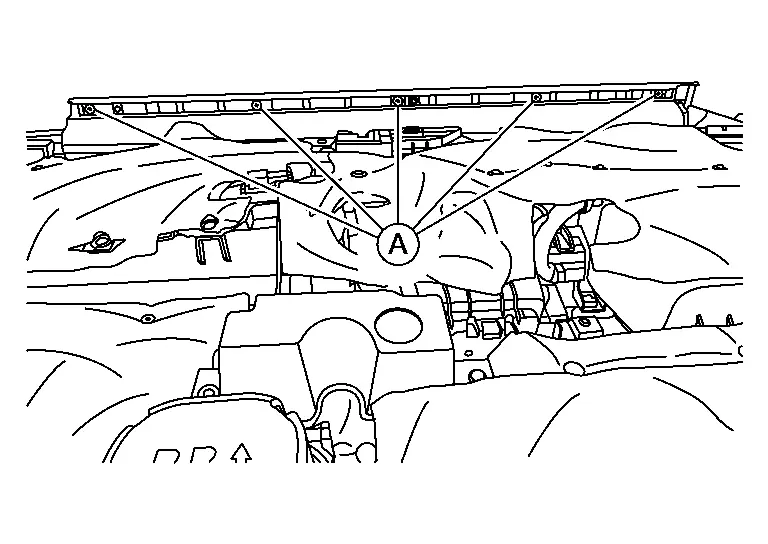
Remove bolt (A).
CAUTION:
Do not reuse inside door handle escutcheon. Replace with new part after removal.
Remove the rear power window switch. Refer to Removal and Installation (LH FRONT ONLY AUTO DOWN) or Removal and Installation (LH & RH FRONT AUTO UP/DOWN).
Using a suitable tool, release rear door finisher clips. Refer to Exploded View.
Disconnect the harness connector from the rear door finisher.
Disconnect the door lock cable and inside door handle cable from the inside handle.
Remove the rear door finisher.
INSTALLATION
Installation is in the reverse order of removal.
CAUTION:
-
Do not reuse inside door handle escutcheon. Replace with new part after removal.
-
Visually check the clips and pawls for deformation and damage during installation. Replace with new ones if necessary.
-
When installing rear door finisher, check that clips and pawls are securely placed in body panel holes.
Rear Door Shade Assembly Nissan Pathfinder 2026
Removal and Installation
Remove rear door finisher. Refer to Removal and Installation.
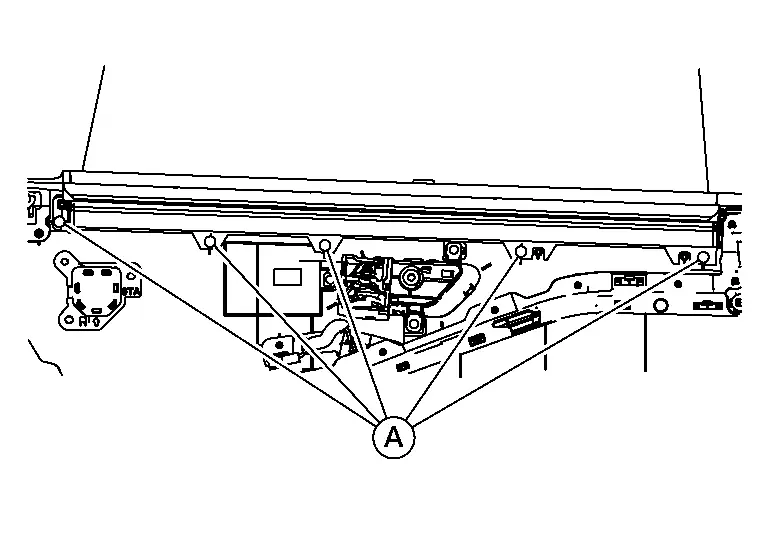
Remove bolts (A).
Remove bolts (A).
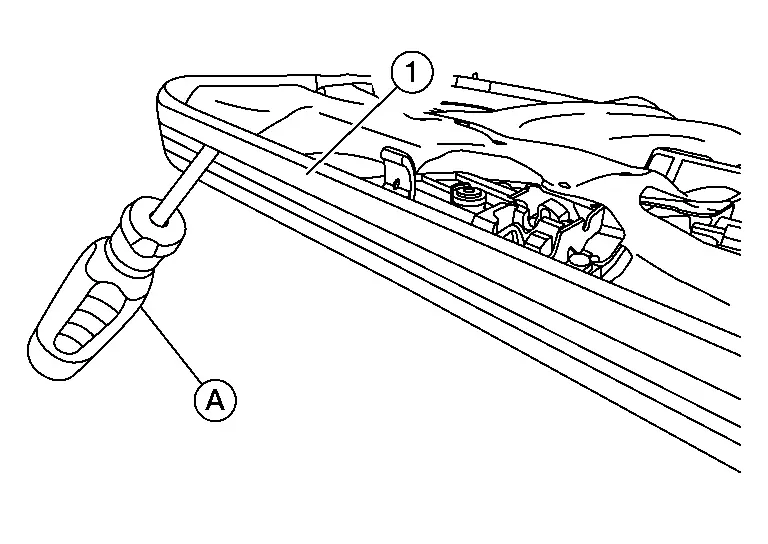
Using a suitable tool (A), release rear door shade assembly (1) from rear door finisher.
Remove rear door shade assembly.
INSTALLATION
Installation is in the reverse order of removal.
Rear Door Shade Hook Nissan Pathfinder
Removal and Installation
Using a suitable tool, push clip (A) to release rear door shade hook (1).
Remove rear door shade hook.
INSTALLATION
Installation is in the reverse order of removal.

Nissan Pathfinder (R53) 2022-2026 Service Manual
Rear Door Finisher
Contact Us
Nissan Pathfinder Info Center
Email: info@nipathfinder.com
Phone: +1 (800) 123-4567
Address: 123 Pathfinder Blvd, Nashville, TN 37214, USA
Working Hours: Mon–Fri, 9:00 AM – 5:00 PM (EST)
