Nissan Pathfinder: Ventilation System - Grilles
Exploded View
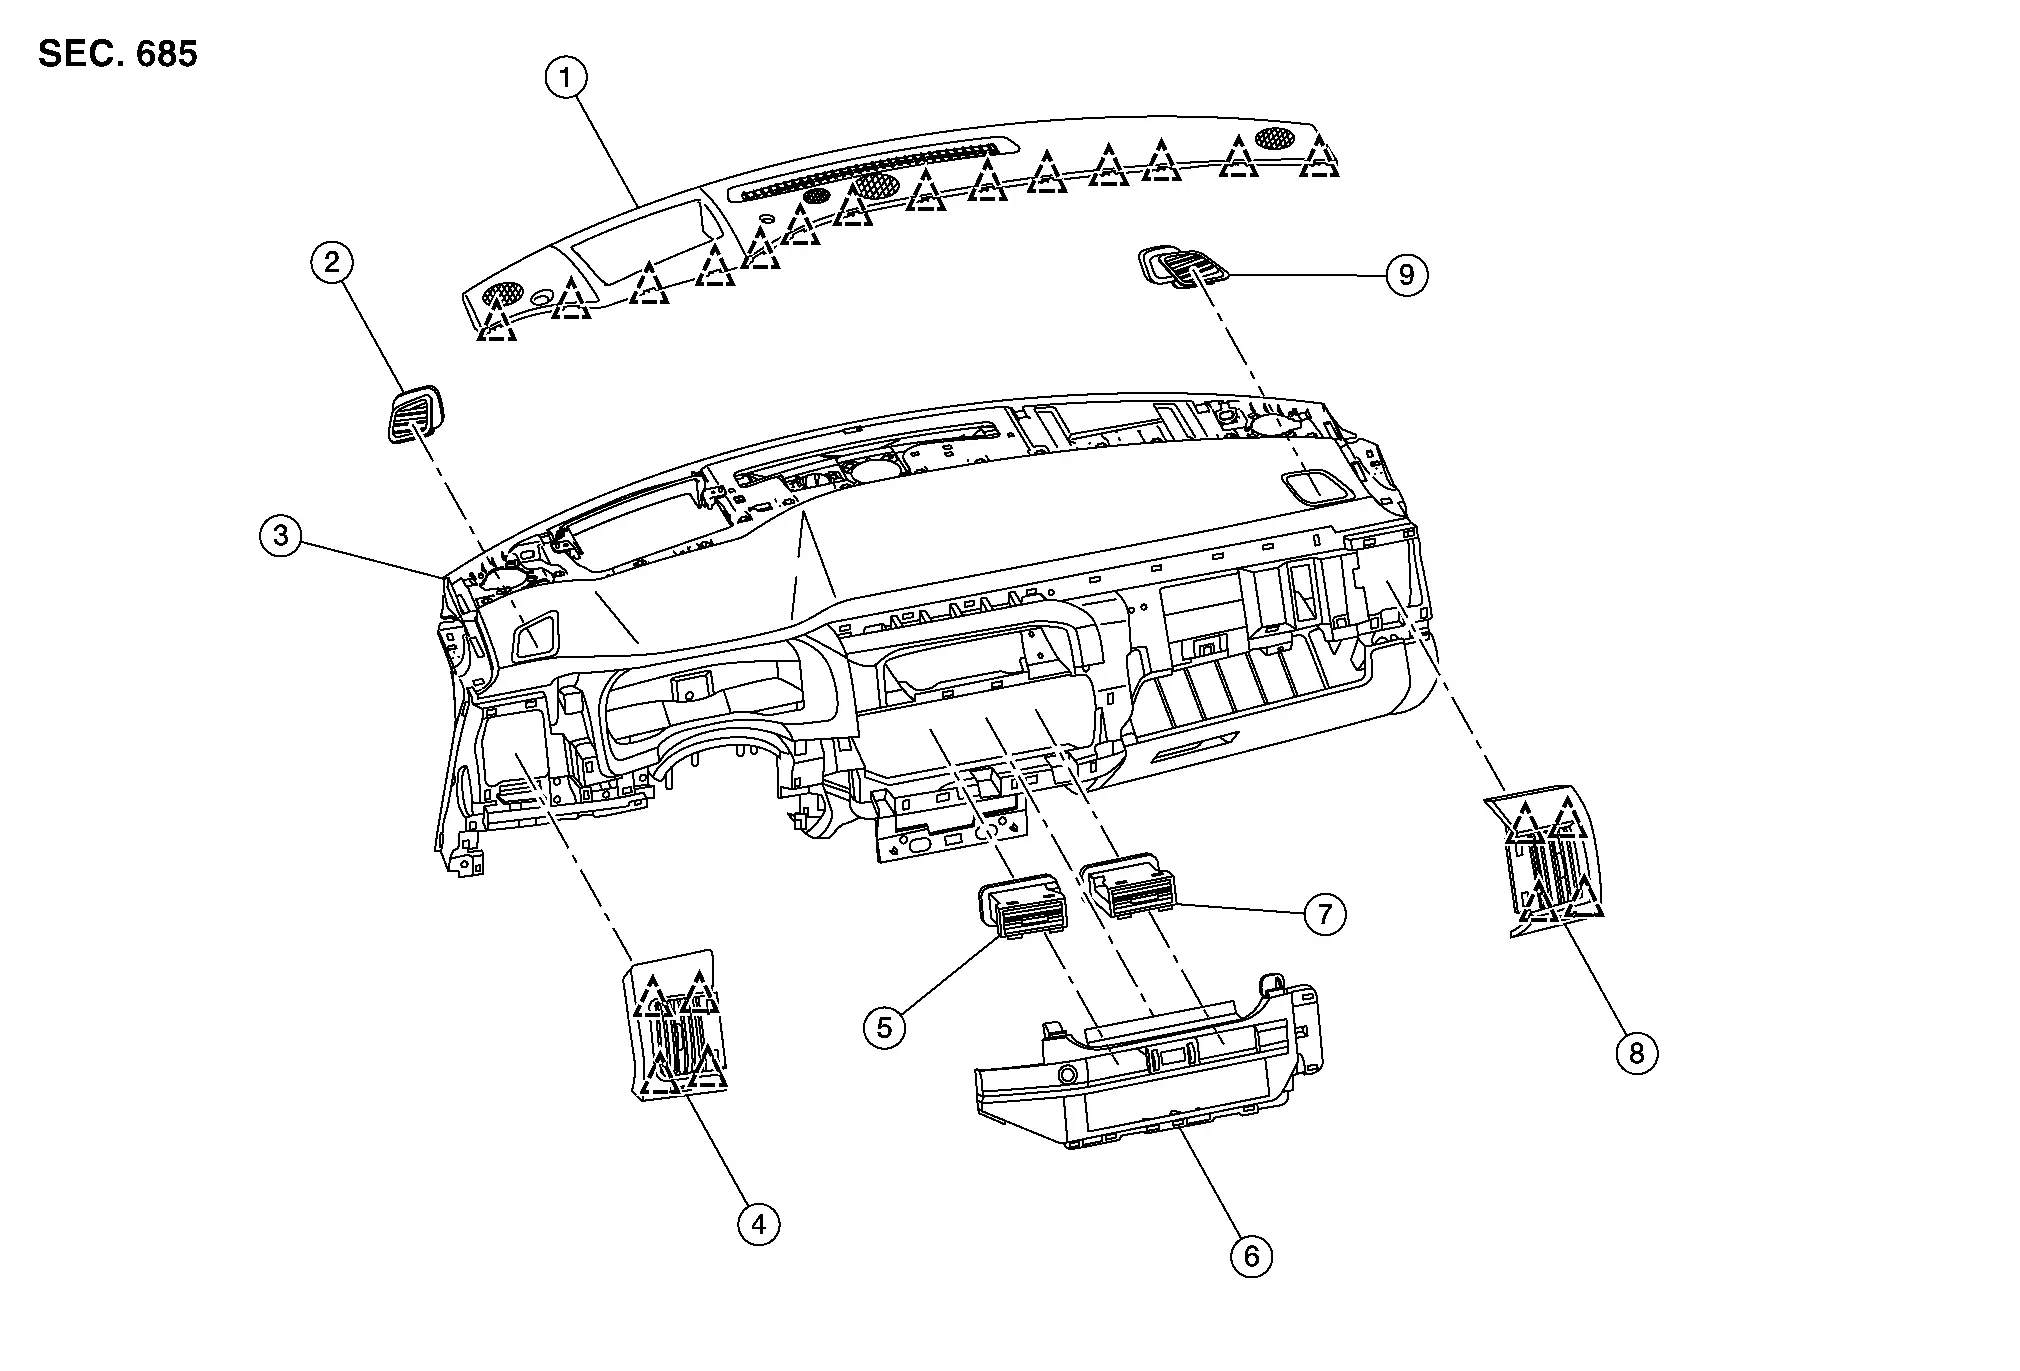
| 1. | Defroster grille | 2. | Side defroster grille (LH) | 3. | Instrument panel |
| 4. | Side ventilator grille (LH) | 5. | Center ventilator grille (LH) | 6. | Cluster lid C |
| 7. | Center ventilator grille (RH) | 8. | Side ventilator grille (RH) | 9. | Side defroster grille (RH) |
 |
Clips |
- Defroster Grille
- Center Ventilator Grille
- Side Ventilator Grille
- Side Defroster Grille
- Rear Ventilator Upper Grille
Defroster Grille Nissan Pathfinder SUV
Removal and Installation
REMOVAL
Remove front pillar finisher (RH/LH). Refer to Removal and Installation.
Using a suitable tool, release clips then remove defroster grille. Refer to Exploded View.
INSTALLATION
Installation is in the reverse order of removal.
Center Ventilator Grille Nissan Pathfinder SUV
Removal and Installation (RH)
REMOVAL
Remove cluster lid C. Refer to Removal and Installation.
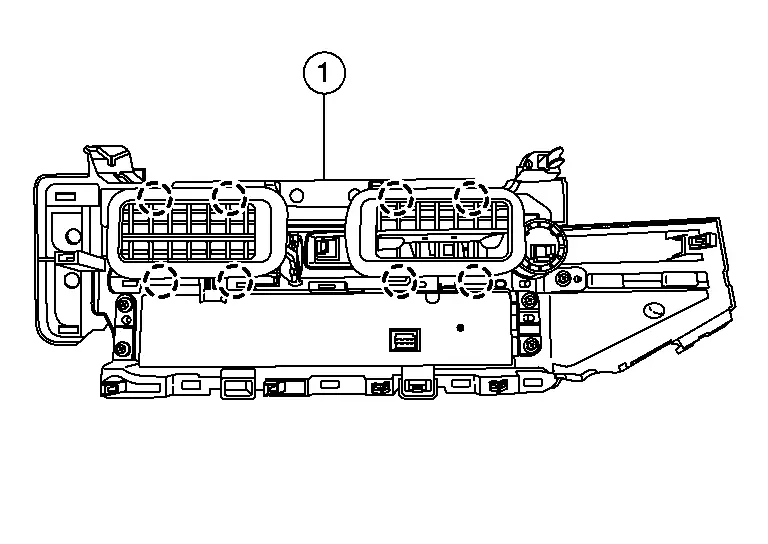
Using a suitable tool, release center ventilator grille pawls from cluster lid C (1).
 |
: Pawl |
Remove center ventilator grille (RH).
INSTALLATION
Installation is in the reverse order of removal.
Removal and Installation (LH)
REMOVAL
Remove cluster lid C. Refer to Removal and Installation.
Using a suitable tool, release center ventilator grille pawls from cluster lid C (1).

 |
: Pawl |
Remove center ventilator grille (LH).
INSTALLATION
Installation is in the reverse order of removal.
Side Ventilator Grille Nissan Pathfinder SUV
Removal and Installation (RH)
REMOVAL
Remove instrument finisher C. Refer to Removal and Installation.
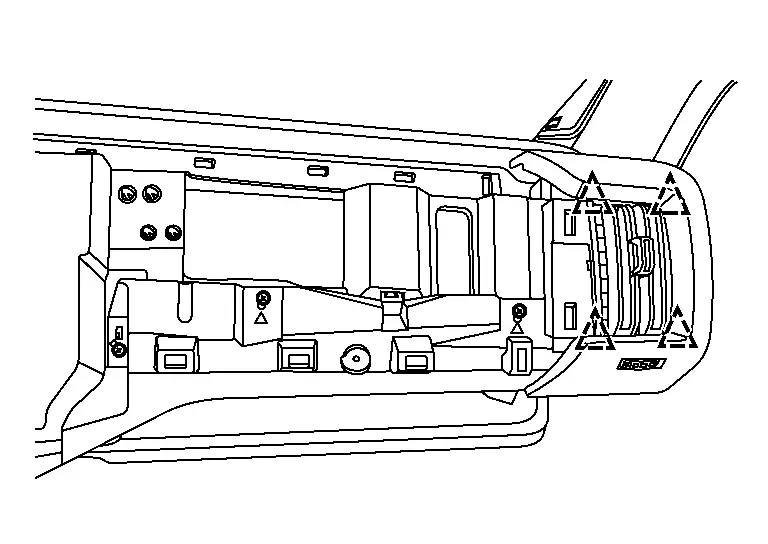
Using a suitable tool, release clips then remove side ventilator grille (RH).
 |
: Clip |
CAUTION:
Apply protective tape around the side ventilator grille and instrument panel prior to removal to protect components from damage.
INSTALLATION
Installation is in the reverse order of removal.
Removal and Installation (LH)
REMOVAL
Remove instrument finisher A. Refer to Removal and Installation.
Using a suitable tool, release clips then remove side ventilator grille (LH).
 |
: Clip |
CAUTION:
Apply protective tape around the side ventilator grille and instrument panel prior to removal to protect components from damage.
INSTALLATION
Installation is in the reverse order of removal.
Side Defroster Grille Nissan Pathfinder R53
Removal and Installation (RH)
REMOVAL
Remove side defroster duct. Refer to Removal and Installation.
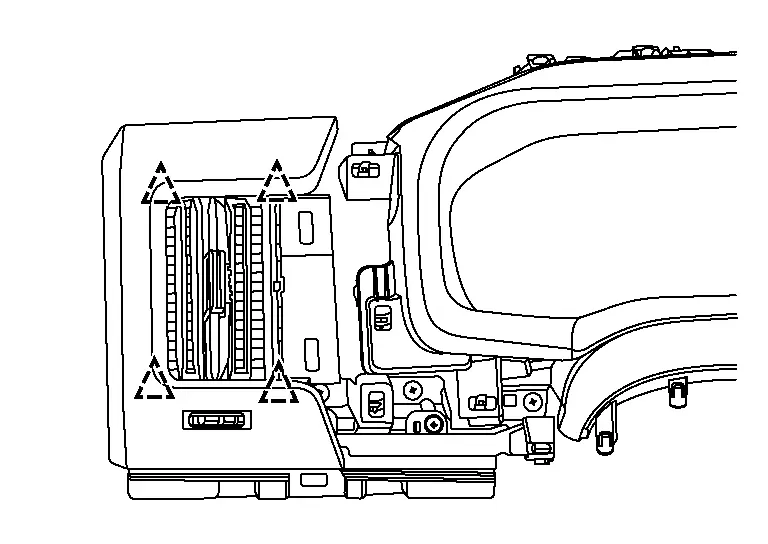
Using a suitable tool, release pawl then remove side defroster grille (RH).
CAUTION:
Apply protective tape around the instrument panel and side defroster grille prior to removal to prevent components from damage.
 |
: Pawl |
INSTALLATION
Installation is in the reverse order of removal.
Removal and Installation (LH)
REMOVAL
Remove side defroster duct. Refer to Removal and Installation.
Using a suitable tool, release pawl then remove side defroster grille (LH).
CAUTION:
Apply protective tape around the instrument panel and side defroster grille prior to removal to prevent components from damage.
 |
: Pawl |
INSTALLATION
Installation is in the reverse order of removal.
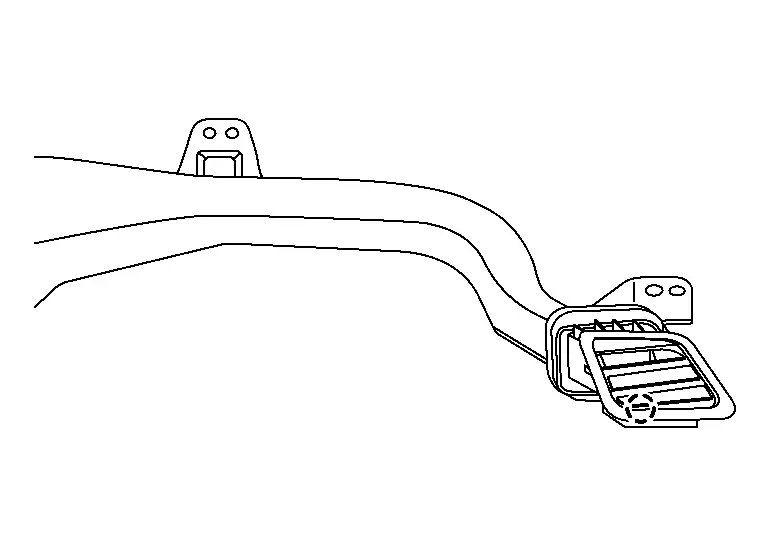
Rear Ventilator Upper Grille Nissan Pathfinder Fifth generation
Removal and Installation - 2nd Row
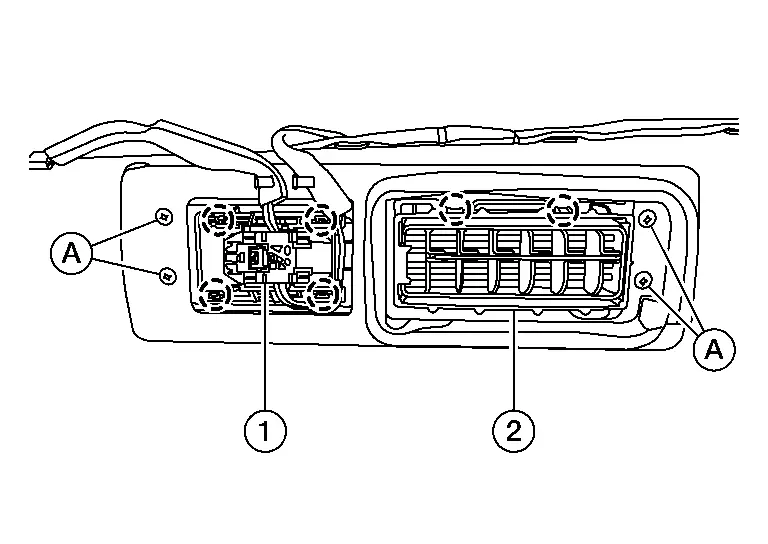
REMOVAL
Remove headlining. Refer to Removal and Installation.
Remove screws (A).
 |
: Pawl |
Disconnect harness connector from personal lamp (1).
Using a suitable tool, release pawls then remove personal lamp.
Using a suitable tool, release pawls then remove rear ventilator duct upper grille (2).
INSTALLATION
Installation is in the reverse order of removal.
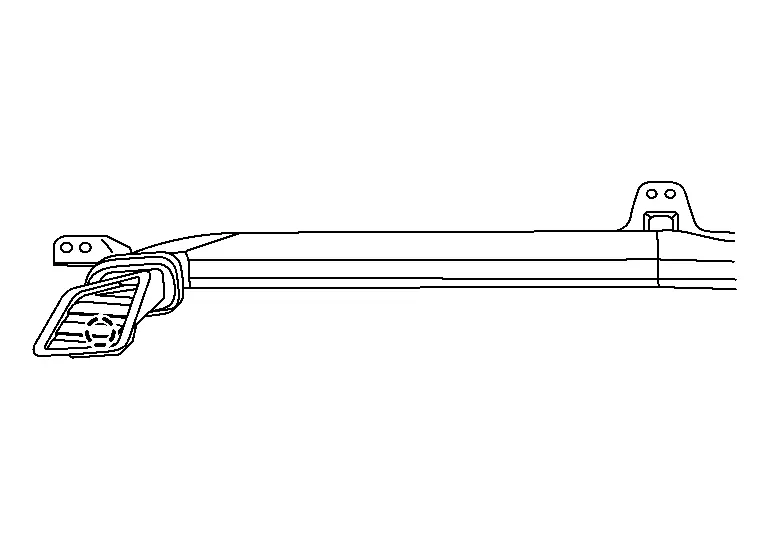
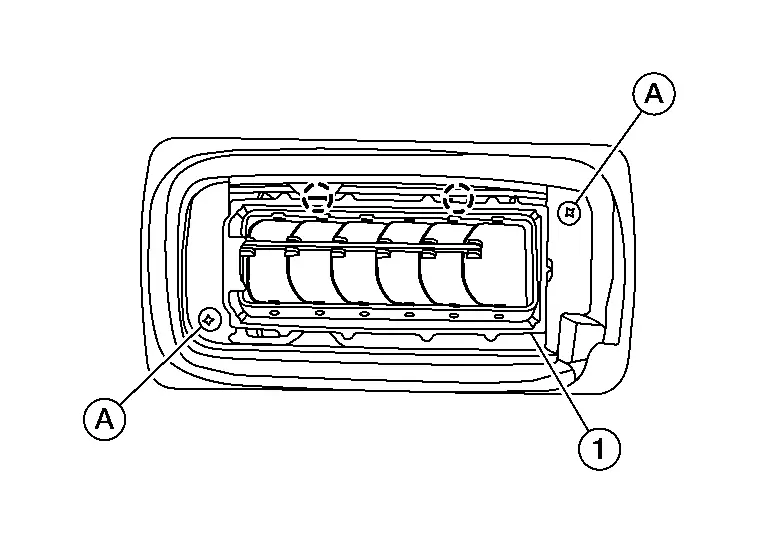
Removal and Installation - 3rd Row
Remove headlining. Refer to Removal and Installation.
Remove screws (A).
 |
: Pawl |
Using a suitable tool, release pawls then remove rear ventilator duct upper grille (1).
INSTALLATION
Installation is in the reverse order of removal.

Nissan Pathfinder (R53) 2022-2026 Service Manual
Grilles
- Defroster Grille
- Center Ventilator Grille
- Side Ventilator Grille
- Side Defroster Grille
- Rear Ventilator Upper Grille
Contact Us
Nissan Pathfinder Info Center
Email: info@nipathfinder.com
Phone: +1 (800) 123-4567
Address: 123 Pathfinder Blvd, Nashville, TN 37214, USA
Working Hours: Mon–Fri, 9:00 AM – 5:00 PM (EST)
