Nissan Pathfinder: Heater & Air Conditioning System - Cooler Pipe and Hose
Exploded View
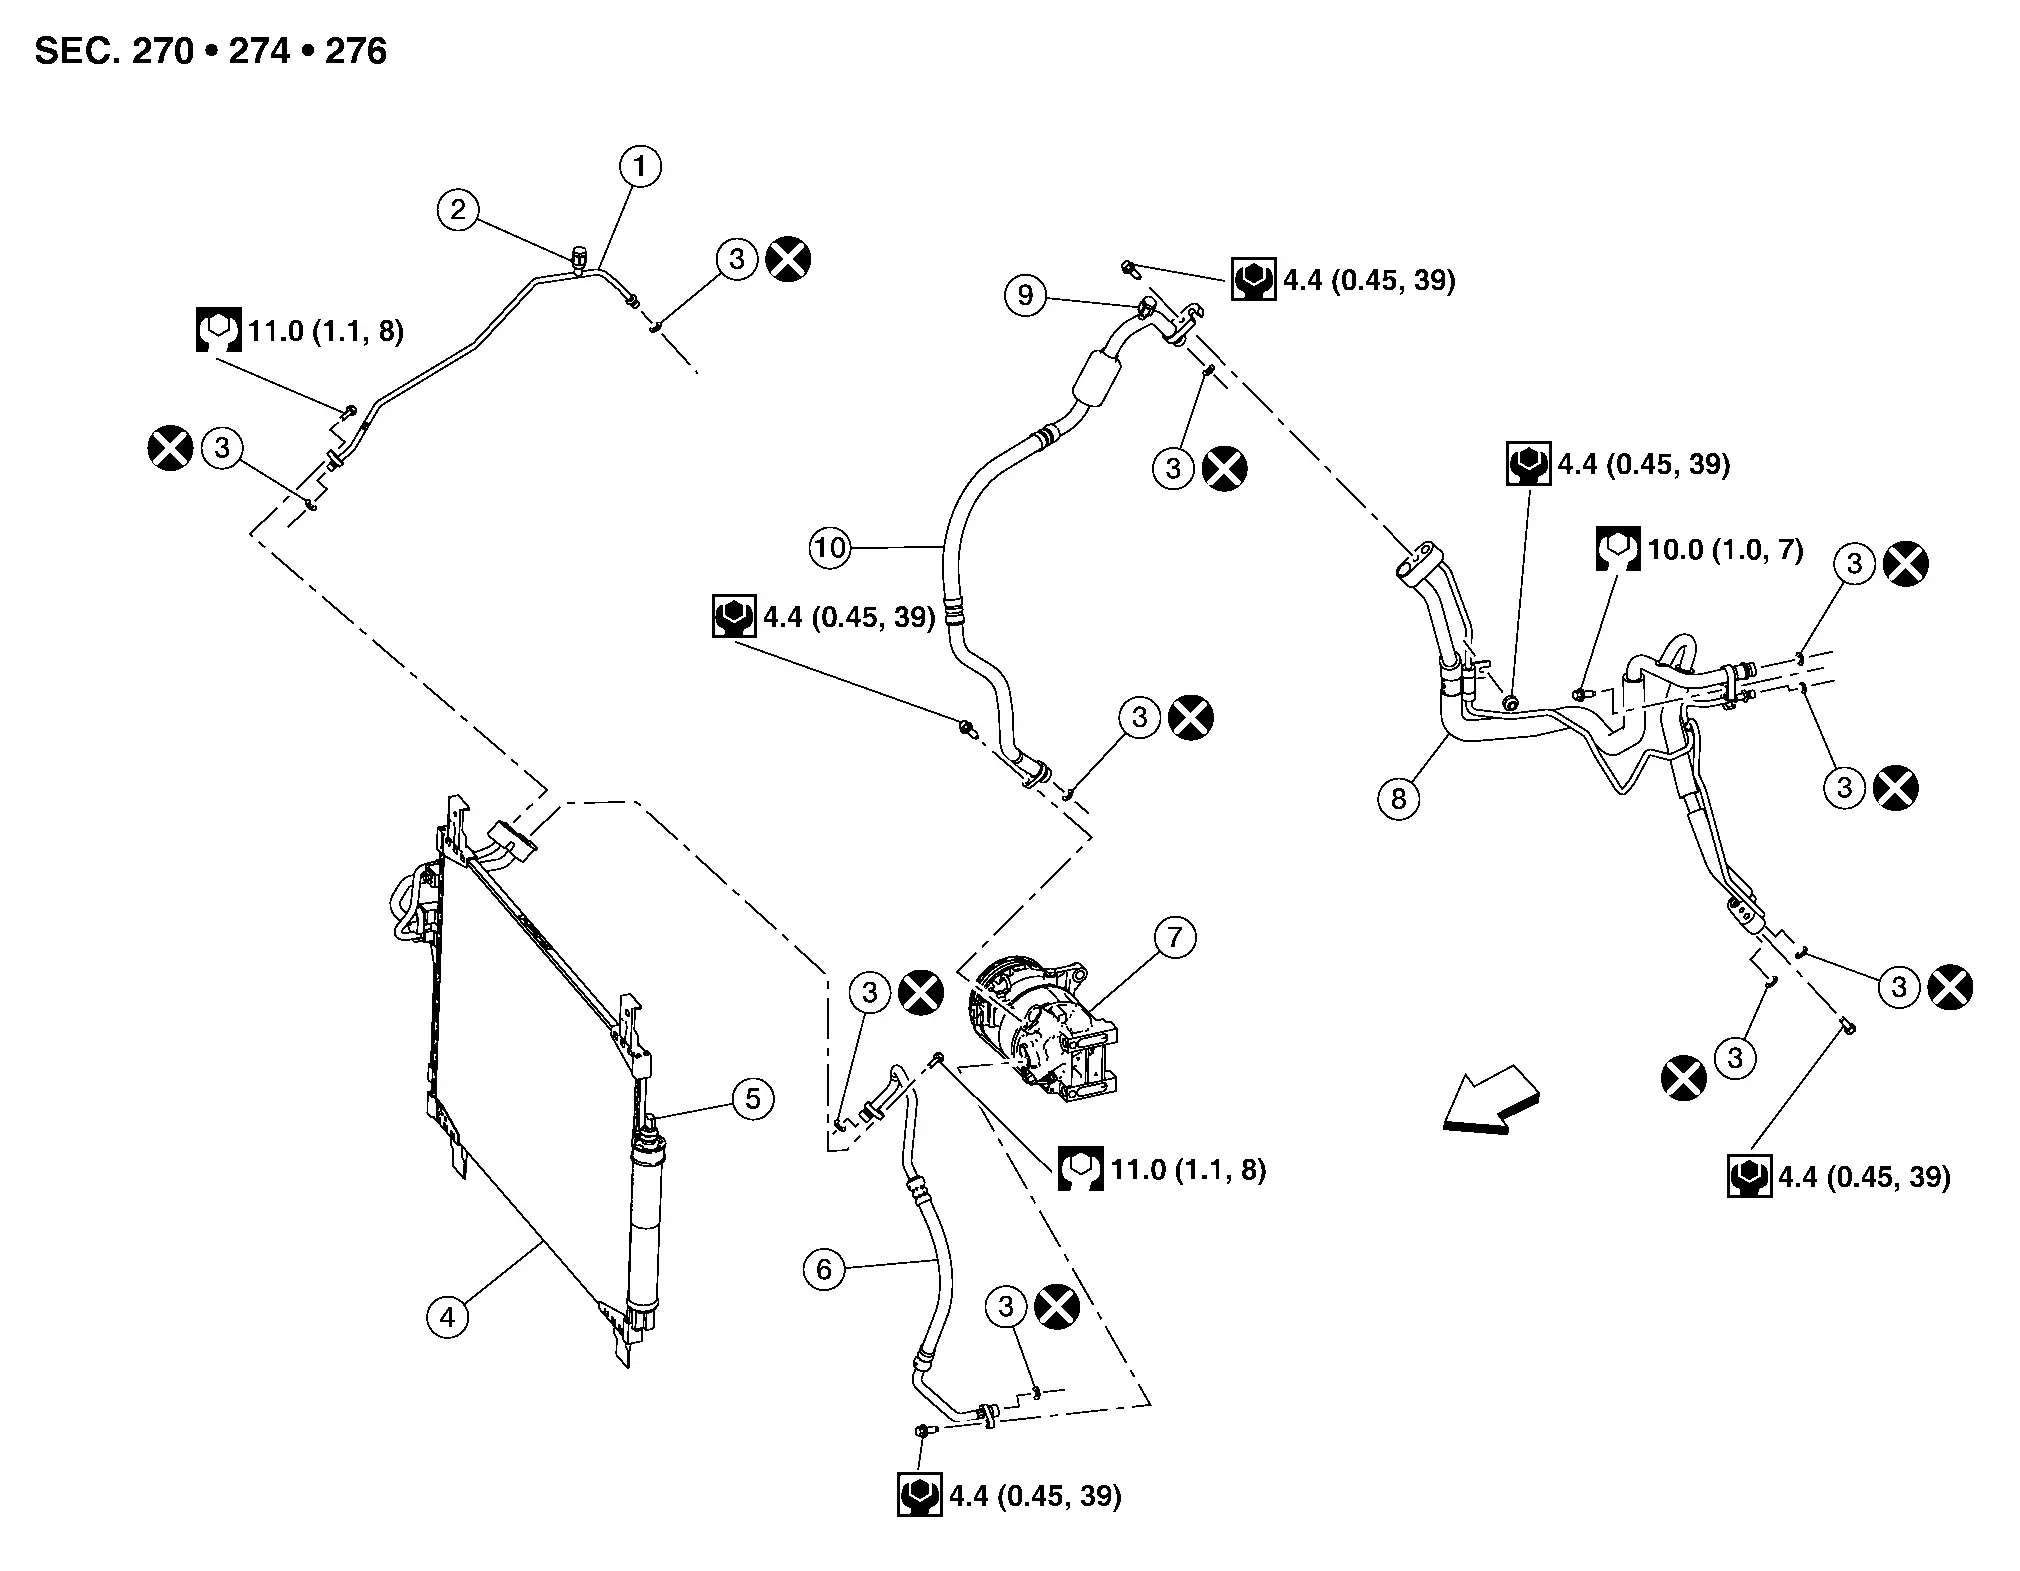
| 1. | High-pressure pipe | 2. | High-pressure service port | 3. | O-ring |
| 4. | Condenser | 5. | Refrigerant pressure sensor | 6. | High-pressure flexible hose |
| 7. | Compressor | 8. | High-pressure and low-pressure pipe | 9. | Low-pressure service port |
| 10. | Low-pressure flexible hose |
 |
Front |
- High-Pressure and Low-Pressure Pipe
- Low-Pressure Flexible Hose
- High-Pressure Pipe
- High-Pressure Flexible Hose
- Underfloor Rear High-Pressure and Low-Pressure A/c Pipes
High-Pressure and Low-Pressure Pipe Nissan Pathfinder SUV
Removal and Installation
REMOVAL
Discharge refrigerant. Refer to Recycle Refrigerant.
Remove front under cover. Refer to Removal and Installation.
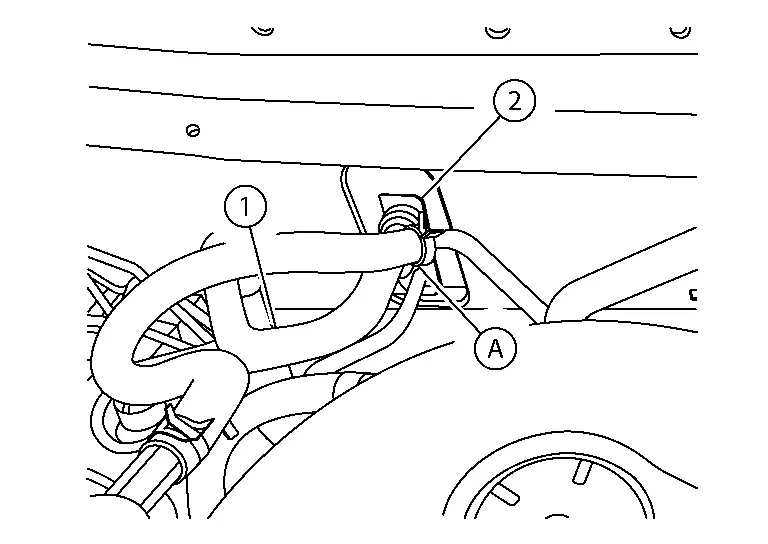
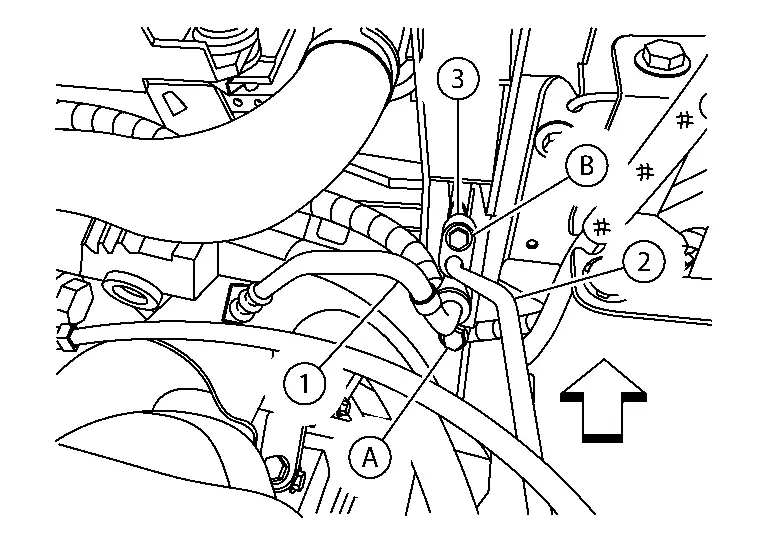
Remove bolt (B), then disconnect high-pressure and low-pressure pipe (1) from underfloor rear high-pressure and low-pressure A/C pipes (2).

CAUTION:
Cap or wrap the joint of the pipe with suitable material such as vinyl tape to avoid the entry of air.
Remove core support cover. Refer to Exploded View.
Remove cowl top extension. Refer to Exploded View.
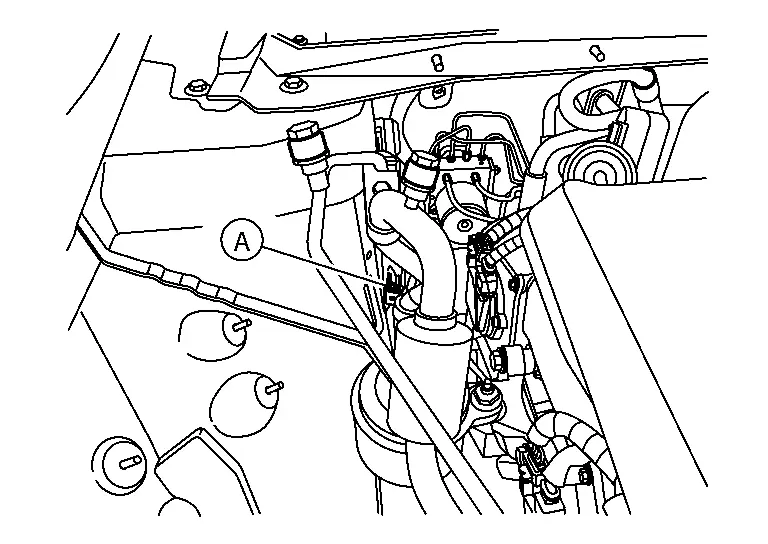
Remove nut (A), then disconnect high-pressure and low-pressure pipe (1) from expansion valve (2).
CAUTION:
Cap or wrap the joint of the pipe with suitable material such as vinyl tape to avoid the entry of air.
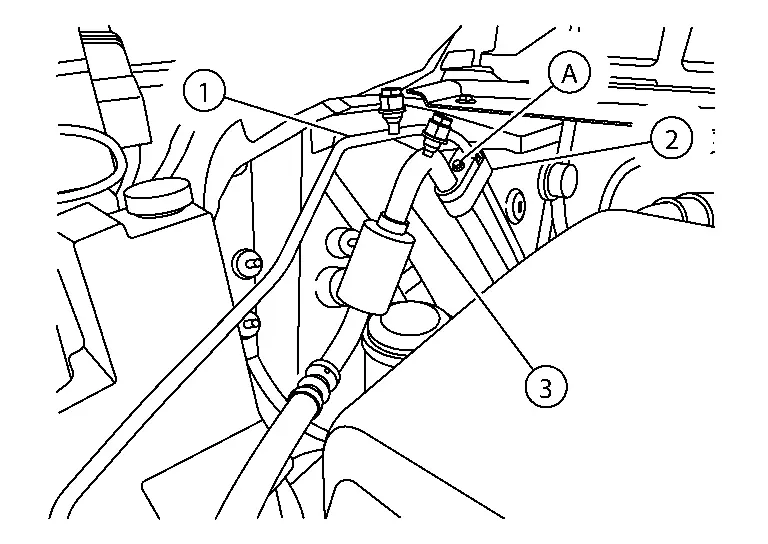
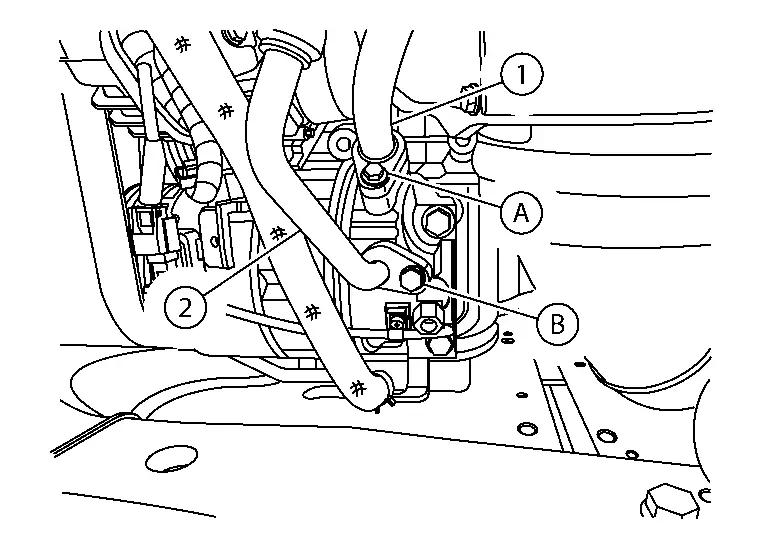
Remove bolt (A), then disconnect high-pressure and low-pressure pipe (2) from high-pressure pipe (1) and low-pressure flexible hose (3).

CAUTION:
Cap or wrap the joint of the pipe with suitable material such as vinyl tape to avoid the entry of air.
Remove nut (A), then release high-pressure and low-pressure pipe bracket.
Remove high-pressure and low-pressure pipe.
INSTALLATION
Installation is in the reverse order of removal.
CAUTION:
-
Do not reuse O-rings.
-
Apply A/C oil to the O-rings of the high-pressure and low-pressure pipe for installation.
-
After charging refrigerant, check for leaks. Refer to Leak Test.
Low-Pressure Flexible Hose Nissan Pathfinder
Removal and Installation
REMOVAL
Discharge refrigerant. Refer to Recycle Refrigerant.
Remove front under cover. Refer to Removal and Installation.
Remove bolt (A), then disconnect high-pressure and low-pressure pipe (2) from low-pressure flexible hose (3).

CAUTION:
Cap or wrap the joint of the pipe with suitable material such as vinyl tape to avoid the entry of air.
| (1) | : High-pressure pipe |
Remove bolt (A), then disconnect low-pressure flexible hose (1) from compressor.

CAUTION:
Cap or wrap the joint of the pipe with suitable material such as vinyl tape to avoid the entry of air.
| (2) | : High-pressure flexible hose |
| (B) | : Bolt |
Remove low-pressure flexible hose.
INSTALLATION
Installation is in the reverse order of removal.
CAUTION:
-
Do not reuse O-rings.
-
Apply A/C oil to the O-rings of the low-pressure flexible hose for installation.
-
After charging refrigerant, check for leaks. Refer to Leak Test.
High-Pressure Pipe Nissan Pathfinder 2026
Removal and Installation
REMOVAL
Discharge refrigerant. Refer to Recycle Refrigerant.
Remove bolt (A), then disconnect high-pressure pipe (1) from high-pressure and low-pressure pipe (2).
CAUTION:
Cap or wrap the joint of the pipe with suitable material such as vinyl tape to avoid the entry of air.
| (3) | : Low-pressure flexible hose |
Remove bolt (B), then disconnect high-pressure pipe (2) from condenser pipe assembly (3).
CAUTION:
Cap or wrap the joint of the pipe with suitable material such as vinyl tape to avoid the entry of air.
| (1) | : High-pressure flexible hose |
| (A) | : Bolt |
 |
: Front |
Remove high-pressure pipe.
INSTALLATION
Installation is in the reverse order of removal.
CAUTION:
-
Do not reuse O-rings.
-
Apply A/C oil to the O-rings of the high-pressure pipe for installation.
-
After charging the refrigerant, check for leaks. Refer to Leak Test.
High-Pressure Flexible Hose Nissan Pathfinder
Removal and Installation
REMOVAL
Discharge refrigerant. Refer to Recycle Refrigerant.
Remove front under cover. Refer to Removal and Installation.
Remove bolt (A), then disconnect high-pressure flexible hose (1) from condenser pipe assembly (3).

CAUTION:
Cap or wrap the joint of the pipe with suitable material such as vinyl tape to avoid the entry of air.
| (2) | : High-pressure pipe |
| (B) | : Bolt |
 |
: Front |
Remove bolt (B), then disconnect high-pressure flexible hose (2) from compressor.
CAUTION:
Cap or wrap the joint of the pipe with suitable material such as vinyl tape to avoid the entry of air.
| (1) | : Low-pressure flexible hose |
| (A) | : Bolt |
Remove high-pressure flexible hose.
INSTALLATION
Installation is in the reverse order of removal.
CAUTION:
-
Do not reuse O-rings.
-
Apply A/C oil to the O-rings of the high-pressure flexible hose for installation.
-
After charging the refrigerant, check for leaks. Refer to Leak Test.
Underfloor Rear High-Pressure and Low-Pressure A/c Pipes Nissan Pathfinder 2022
Exploded View
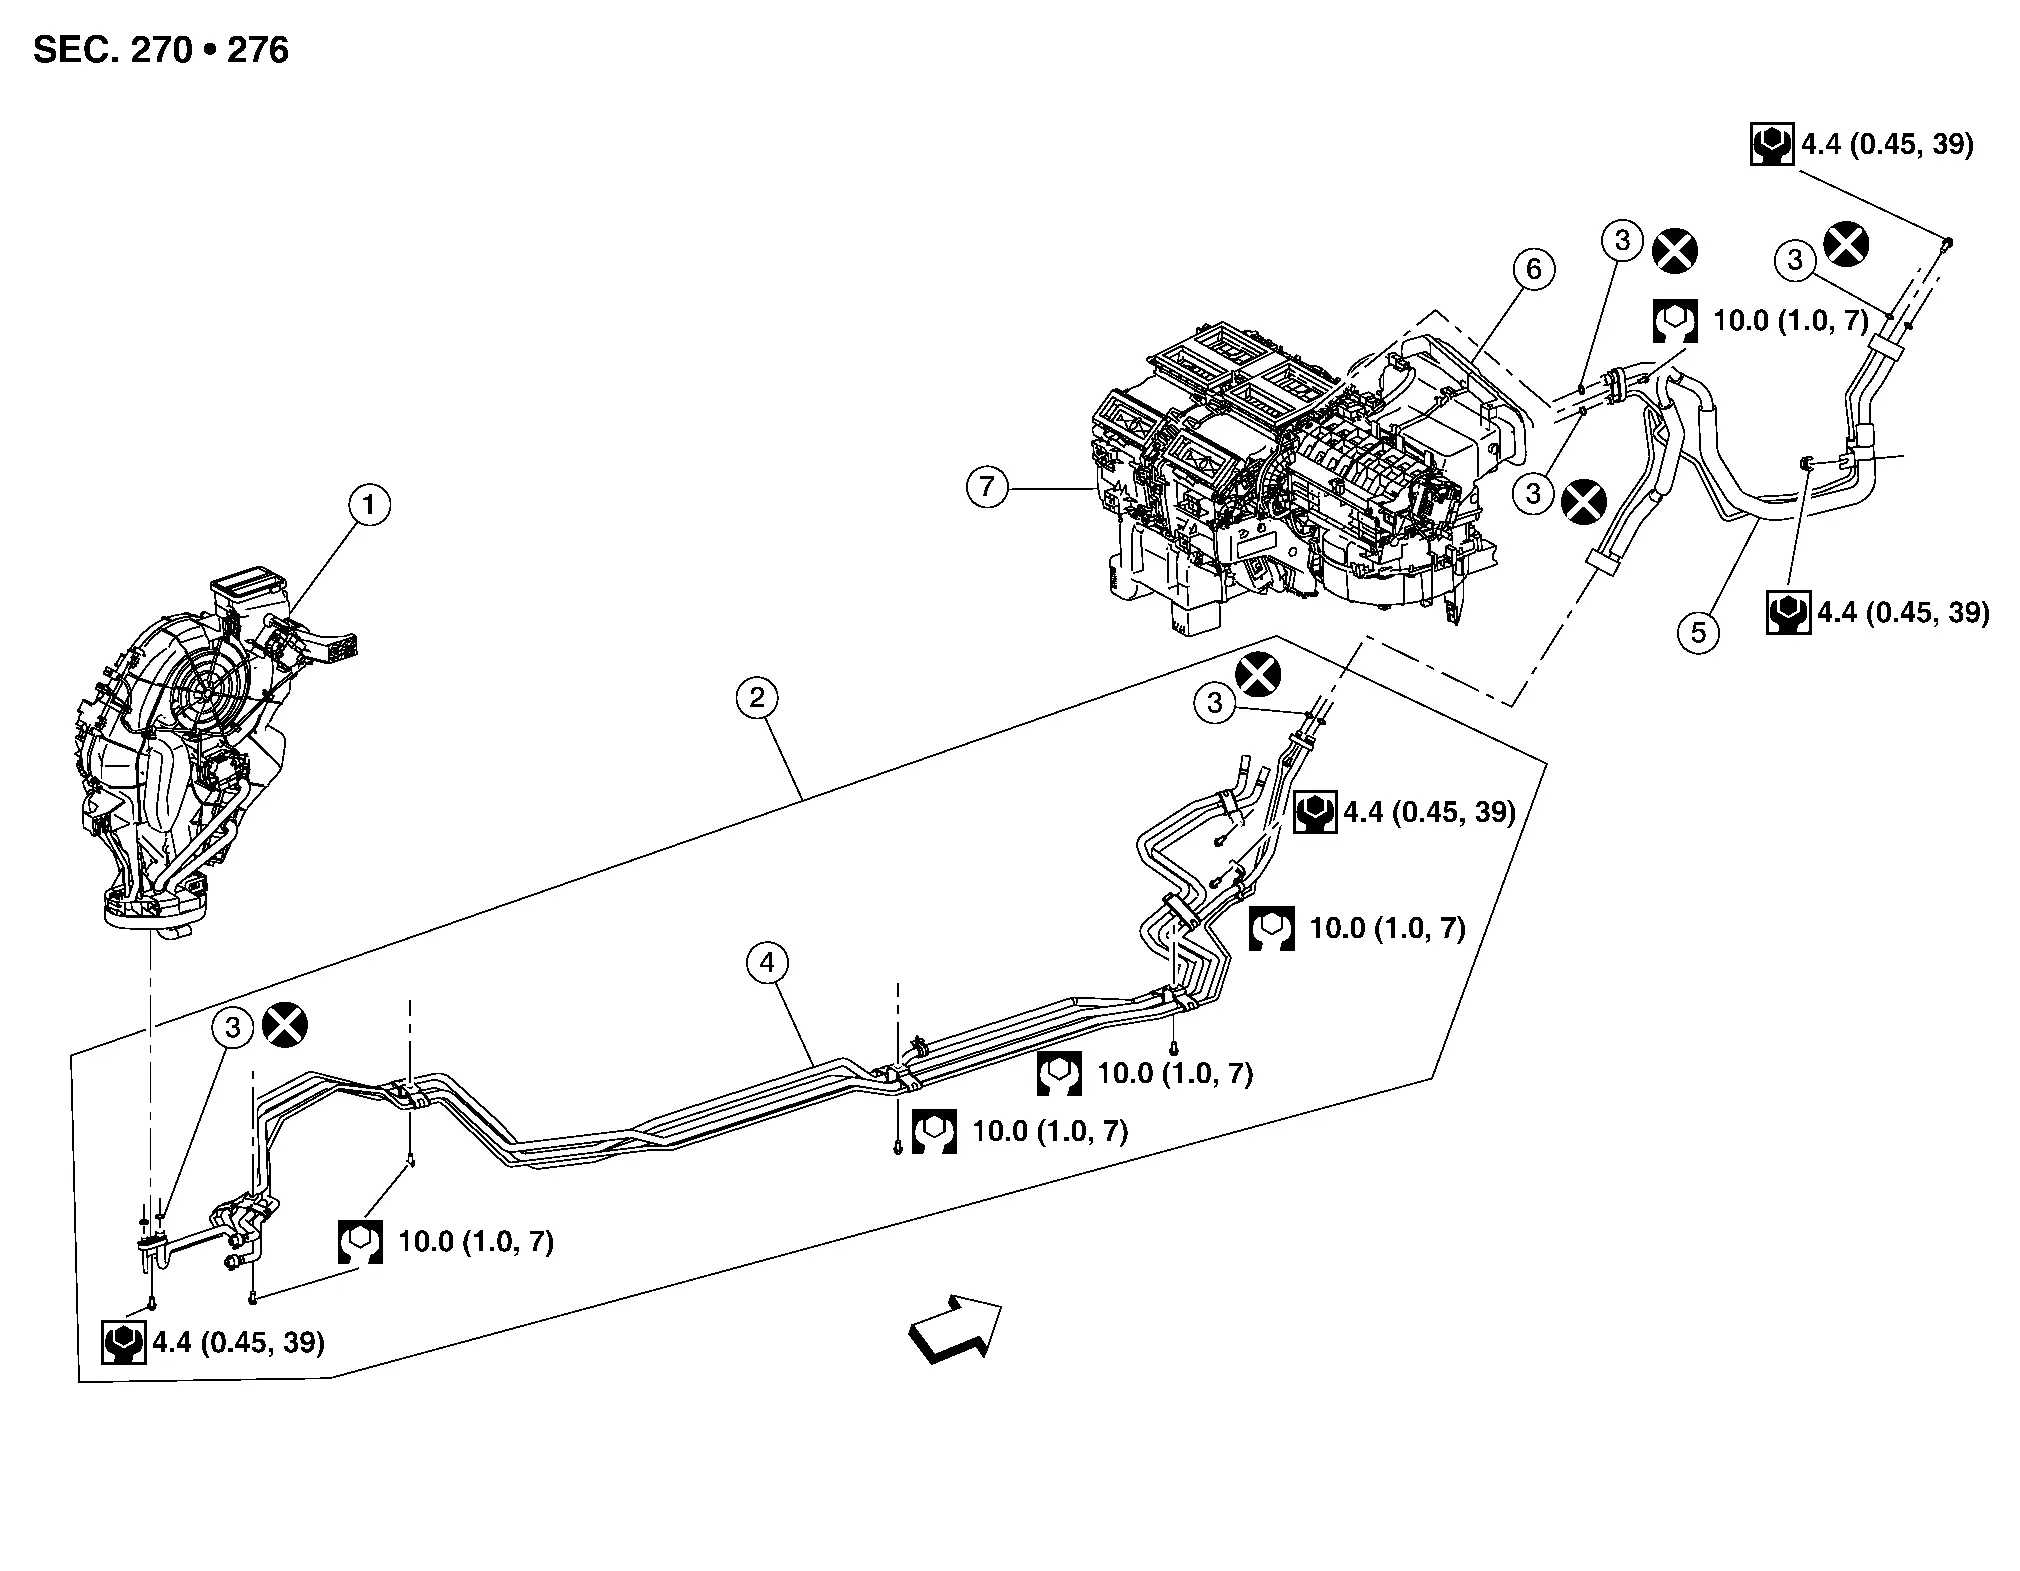
| 1. | Rear heating and cooling unit assembly | 2. | Underfloor rear high-pressure and low-pressure A/C pipes assembly | 3. | O-ring |
| 4. | Underfloor rear high-pressure and low-pressure A/C pipes | 5. | High-pressure and low-pressure pipe | 6. | Front blower unit |
| 7. | Front heating and cooling unit assembly |
 |
Front |
Removal and Installation
REMOVAL
Discharge refrigerant. Refer to Recycle Refrigerant.
Drain engine coolant. Refer to Draining.
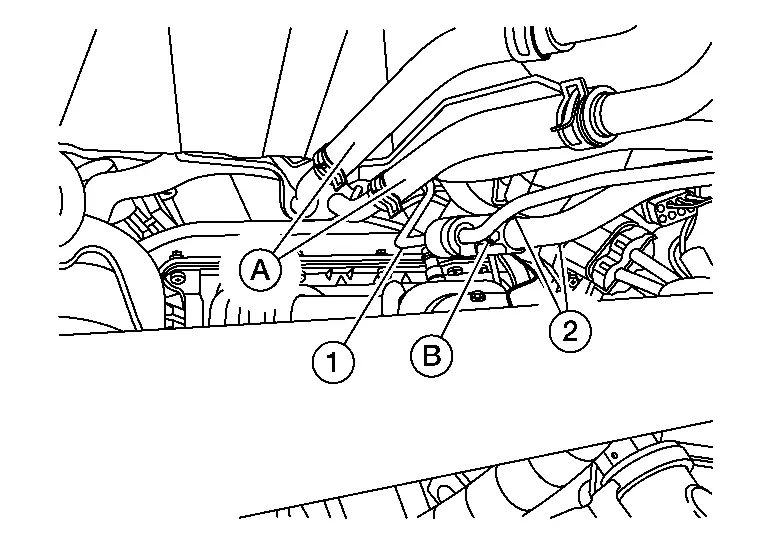
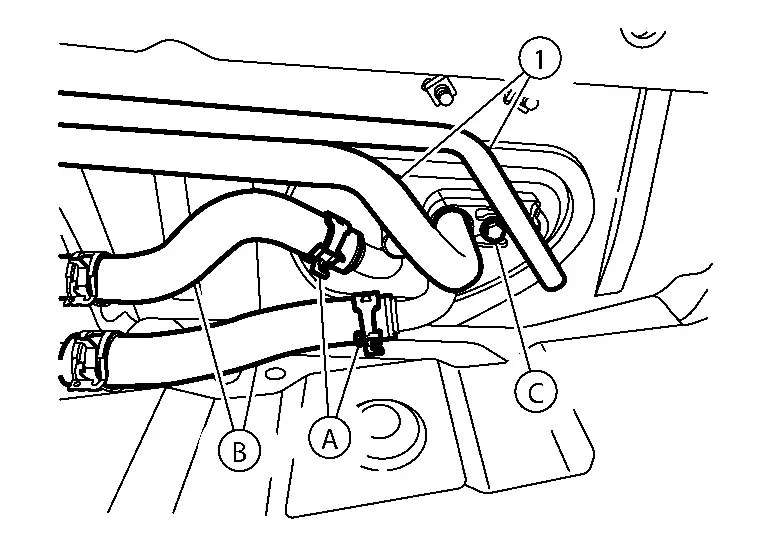
Remove bolt (B), then disconnect high-pressure and low-pressure pipe (1) from underfloor rear high-pressure and low-pressure A/C pipes (2).
CAUTION:
Cap or wrap the joint of the pipe with suitable material such as vinyl tape to avoid the entry of air.
| (A) | : Front heater hoses |
Disconnect front heater hoses (A) from underfloor rear high-pressure and low-pressure A/C pipes (2).

CAUTION:
Cap or wrap the joint of the pipe with suitable material such as vinyl tape to avoid the entry of air.
| (1) | : High-pressure and low-pressure pipe |
| (B) | : Bolt |
Remove bolt (C), then disconnect underfloor rear high-pressure and low-pressure A/C pipes (1) from the rear expansion valve.

CAUTION:
Cap or wrap the joint of the pipe with suitable material such as vinyl tape to avoid the entry of air.
| (A) | : Clips |
| (B) | : Rear heater hoses |
Release clips (A), then disconnect rear heater hoses (B) from rear heating and cooling unit assembly.
| (1) | : Underfloor rear high-pressure and low-pressure A/C pipes |
| (C) | : Bolt |
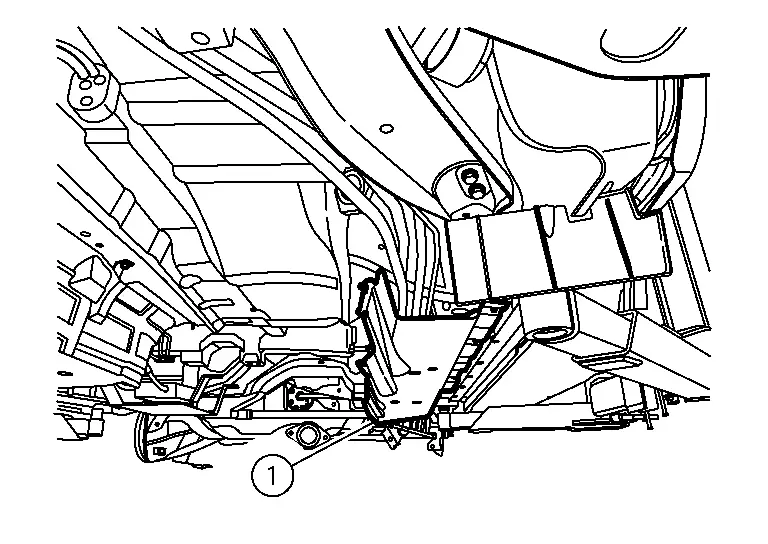
Remove body under cover (1).
Lower rear suspension member to allow room for removal of underfloor rear high-pressure and low-pressure A/C pipes. Refer to Removal and Installation.
Remove underfloor rear high-pressure and low-pressure A/C pipes bracket bolts. Refer to Exploded View.
Remove underfloor rear high-pressure and low-pressure A/C pipes.
INSTALLATION
Installation is in the reverse order of removal.
CAUTION:
-
Do not reuse O-rings.
-
Apply A/C oil to new O-rings for installation.
-
After charging refrigerant, check for leaks. Refer to Leak Test.

Nissan Pathfinder (R53) 2022-2026 Service Manual
Cooler Pipe and Hose
- High-Pressure and Low-Pressure Pipe
- Low-Pressure Flexible Hose
- High-Pressure Pipe
- High-Pressure Flexible Hose
- Underfloor Rear High-Pressure and Low-Pressure A/c Pipes
Contact Us
Nissan Pathfinder Info Center
Email: info@nipathfinder.com
Phone: +1 (800) 123-4567
Address: 123 Pathfinder Blvd, Nashville, TN 37214, USA
Working Hours: Mon–Fri, 9:00 AM – 5:00 PM (EST)
