Nissan Pathfinder: Interior - Body Side Trim
Exploded View
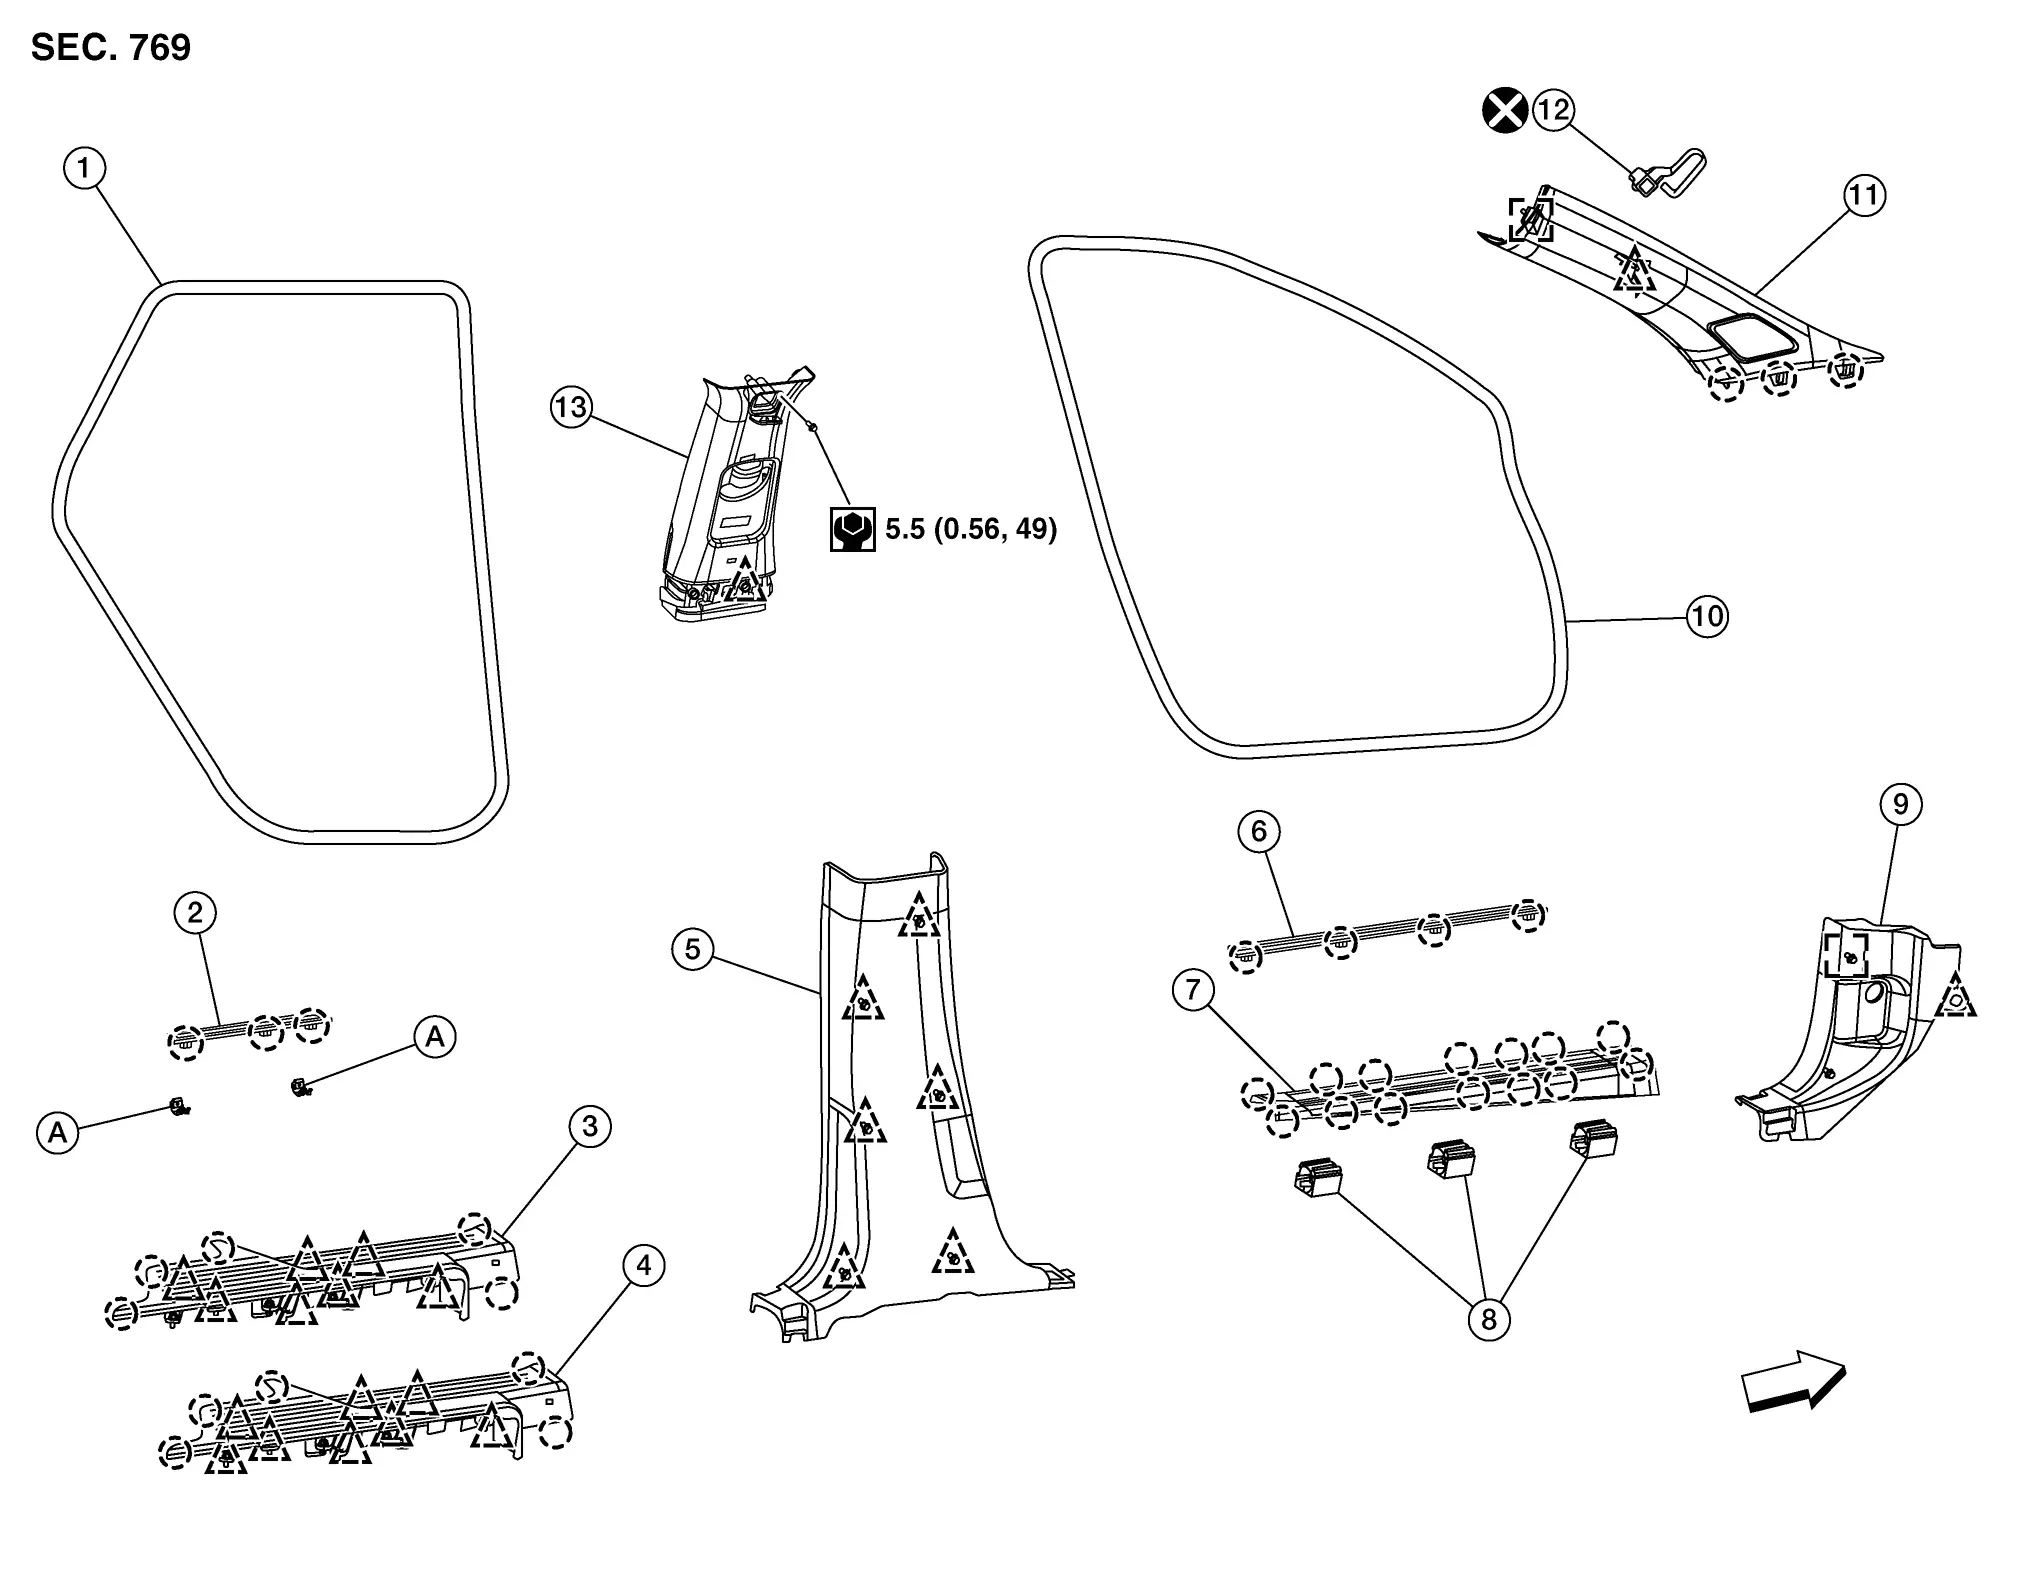
| 1. | Rear door welt | 2. | Rear kicking plate outer | 3. | Rear kicking plate inner (late production) |
| 4. | Rear kicking plate inner (early production) | 5. | Center pillar lower finisher | 6. | Front kicking plate outer |
| 7. | Front kicking plate inner | 8. | Harness clip | 9. | Dash side finisher |
| 10. | Front door welt | 11. | Front pillar finisher | 12. | Tether clip |
| 13. | Center pillar upper finisher | A. | Clip |
 |
Metal clip |
 |
Clip |
 |
Pawl |
 |
Front |
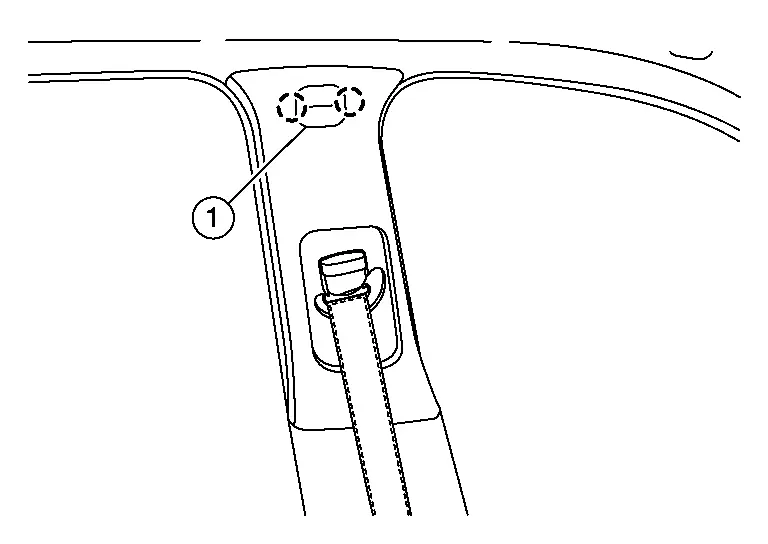
- Dash Side Finisher
- Front Pillar Finisher
- Center Pillar Upper Finisher
- Center Pillar Lower Finisher
- Body Side Welt
- Kicking Plate
Dash Side Finisher Nissan Pathfinder Fifth generation
Removal and Installation
Remove front kicking plate inner. Refer to Removal and Installation.
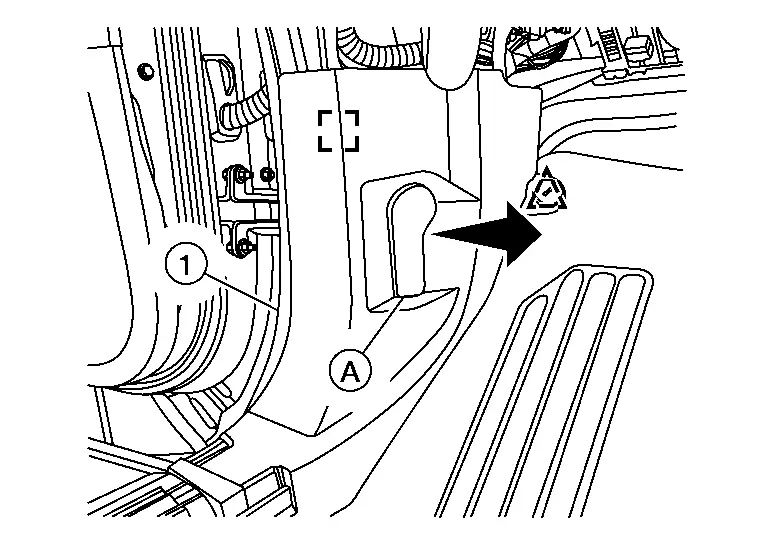
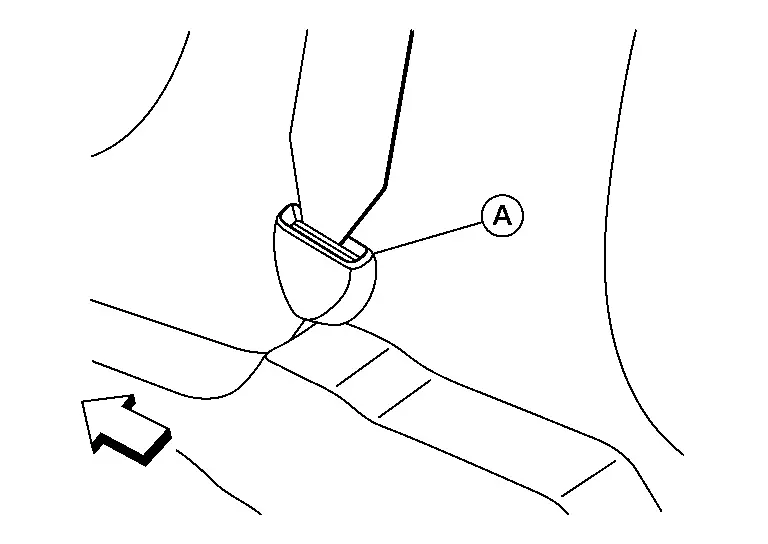
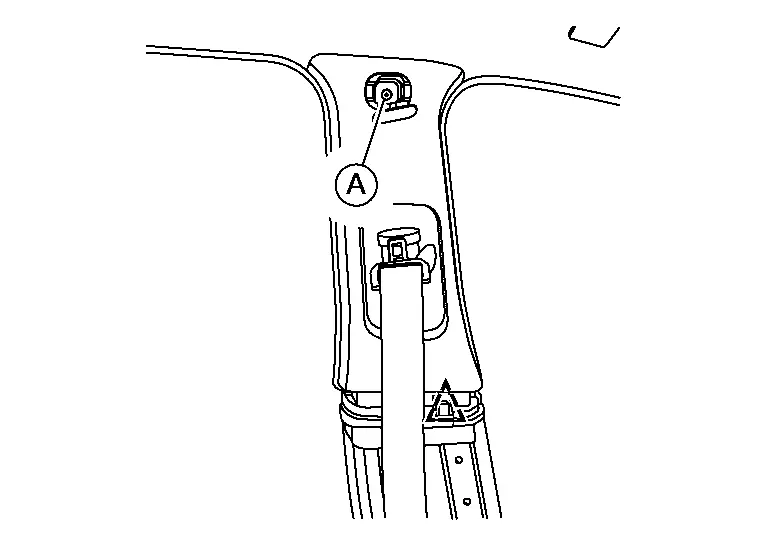
Remove hood release handle [A (LH only)] as shown.
 NOTE:
NOTE:
LH shown; RH similar.
 |
: Metal clip |
 |
: clip |
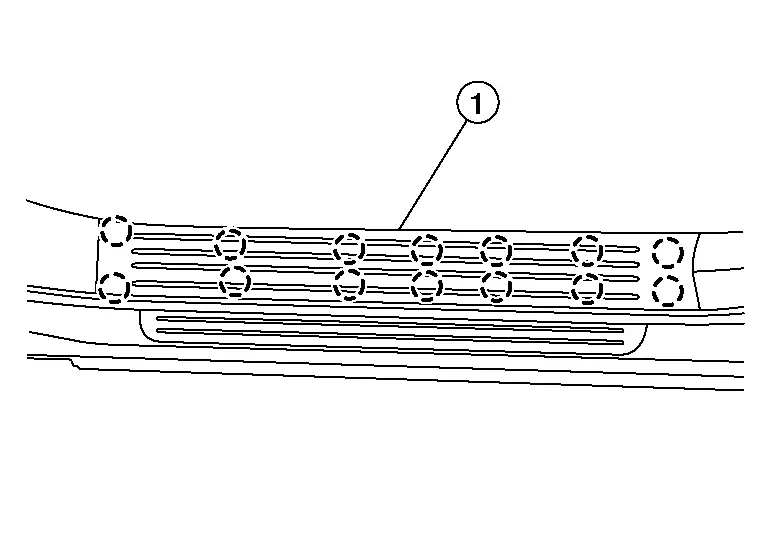
Using a suitable tool, release clips and remove dash side finisher (1).
INSTALLATION
Installation is in the reverse order of removal.
Front Pillar Finisher Nissan Pathfinder 5th Gen
Removal and Installation
REMOVAL
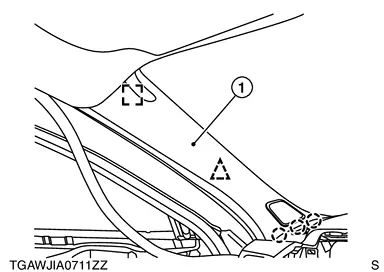
Partially remove the front door welt.
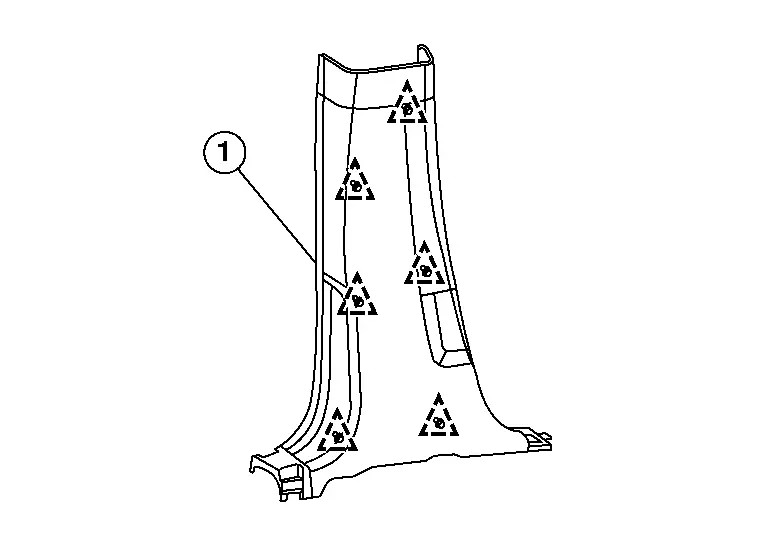
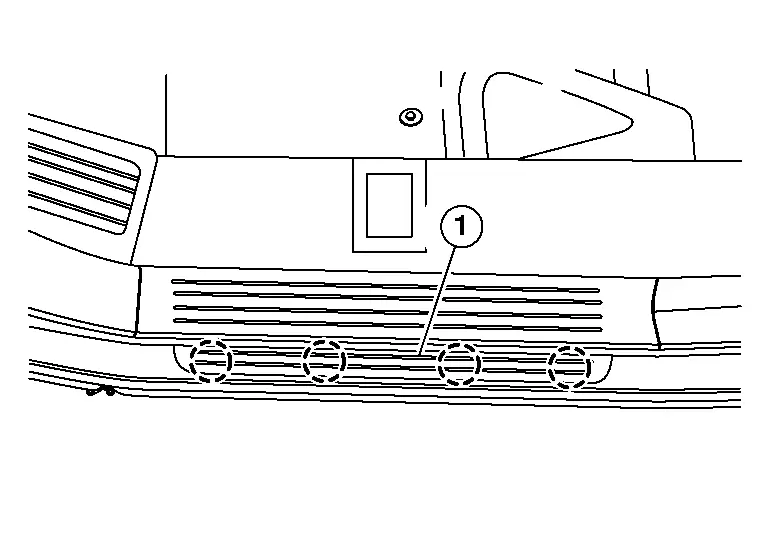
Using a suitable tool, release front pillar finisher (1) pawls.
 NOTE:
NOTE:
LH shown; RH similar.
 |
: Metal clip |
 |
: Clip |
 |
: Pawl |
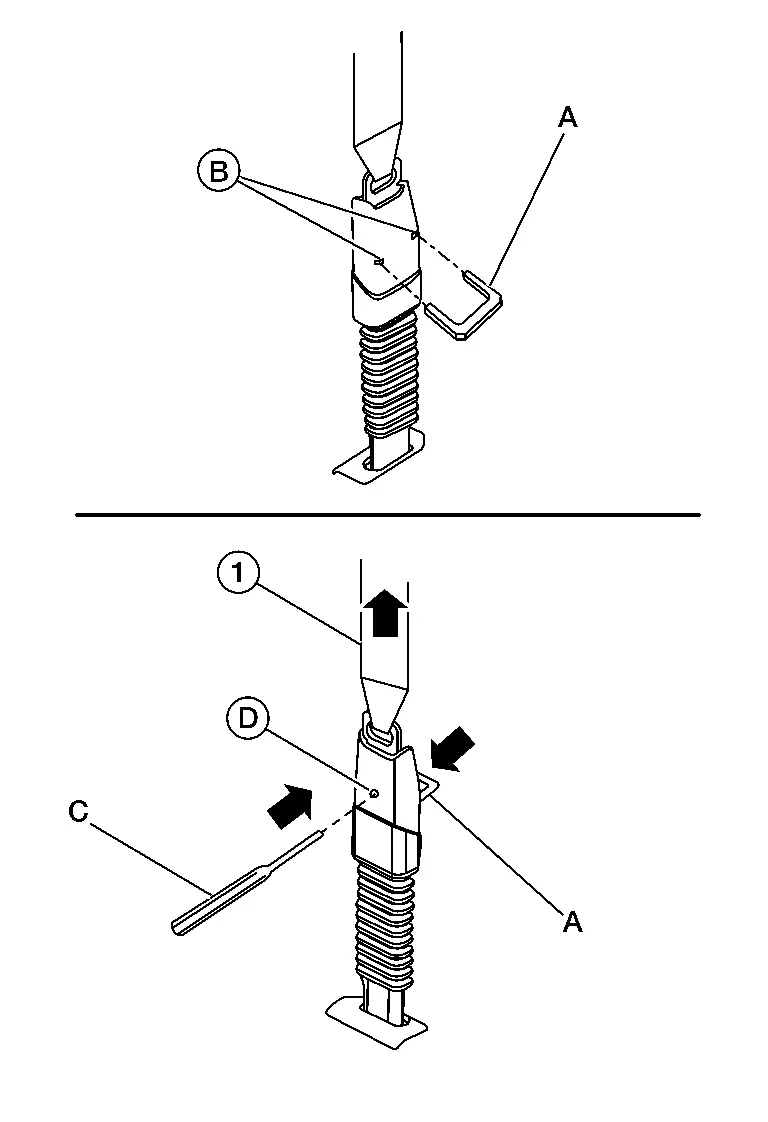
Using a suitable tool, release clip and remove front tether clip.
Disconnect the harness connector (if so equipped), then remove the front pillar finisher.
INSTALLATION
Installation is in the reverse order of removal.
CAUTION:
-
Make sure to install tether clip to front pillar finisher before installing front pillar finisher.
-
When installing tether clip to front pillar finisher, be sure to install by aligning to the cutout.
-
When installing front pillar finisher, check that clip, tether clip and pawls are securely placed into body panel holes.
Center Pillar Upper Finisher Nissan Pathfinder SUV
Removal and Installation
REMOVAL
Remove the center pillar lower finisher. Refer to Removal and Installation.
For USA and CAN, release front seat belt pre-tensioner [shoulder belt (1)] from the front seat belt pre-tensioner (lap belt).
For MEX, pull back lower anchor bolt cover (A) and remove the seat belt lower anchor bolt.
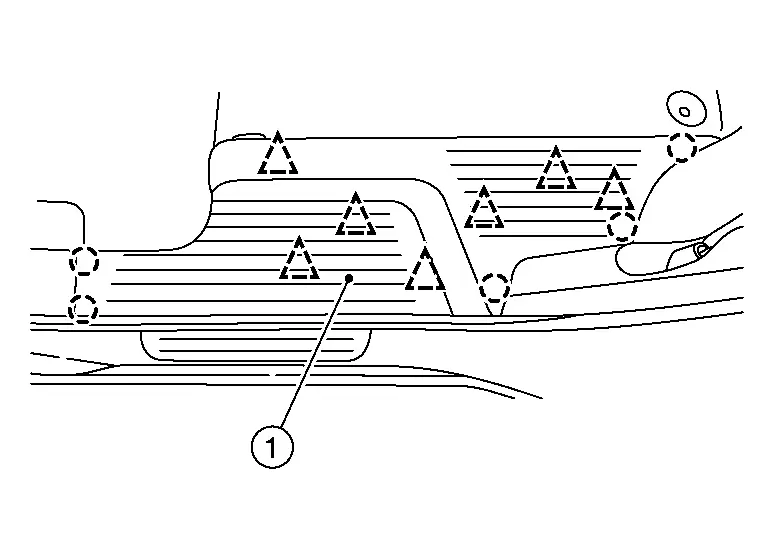
Using a suitable tool, release pawls and remove cap (1).
 |
: Pawl |
Using a suitable tool, remove bolt (A) and release clip.
 |
: Clip |
Remove the seat belt from the center pillar upper finisher and remove.
CAUTION:
-
Do not bend the sheet metal when removing the center pillar upper finisher from the sheet metal.
INSTALLATION
Installation is in the reverse order of removal.
CAUTION:
-
Visually check sheet metal around clip and pawl locations to confirm no deformation from removal of pillar trim. Repair sheet metal if necessary.
-
When installing center pillar upper finisher, check that the clips and pawl are securely placed in body panel holes.
Center Pillar Lower Finisher Nissan Pathfinder SUV
Removal and Installation
REMOVAL
Remove the front kicking plate. Refer to Removal and Installation - Front Kicking Plate.
Remove the rear kicking plate. Refer to Removal and Installation - Rear Kicking Plate.
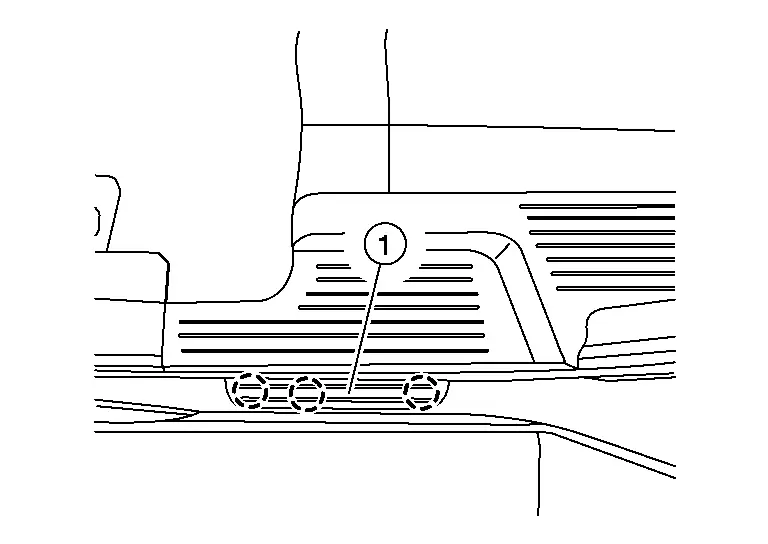
Using a suitable tool, release clips and remove center pillar lower finisher (1).
 |
: Clip |
INSTALLATION
Installation is in the reverse order of removal.
CAUTION:
-
Visually check the clips for deformation and damage during installation. Replace with new ones if necessary.
-
When installing center pillar lower finisher, check that clips are securely placed in body panel holes.
Body Side Welt Nissan Pathfinder 5th Gen
Removal and Installation - Front Door Welt
REMOVAL
Remove the center pillar lower finisher. Refer to Removal and Installation.
Remove the dash side finisher. Refer to Removal and Installation.
Remove the front door welt.
INSTALLATION
Installation is in the reverse order of removal.
Removal and Installation - Rear Door Welt
REMOVAL
Remove the center pillar lower finisher. Refer to Removal and Installation.
Remove the rear kicking plate. Refer to Removal and Installation — Rear Kicking Plate.
Remove the rear door welt.
INSTALLATION
Installation is in the reverse order of removal.
Kicking Plate Nissan Pathfinder Fifth generation
Removal and Installation - Front Kicking Plate
FRONT KICKING PLATE INNER
Removal
Using a suitable tool, release pawls.
 |
: Pawl |
Remove front kicking plate inner (1).
Installation
Installation is in the reverse order of removal.
CAUTION:
-
Visually check the pawls for deformation and damage during installation. Replace front kicking plate inner if necessary.
-
When installing front kicking plate inner, check that the pawls are securely placed in body panel holes.
FRONT KICKING PLATE OUTER
Removal
Using a suitable tool, release pawls.
 |
: Pawl |
Remove front kicking plate outer (1).
Installation
Installation is in the reverse order of removal.
CAUTION:
-
Visually check the pawls for deformation and damage during installation. Replace front kicking plate outer if necessary.
-
When installing front kicking plate outer, check that the pawls are securely placed in body panel holes.
Removal and Installation - Rear Kicking Plate
REAR KICKING PLATE INNER
Removal
Using a suitable tool, release clips and pawls.
 |
: Clip |
 |
: Pawl |
 NOTE:
NOTE:
Rear kicking plate inner (late production) shown.
Remove the rear kicking plate inner (1).
Installation
Installation is in the reverse order of removal.
CAUTION:
-
Visually check the clips and pawls for deformation and damage during installation. Replace with new ones if necessary.
-
When installing rear kicking plate inner, check that the clips and pawls are securely placed in body panel holes.
 NOTE:
NOTE:
When replacing rear kicking plate inner, apply body patch to hole (A).

REAR KICKING PLATE OUTER
Removal
Using a suitable tool, release pawls.
 |
: Pawl |
Remove rear kicking plate outer (1).
Installation
Installation is in the reverse order of removal.
CAUTION:
-
Visually check the pawls for deformation and damage during installation. Replace with new rear kicking plate outer if necessary.
-
When installing rear kicking plate outer, check that the pawls are securely placed in body panel holes.

Nissan Pathfinder (R53) 2022-2026 Service Manual
Body Side Trim
- Dash Side Finisher
- Front Pillar Finisher
- Center Pillar Upper Finisher
- Center Pillar Lower Finisher
- Body Side Welt
- Kicking Plate
Contact Us
Nissan Pathfinder Info Center
Email: info@nipathfinder.com
Phone: +1 (800) 123-4567
Address: 123 Pathfinder Blvd, Nashville, TN 37214, USA
Working Hours: Mon–Fri, 9:00 AM – 5:00 PM (EST)
