Nissan Pathfinder: Interior - Back Door Trim
Exploded View
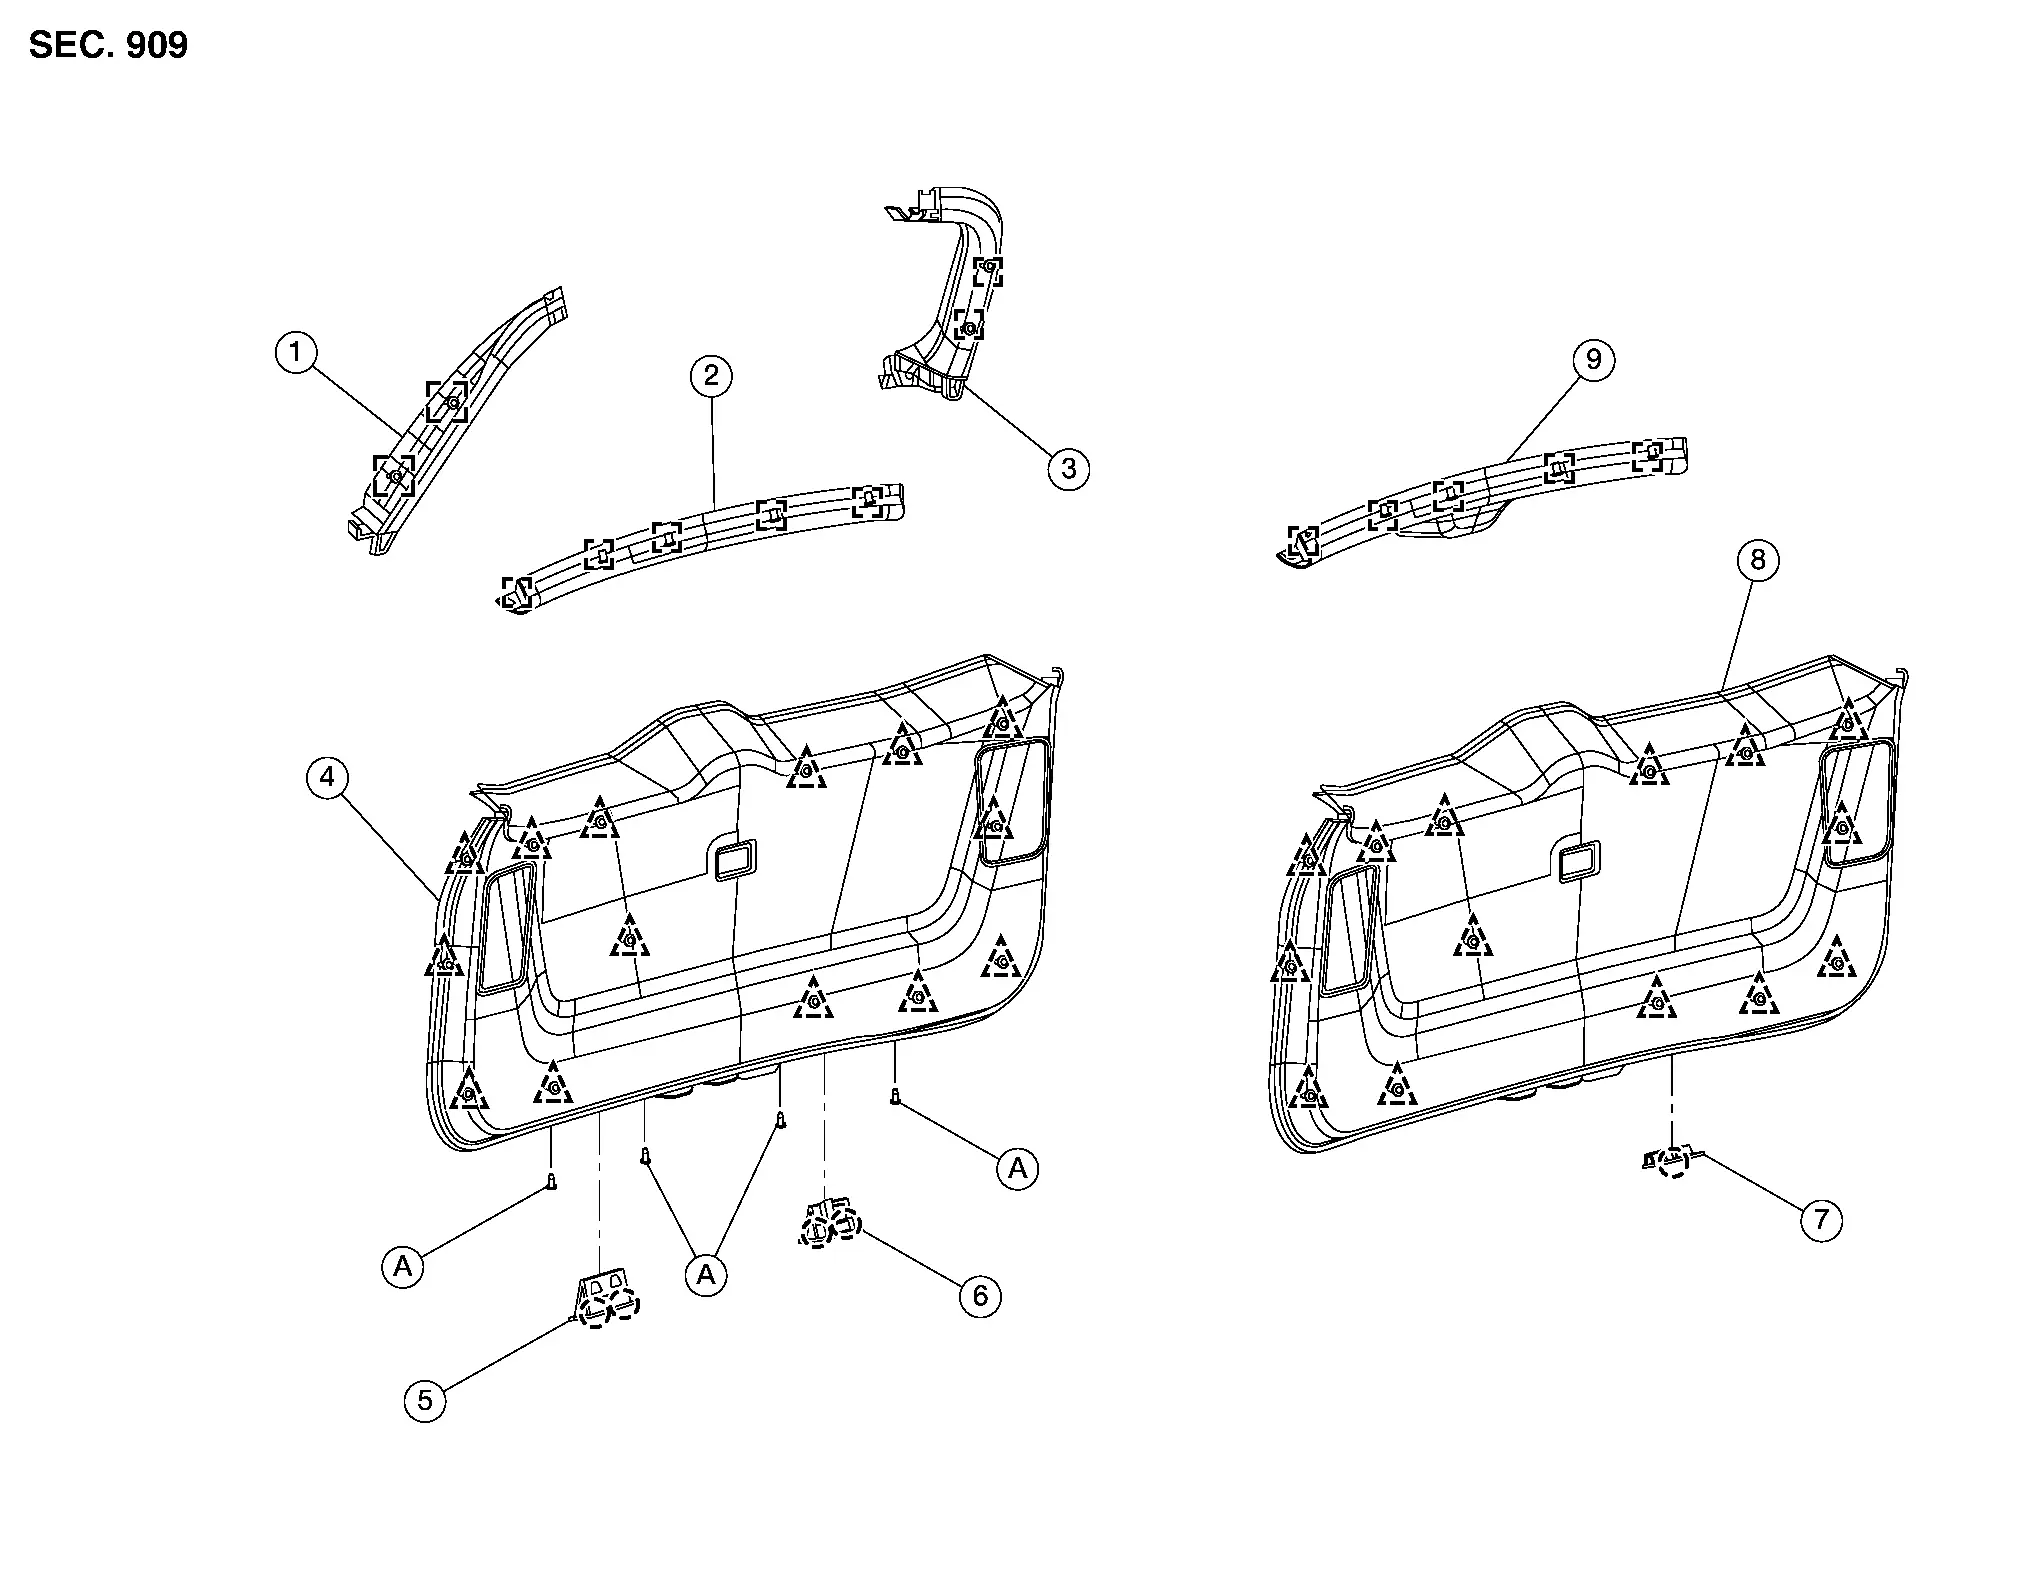
| 1. | Back door side finisher (RH) | 2. | Back door upper finisher (without Smart Rear View Mirror) | 3. | Back door side finisher (LH) |
| 4. | Back door lower finisher (with power back door switch) | 5. | Back door pull handle | 6. | Power back door switch |
| 7. | Back door finisher cap (without power back door switch) | 8. | Back door lower finisher (without power back door switch) | 9. | Back door upper finisher (with Smart Rear View Mirror) |
| A. | Clip |
 |
Metal clip |
 |
Clip |
 |
Pawl |
Back Door Upper Finisher Nissan Pathfinder
Removal and Installation
REMOVAL
Using a suitable tool, release back door upper finisher (1) clips.
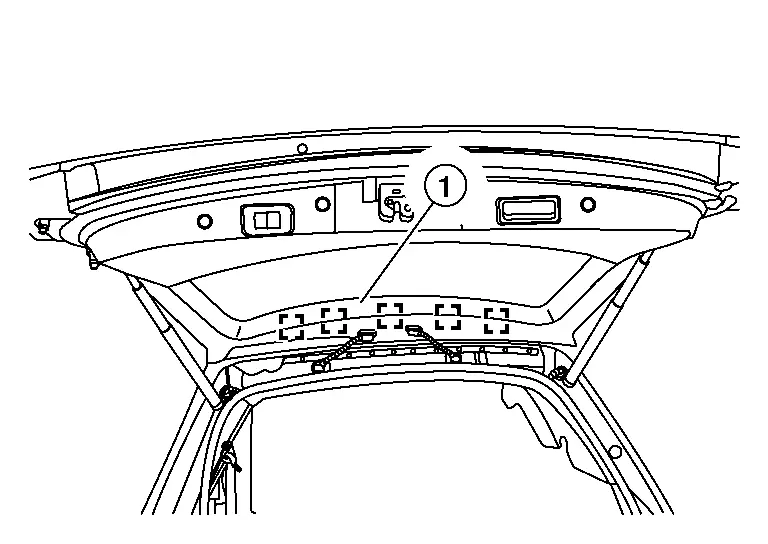
 NOTE:
NOTE:
Back door upper finisher shown without smart rear view mirror; back door upper finisher with smart rear view mirror similar.
 |
: Metal clip |
Disconnect harness connectors (if so equipped with smart rear view mirror).
Remove back door upper finisher.
INSTALLATION
Installation is in the reverse order of removal.
CAUTION:
-
Visually check the metal clips for deformation and damage during installation. Replace with new ones if necessary.
-
When installing back door upper finisher, check that the metal clips are securely placed in body panel holes.
Back Door Side Finisher Nissan Pathfinder 5th Gen
Removal and Installation
REMOVAL
Remove the back door upper finisher. Refer to Removal and Installation.
Remove the back door lower finisher. Refer to Removal and Installation.
Using a suitable tool, release clips.
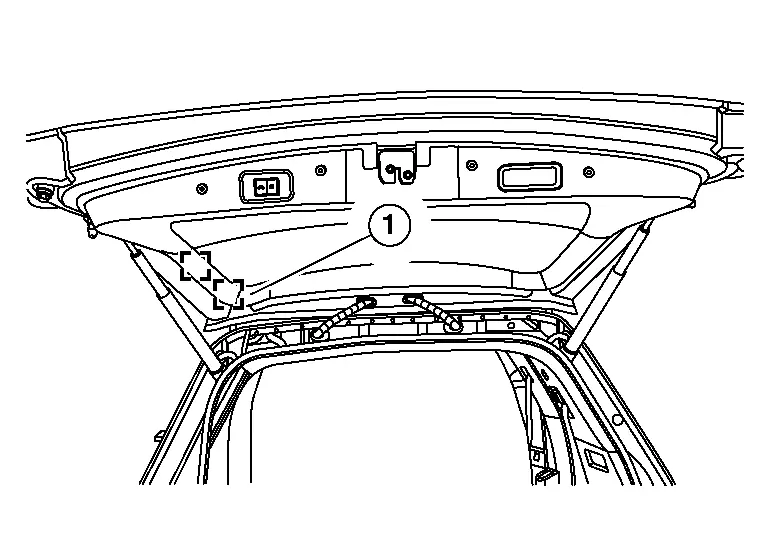
 |
: Metal clip |
 NOTE:
NOTE:
LH shown; RH similar.
Remove back door side finisher (1).
INSTALLATION
Installation is in the reverse order of removal.
CAUTION:
-
Visually check the metal clips for deformation and damage during installation. Replace with new ones if necessary.
-
When installing back door upper finisher, check that the metal clips are securely placed in body panel holes.
Back Door Lower Finisher Nissan Pathfinder Fifth generation
Removal and Installation
REMOVAL
Remove the back door pull handle.
Using a suitable tool, remove the back door lower finisher (1) clips (A).
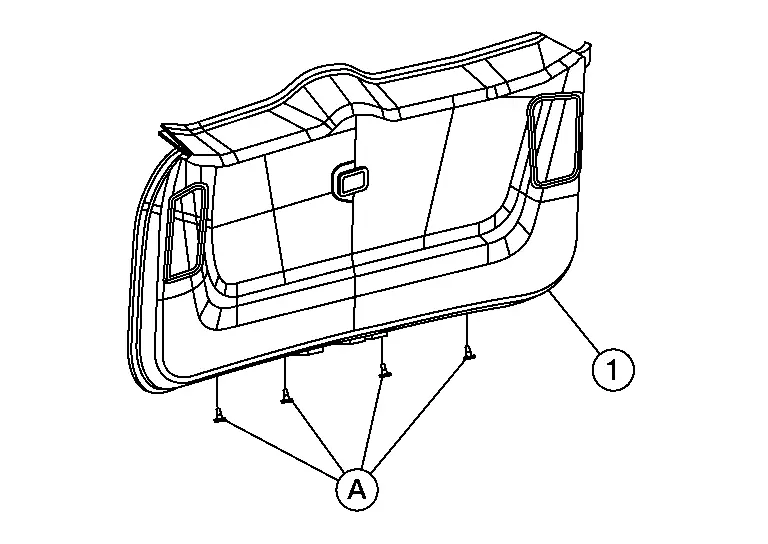
Using a suitable tool, release clips and remove back door lower finisher (1).
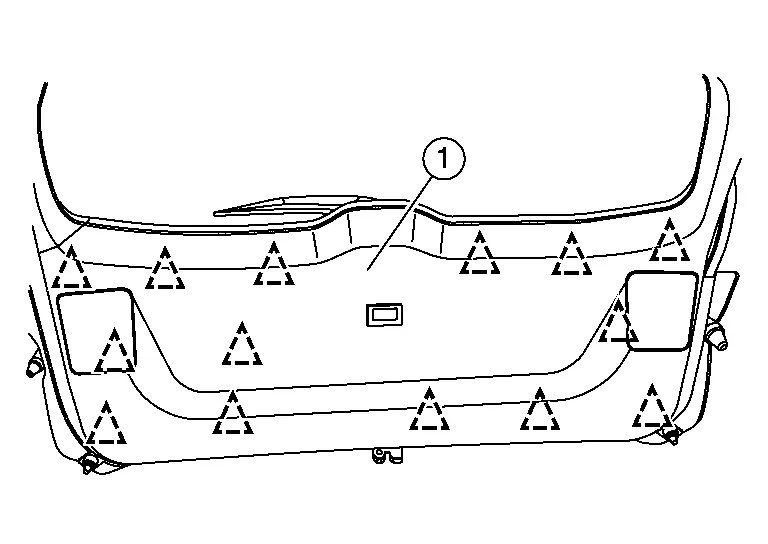
 |
: Clip |
Disconnect the harness connectors from the back door lower finisher and remove.
INSTALLATION
Installation is in the reverse order of removal.
CAUTION:
-
Visually check the clips for deformation and damage during installation. Replace with new ones if necessary.
-
When installing back door finisher, check that clips are securely placed in body panel holes.

Nissan Pathfinder (R53) 2022-2026 Service Manual
Back Door Trim
Contact Us
Nissan Pathfinder Info Center
Email: info@nipathfinder.com
Phone: +1 (800) 123-4567
Address: 123 Pathfinder Blvd, Nashville, TN 37214, USA
Working Hours: Mon–Fri, 9:00 AM – 5:00 PM (EST)
